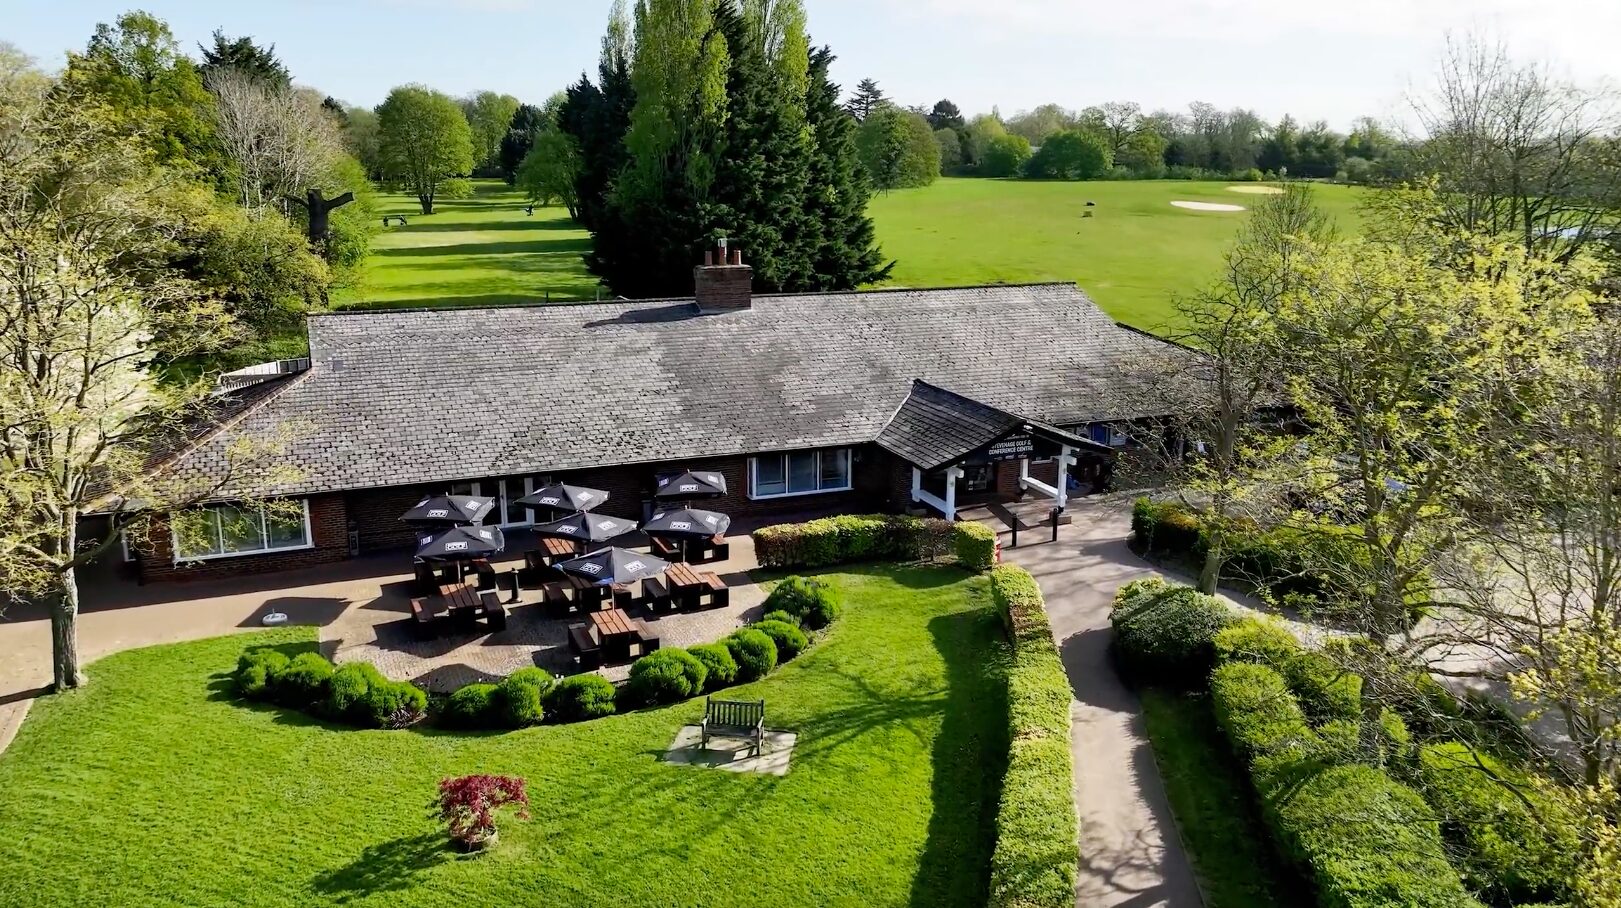

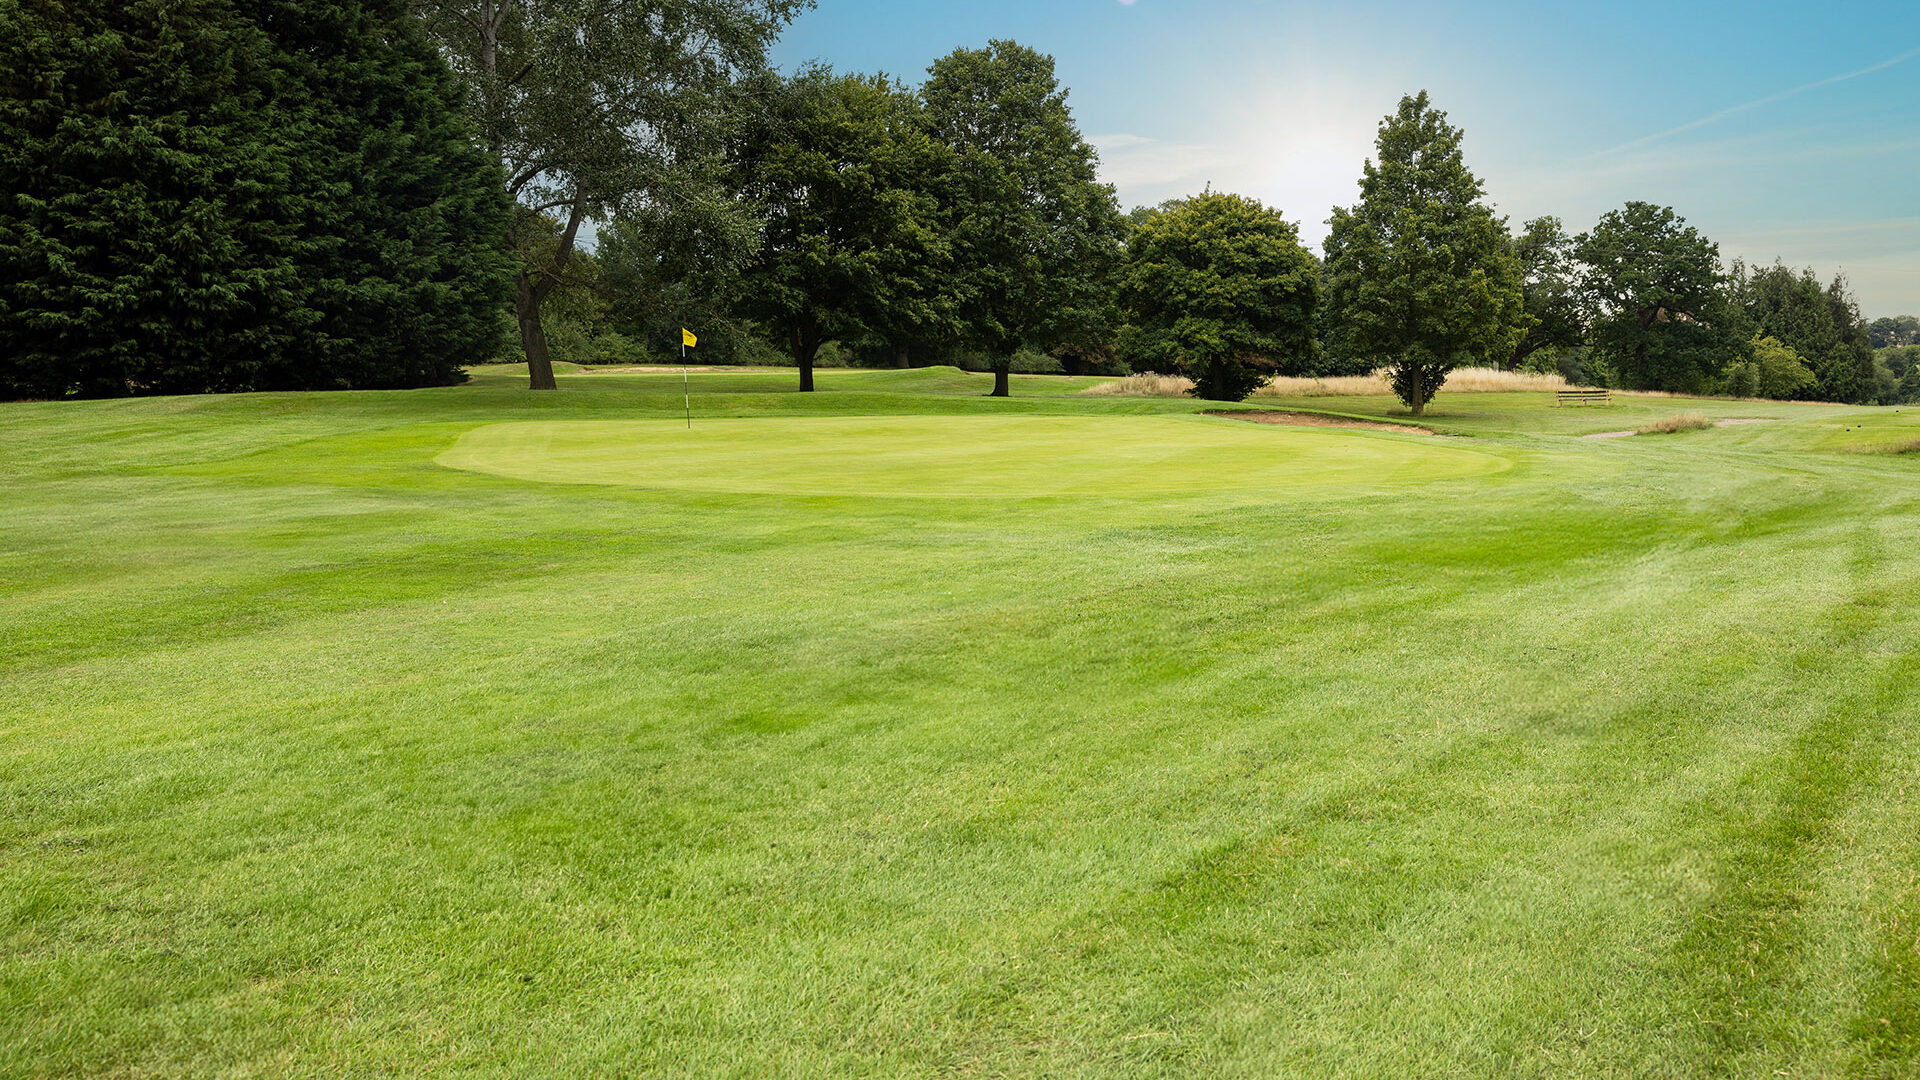
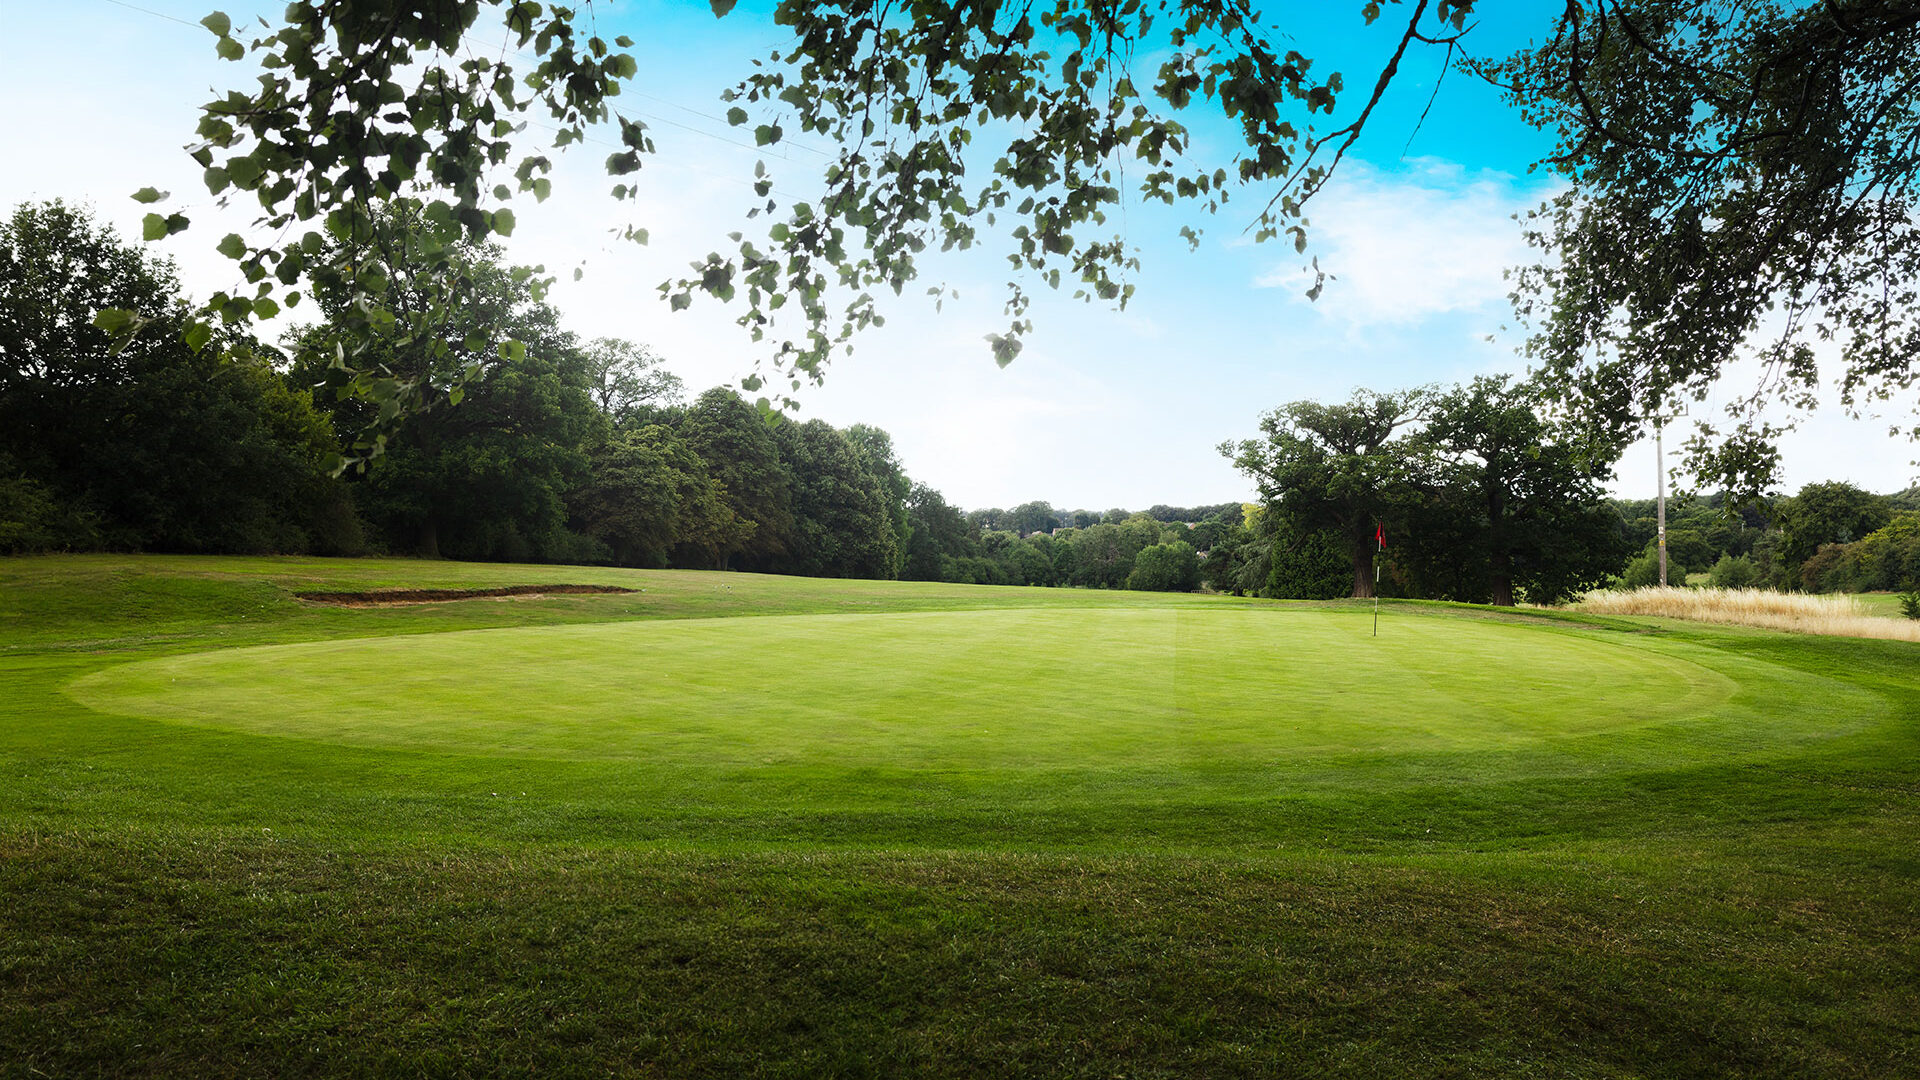
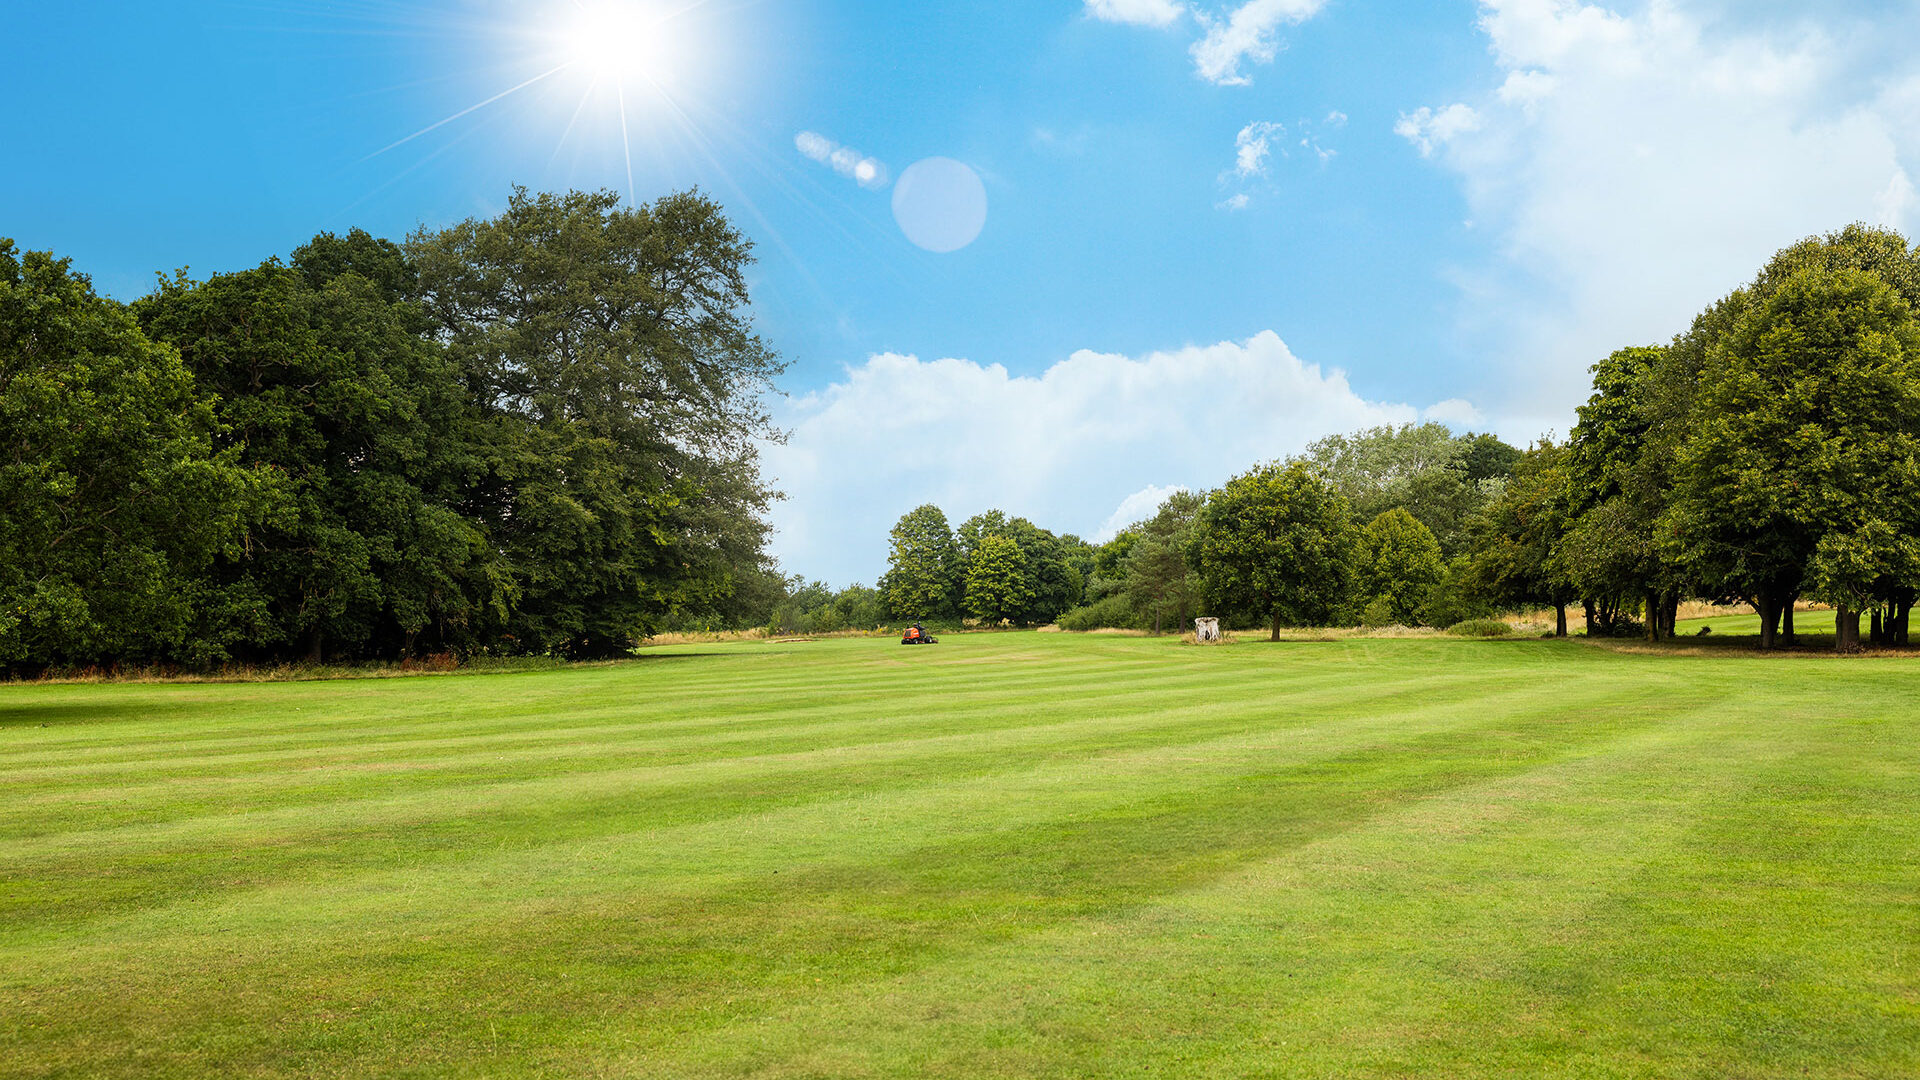
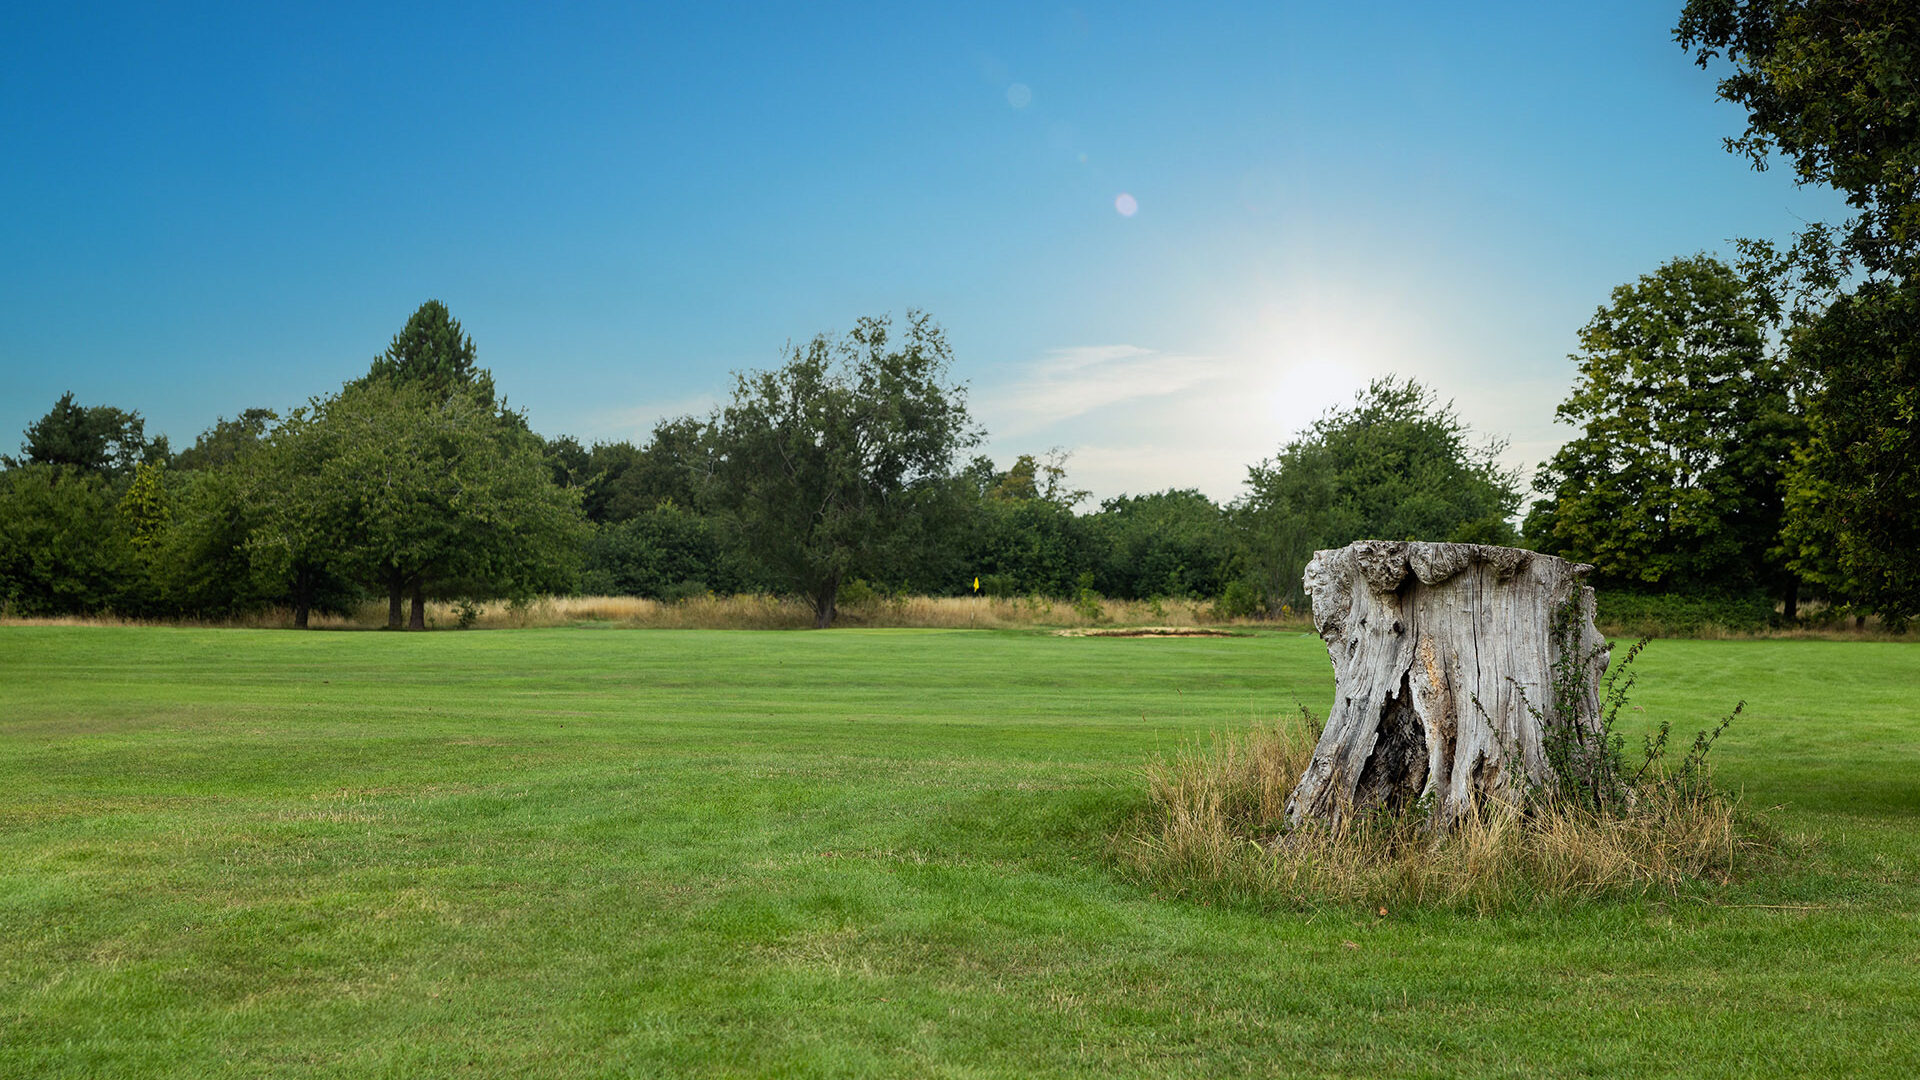
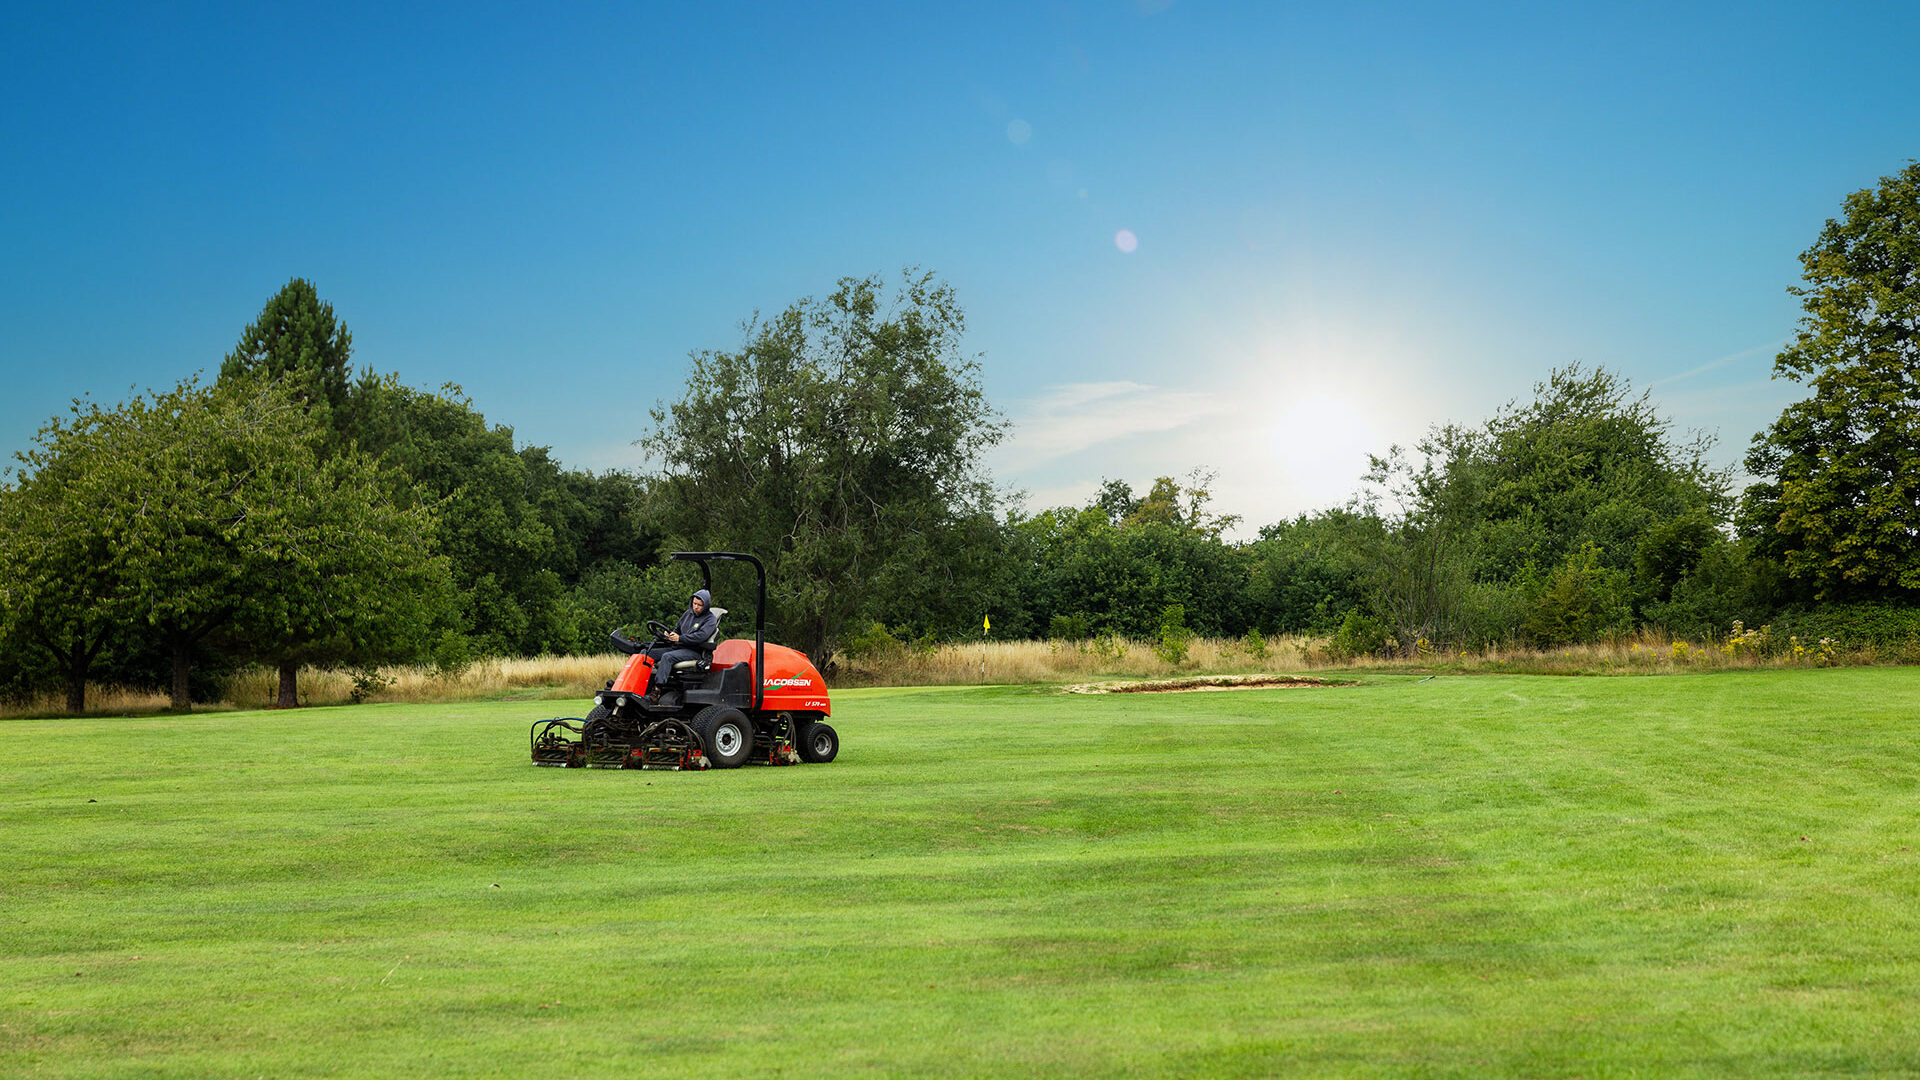
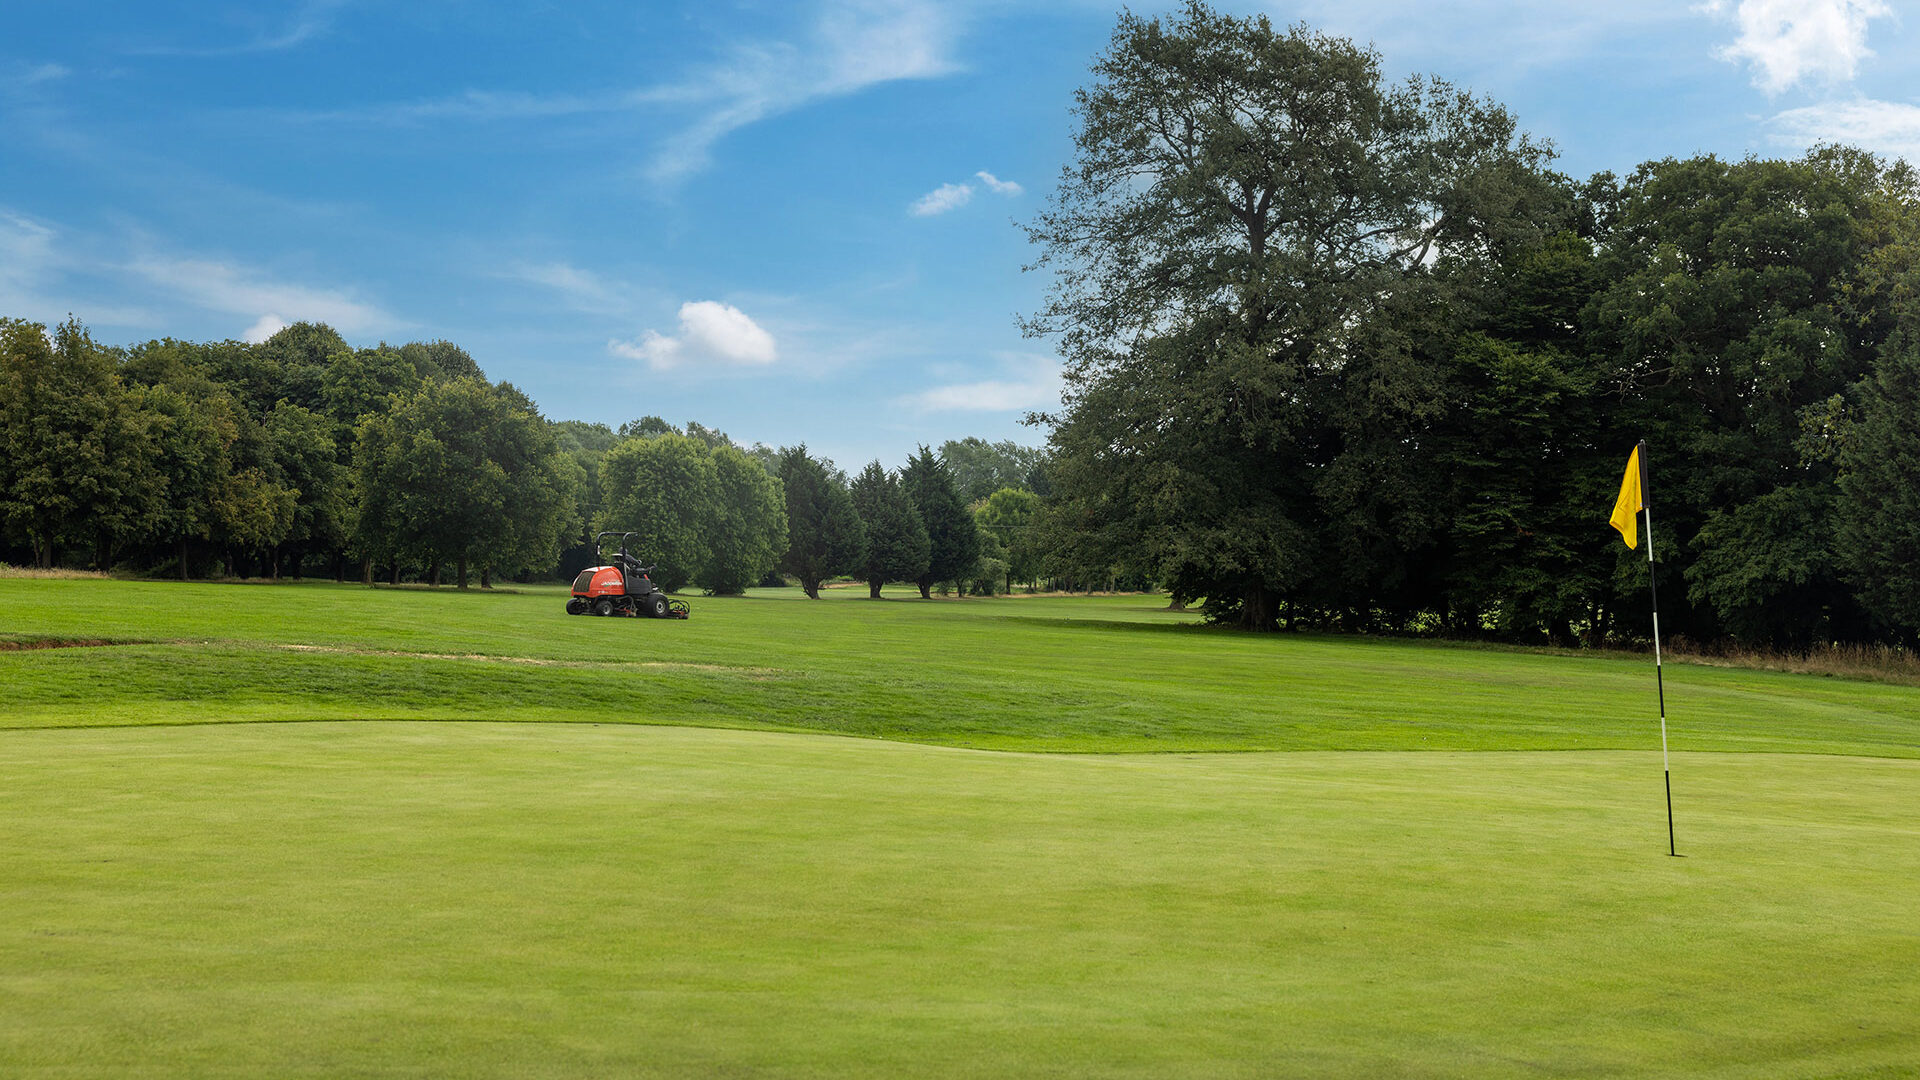
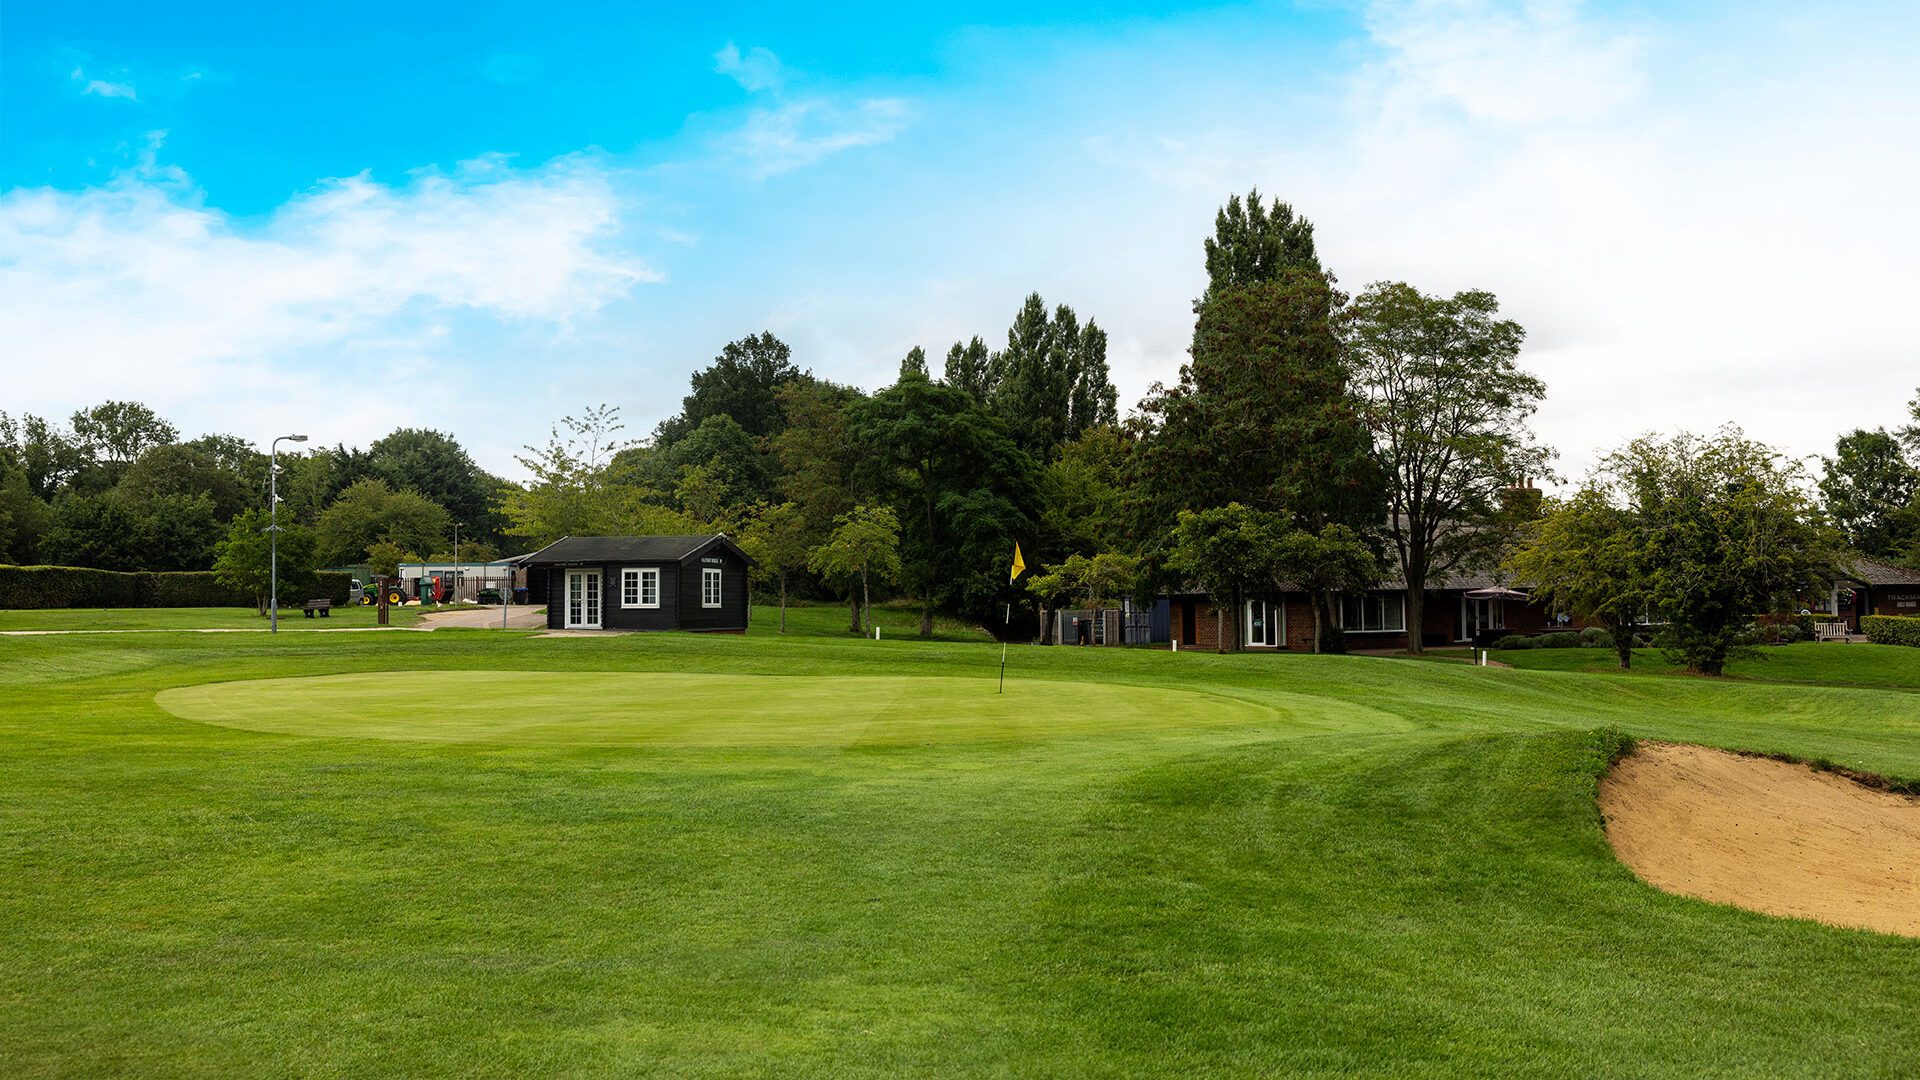
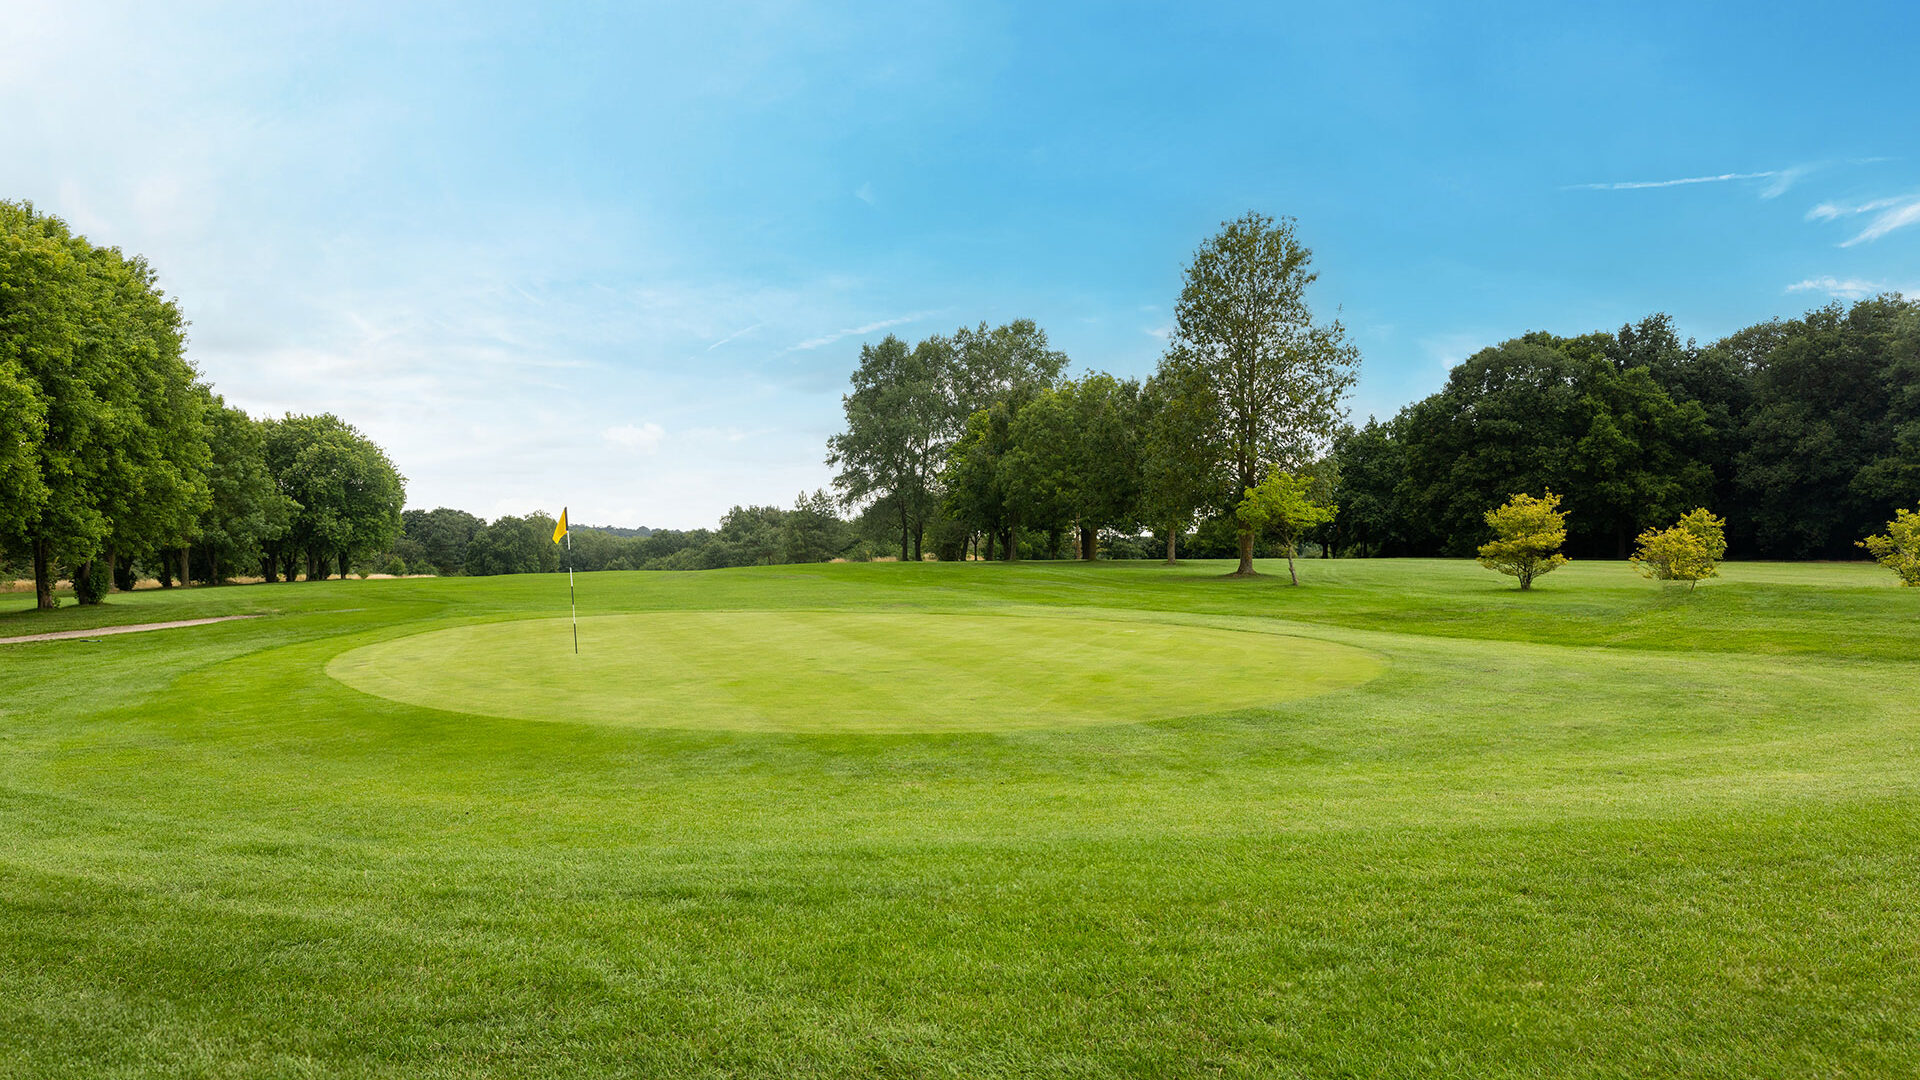
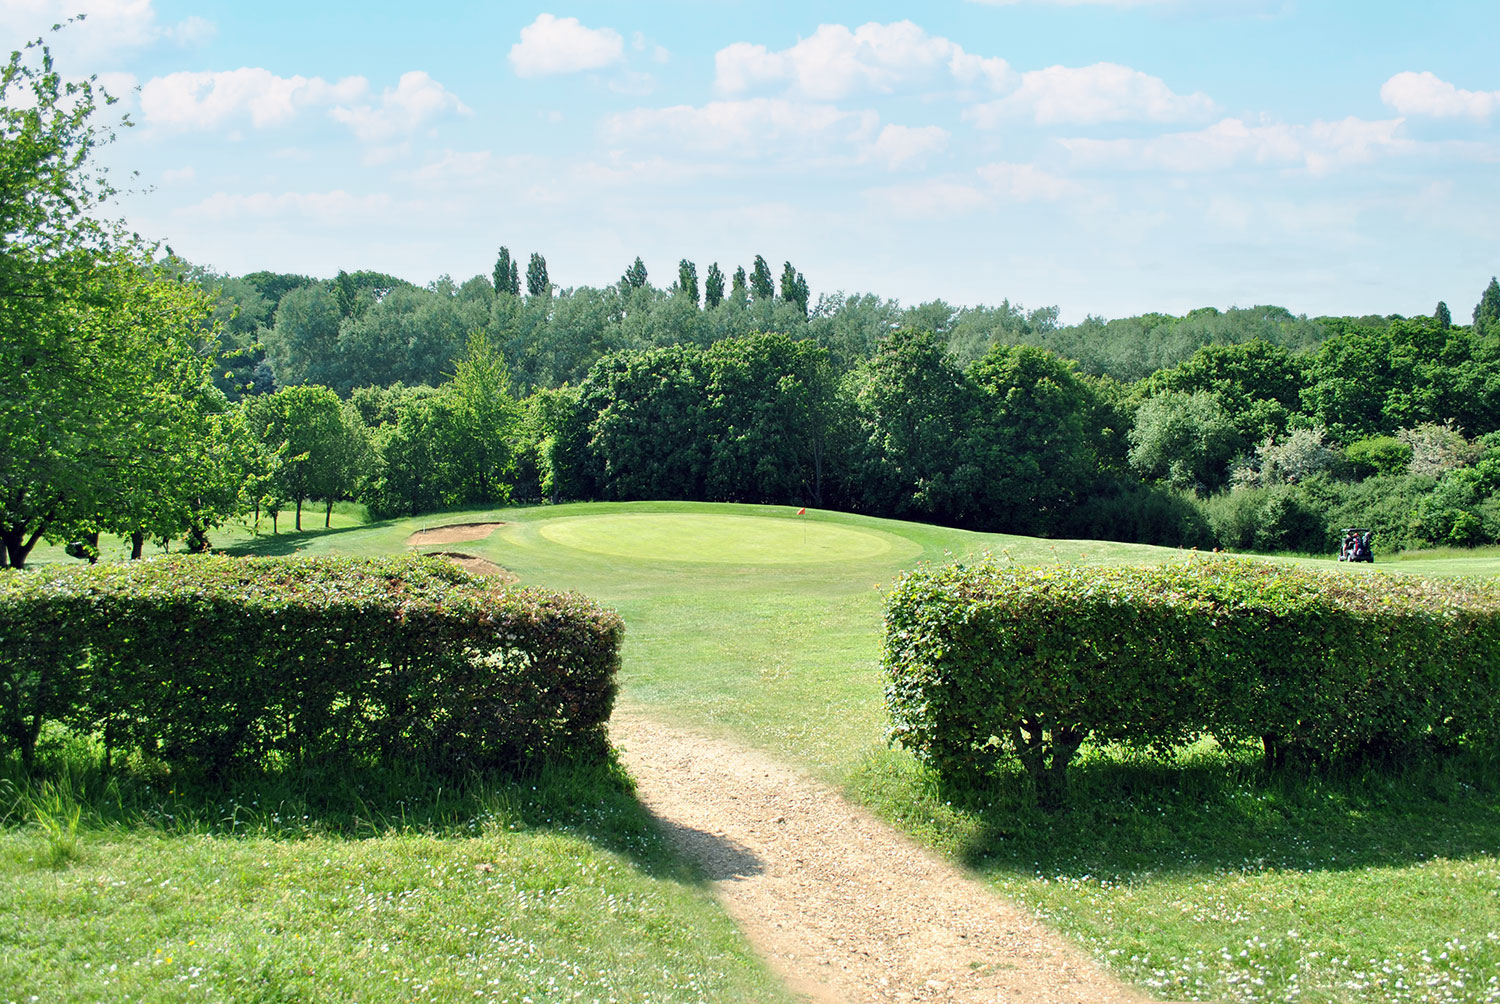
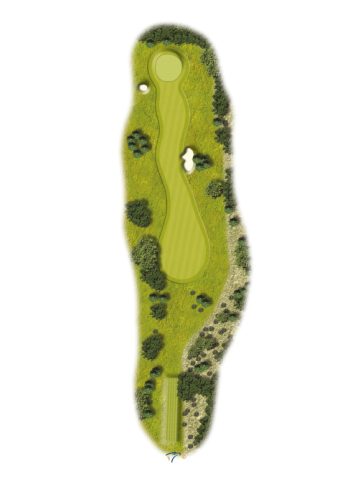
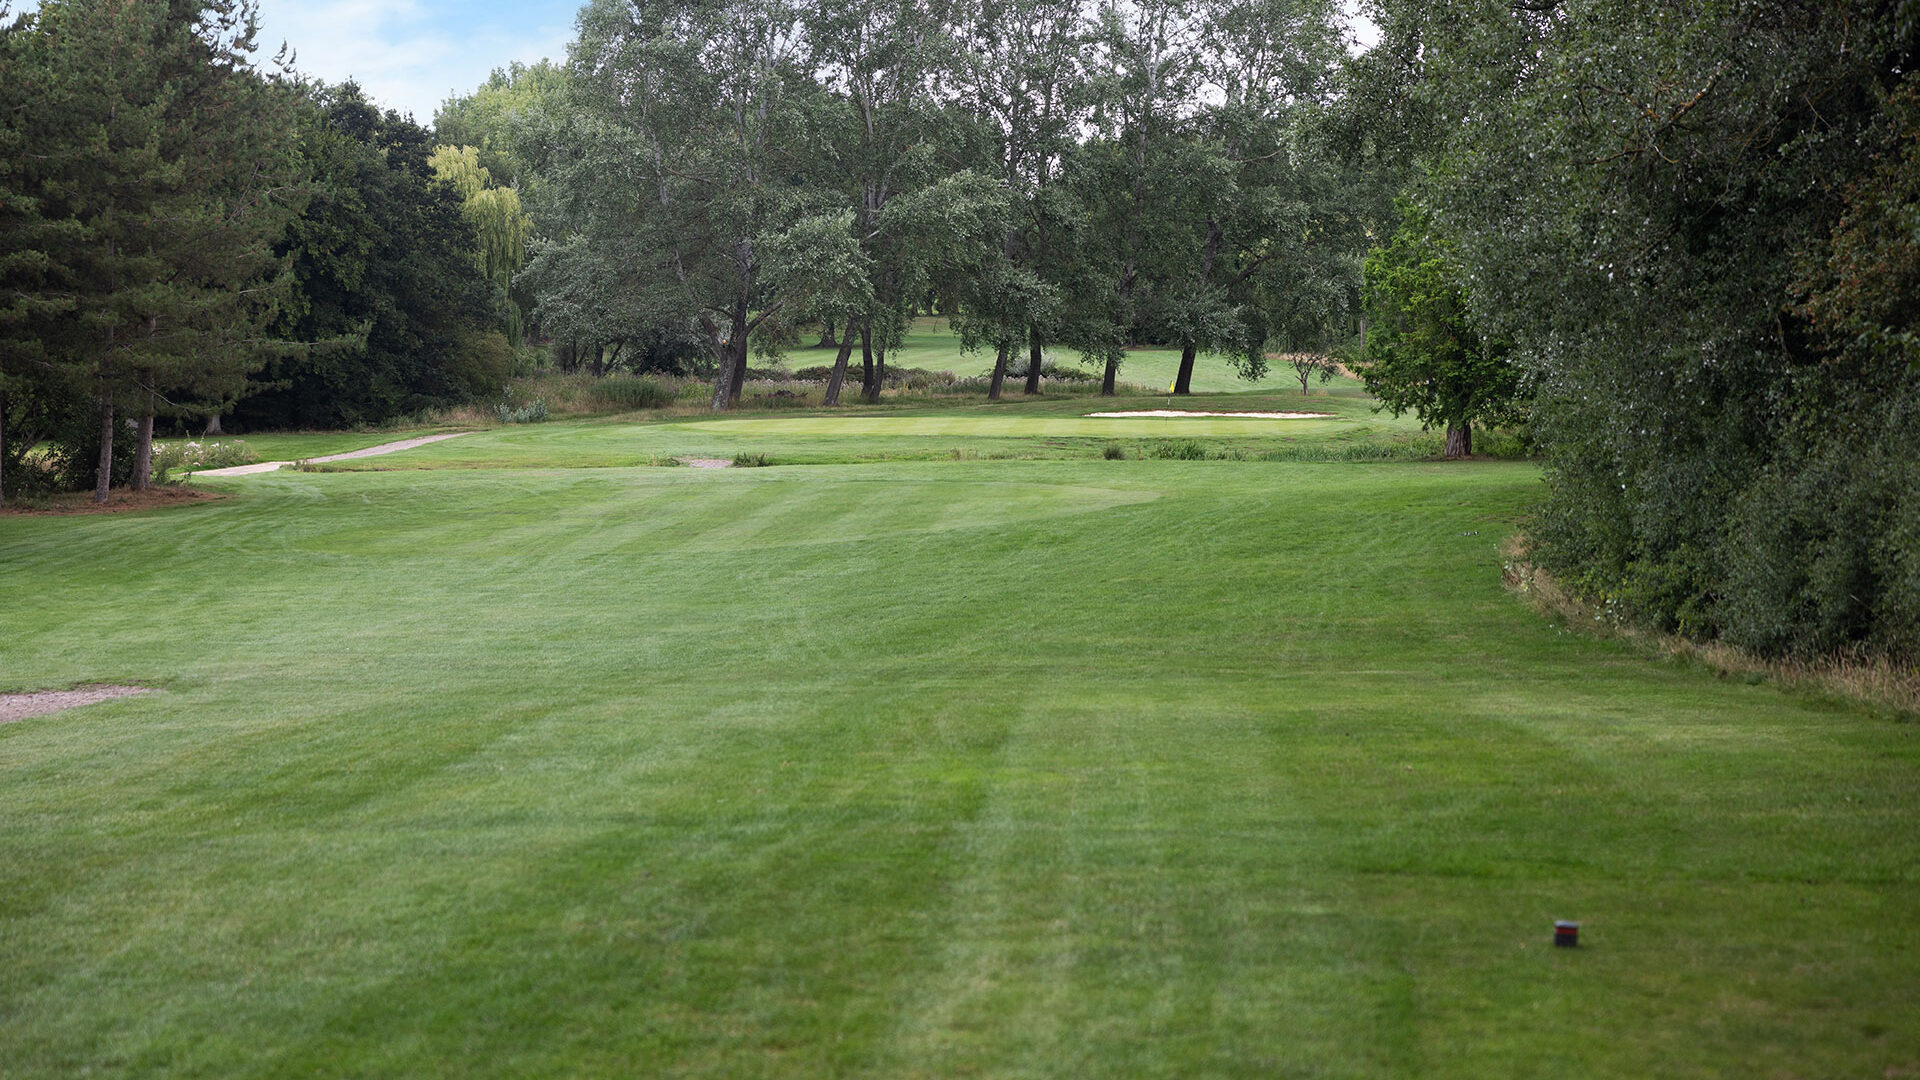
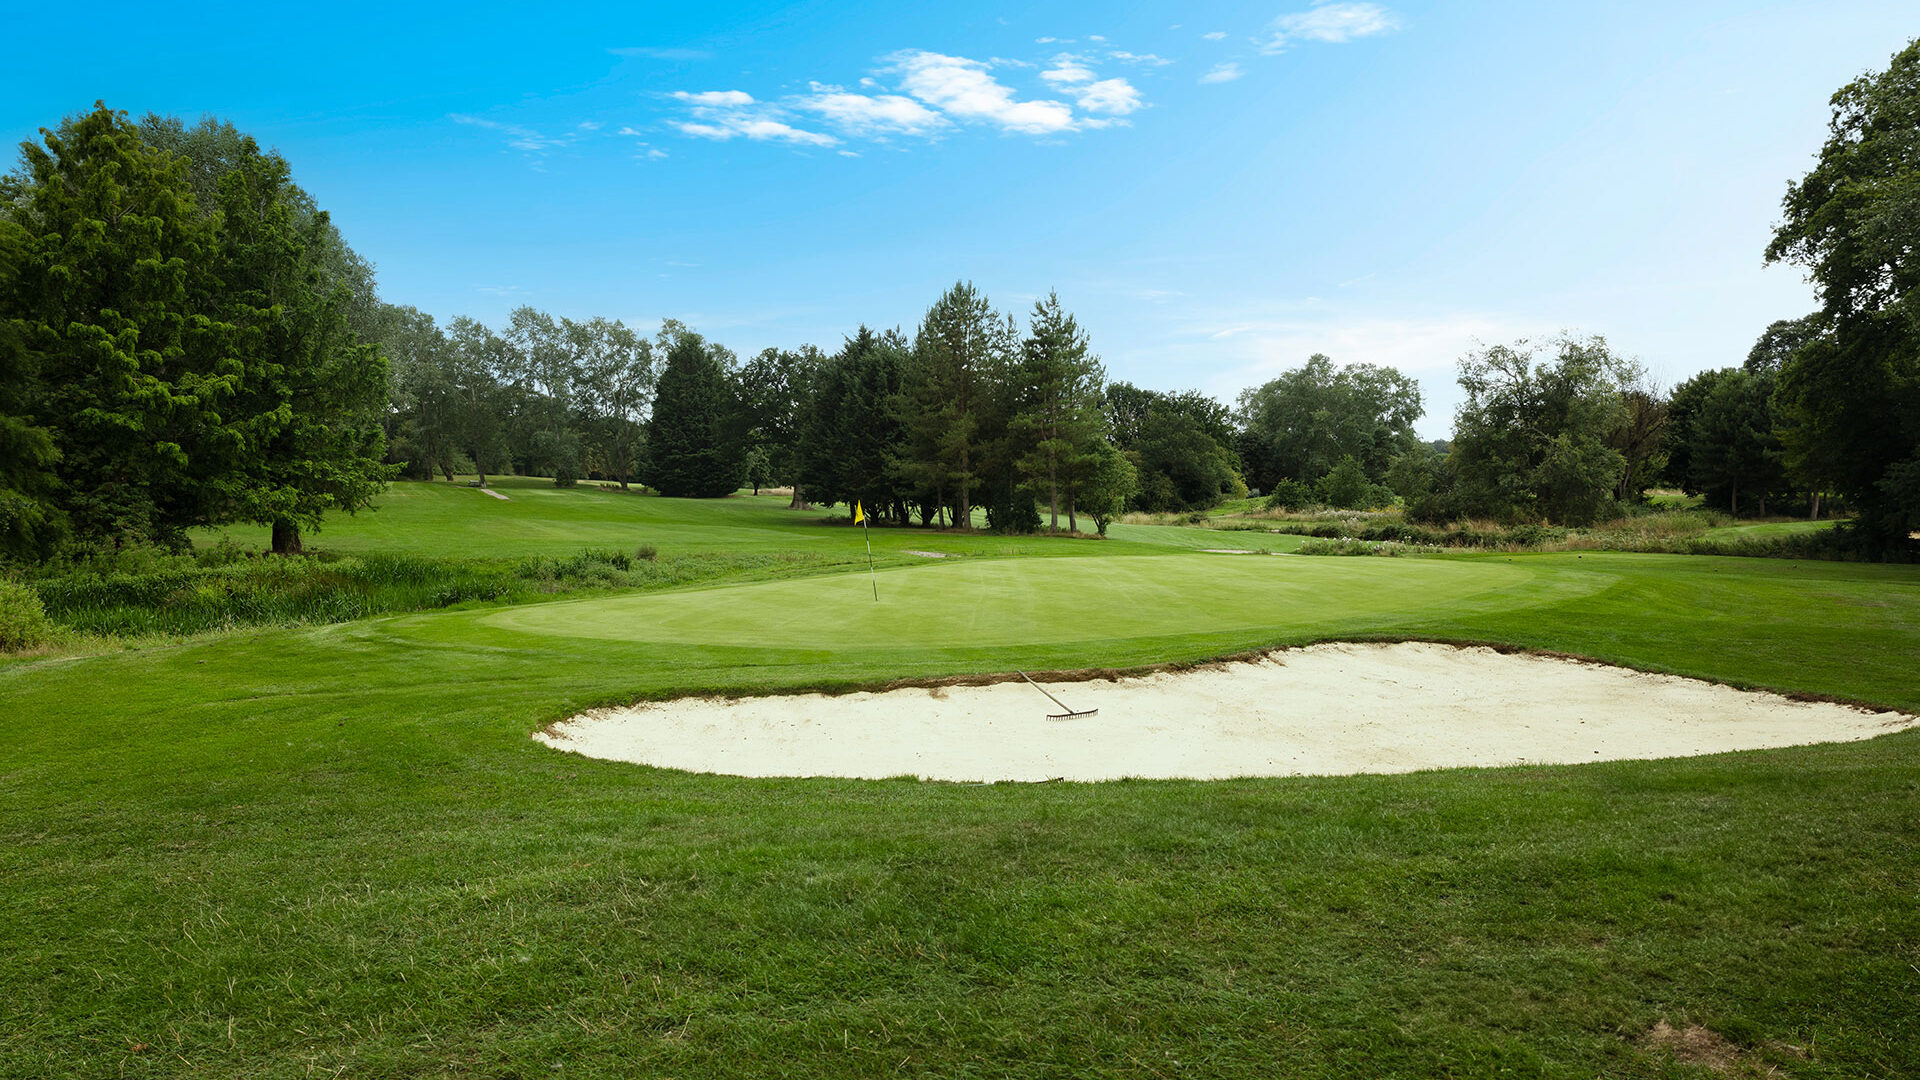
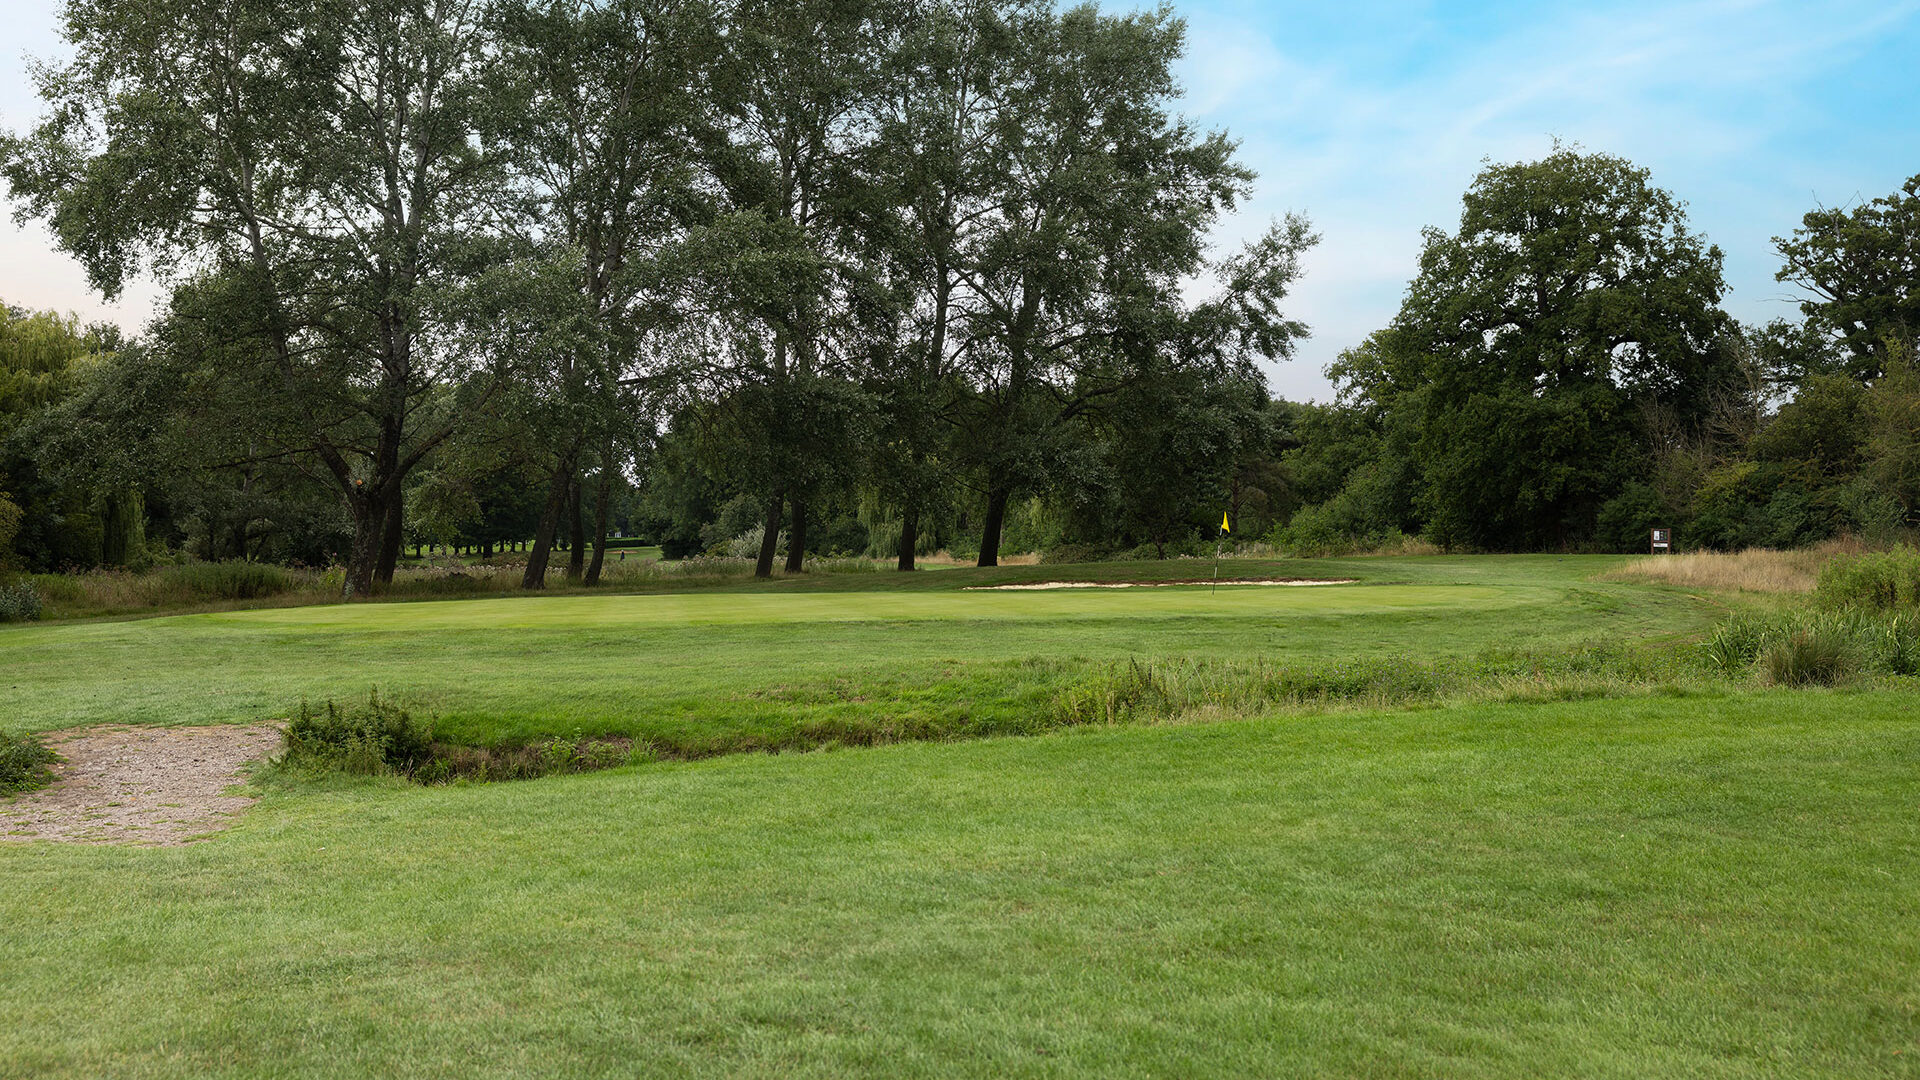
The jewel in the crown of the Stevenage Golf & Conference centre is the par 72, 18-hole golf course. Nestled among the lush Hertfordshire countryside, this stunning course is accessible to beginners, as well as offering a challenge to more advanced golfers. Book your tee time now!
EXPLORE THE COURSE
Loading status...
YARDS
6364
White Tee
YARDS
6165
Yellow Tee
YARDS
5637
Red Tee
1 of 18
| PAR | YARDS | STROKE | |
|---|---|---|---|
| White Tee | 5 | 494 | 13 |
| Yellow Tee | 5 | 486 | 13 |
| Red Tee | 5 | 466 | 13 |
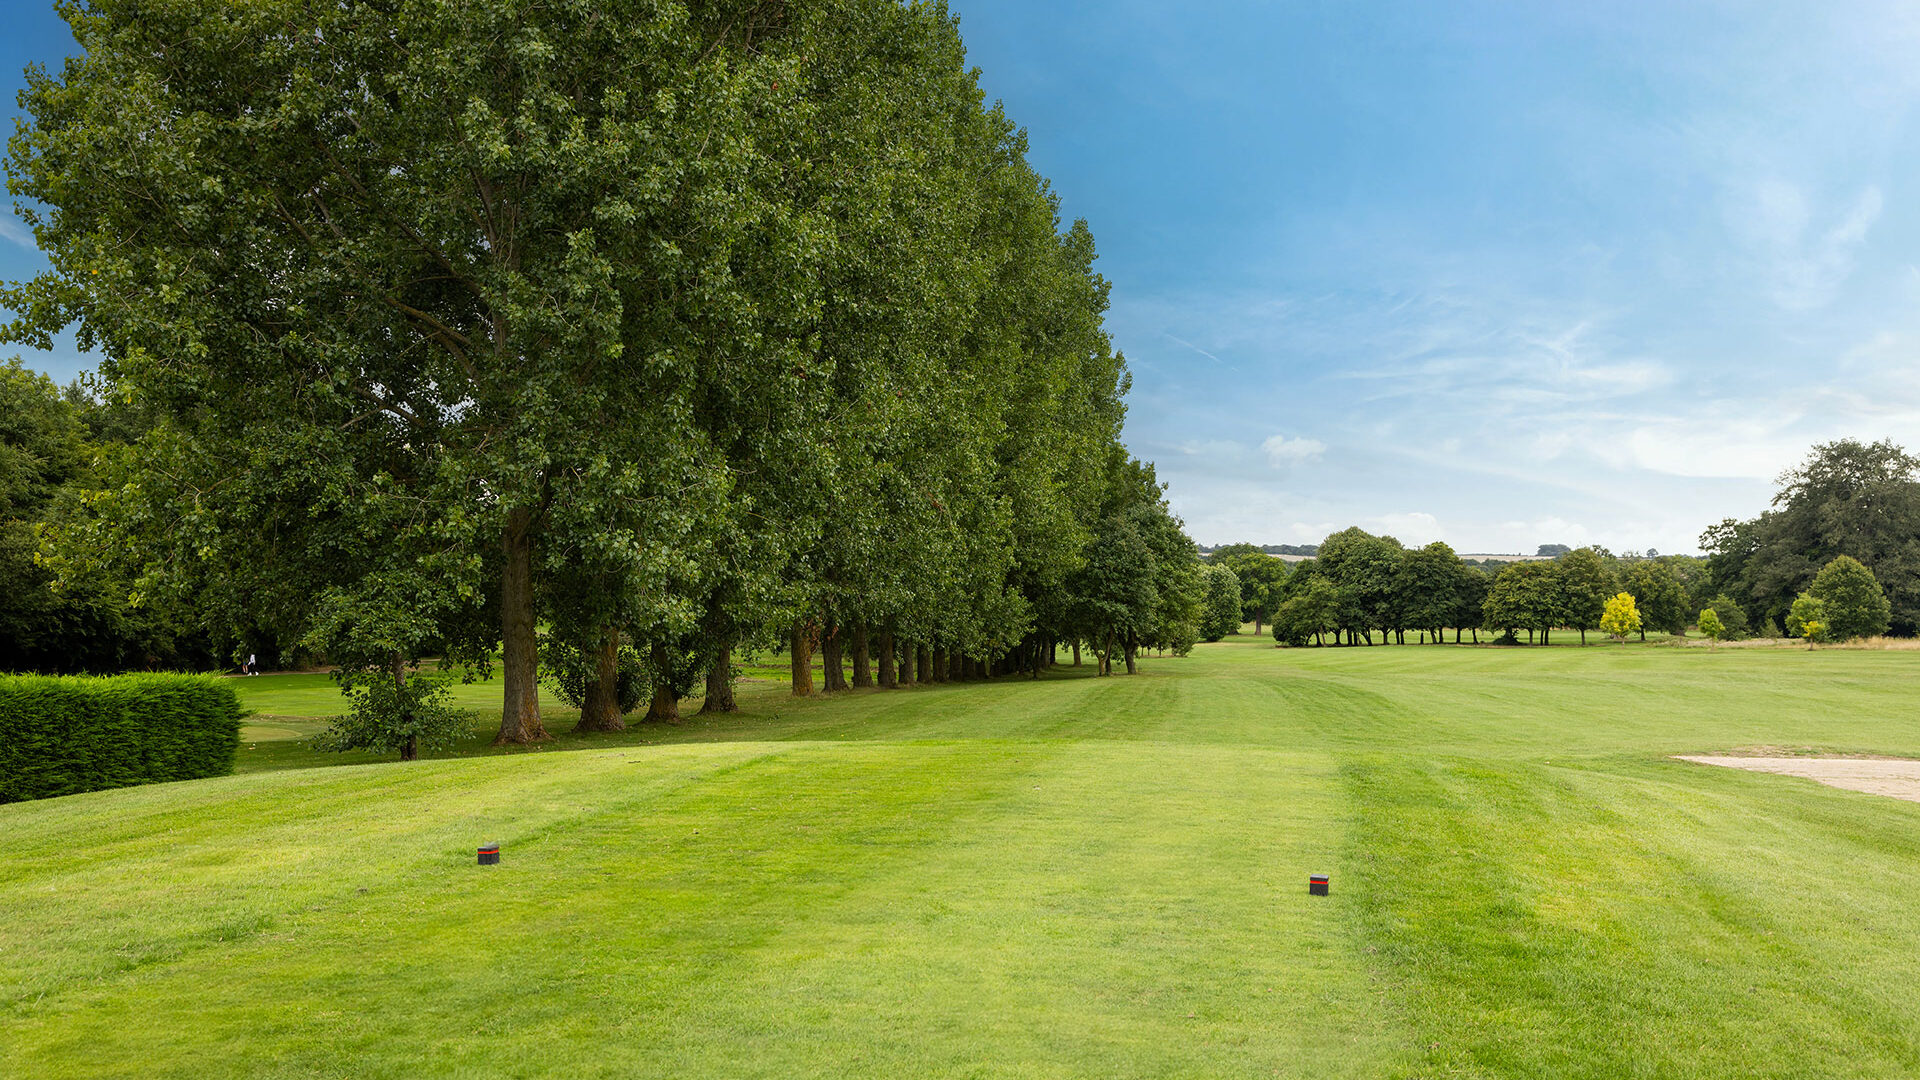
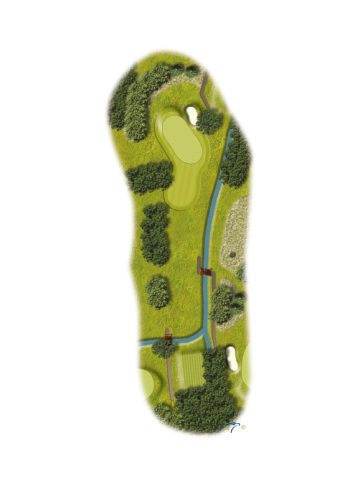
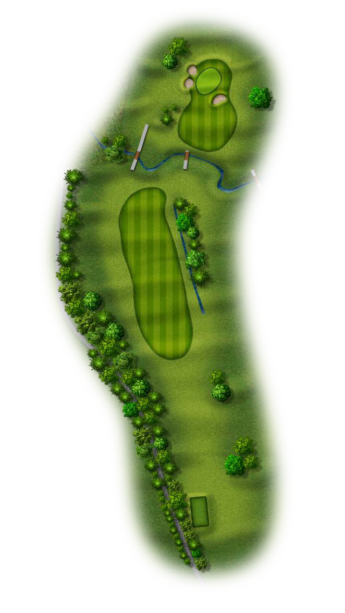
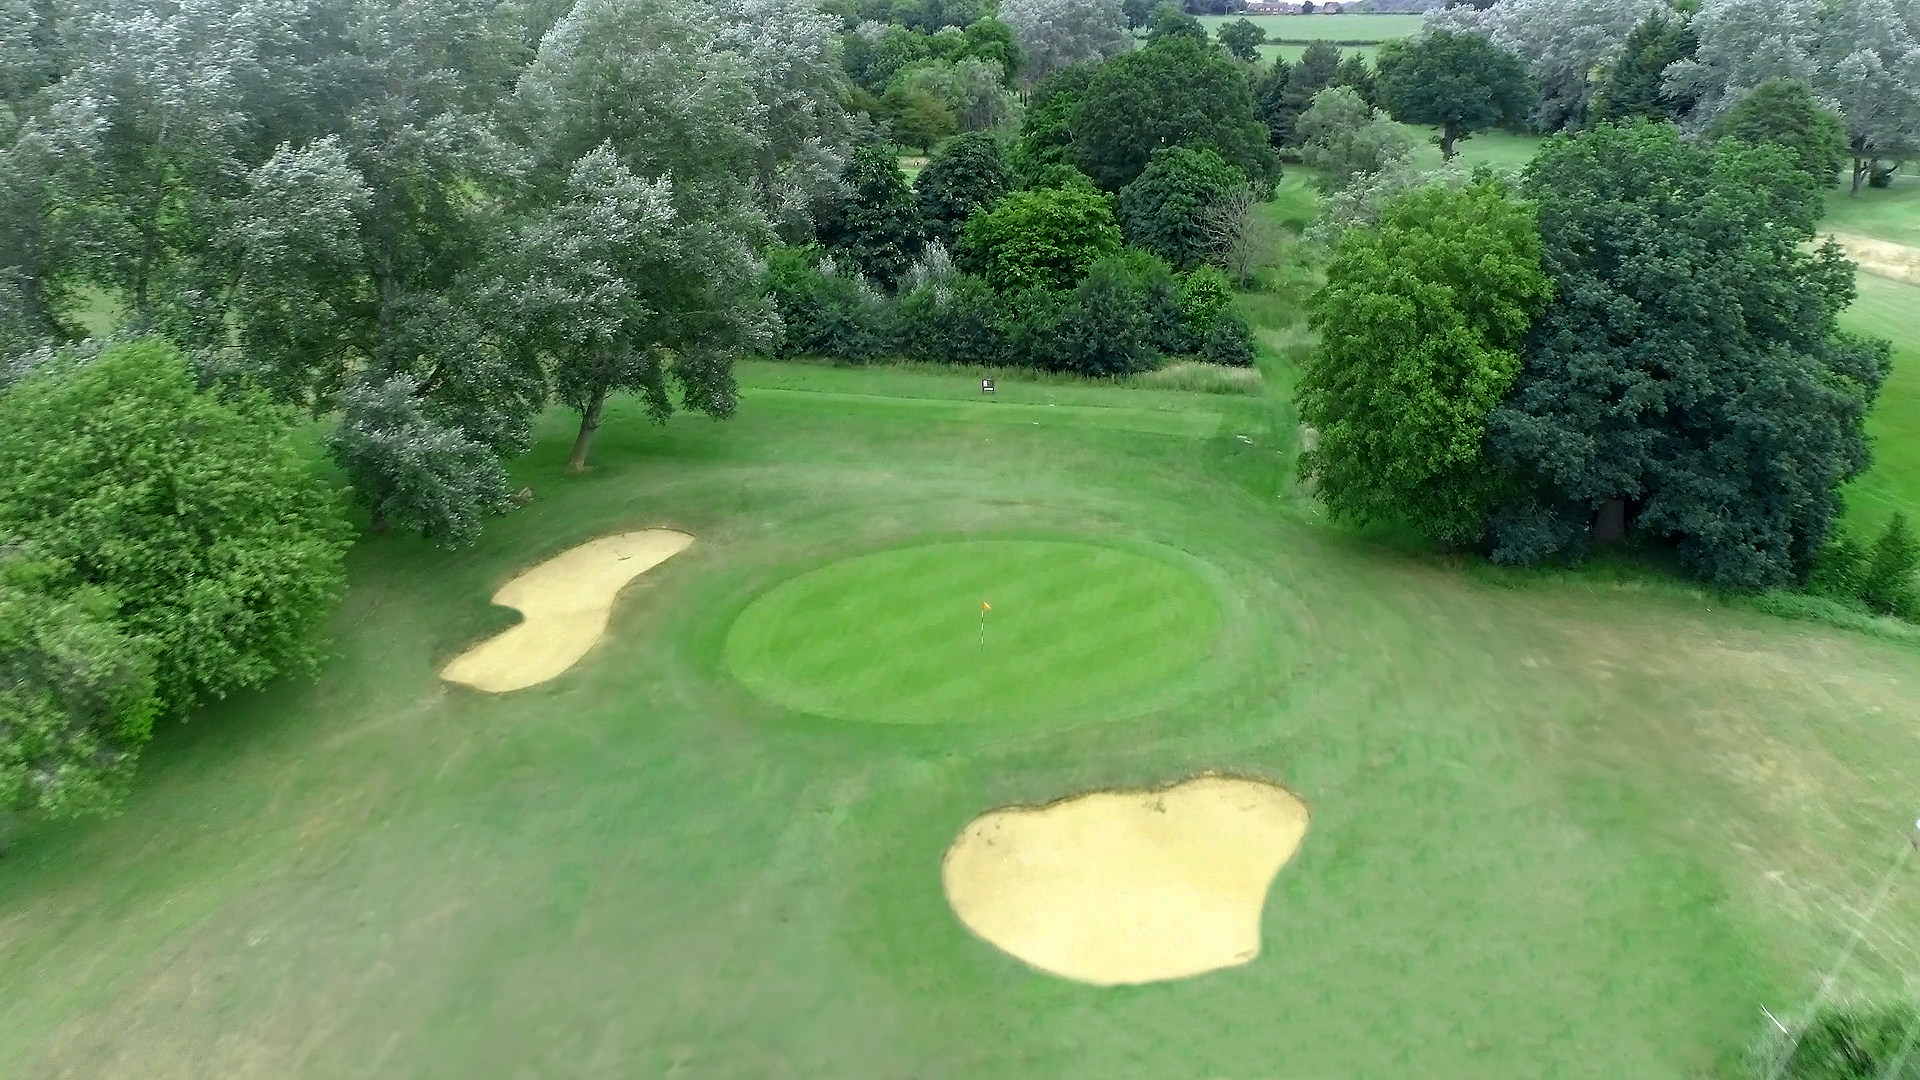
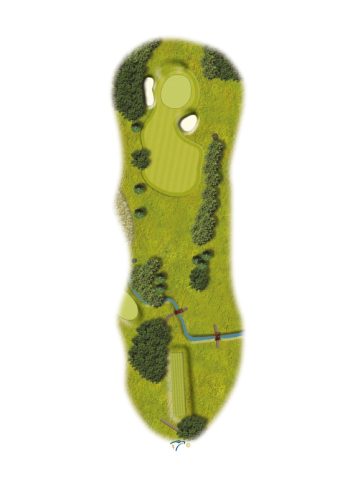
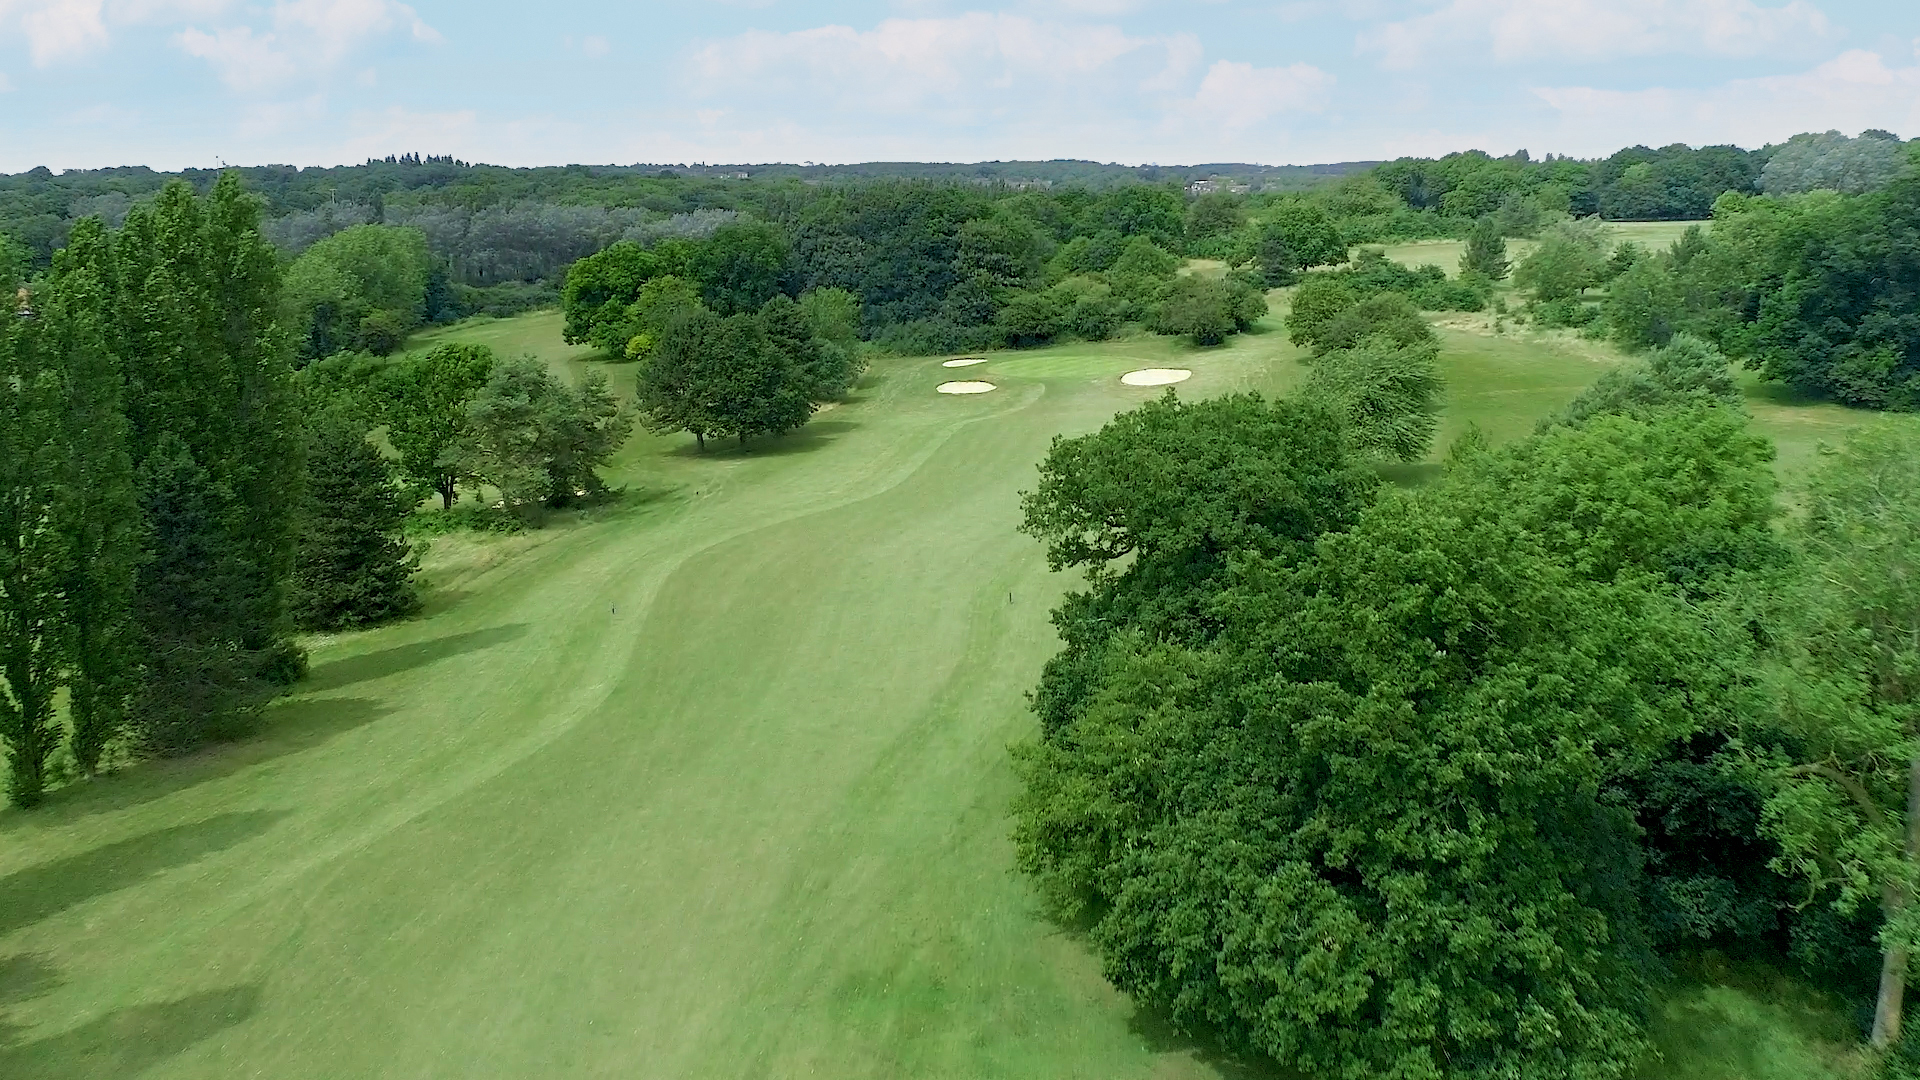
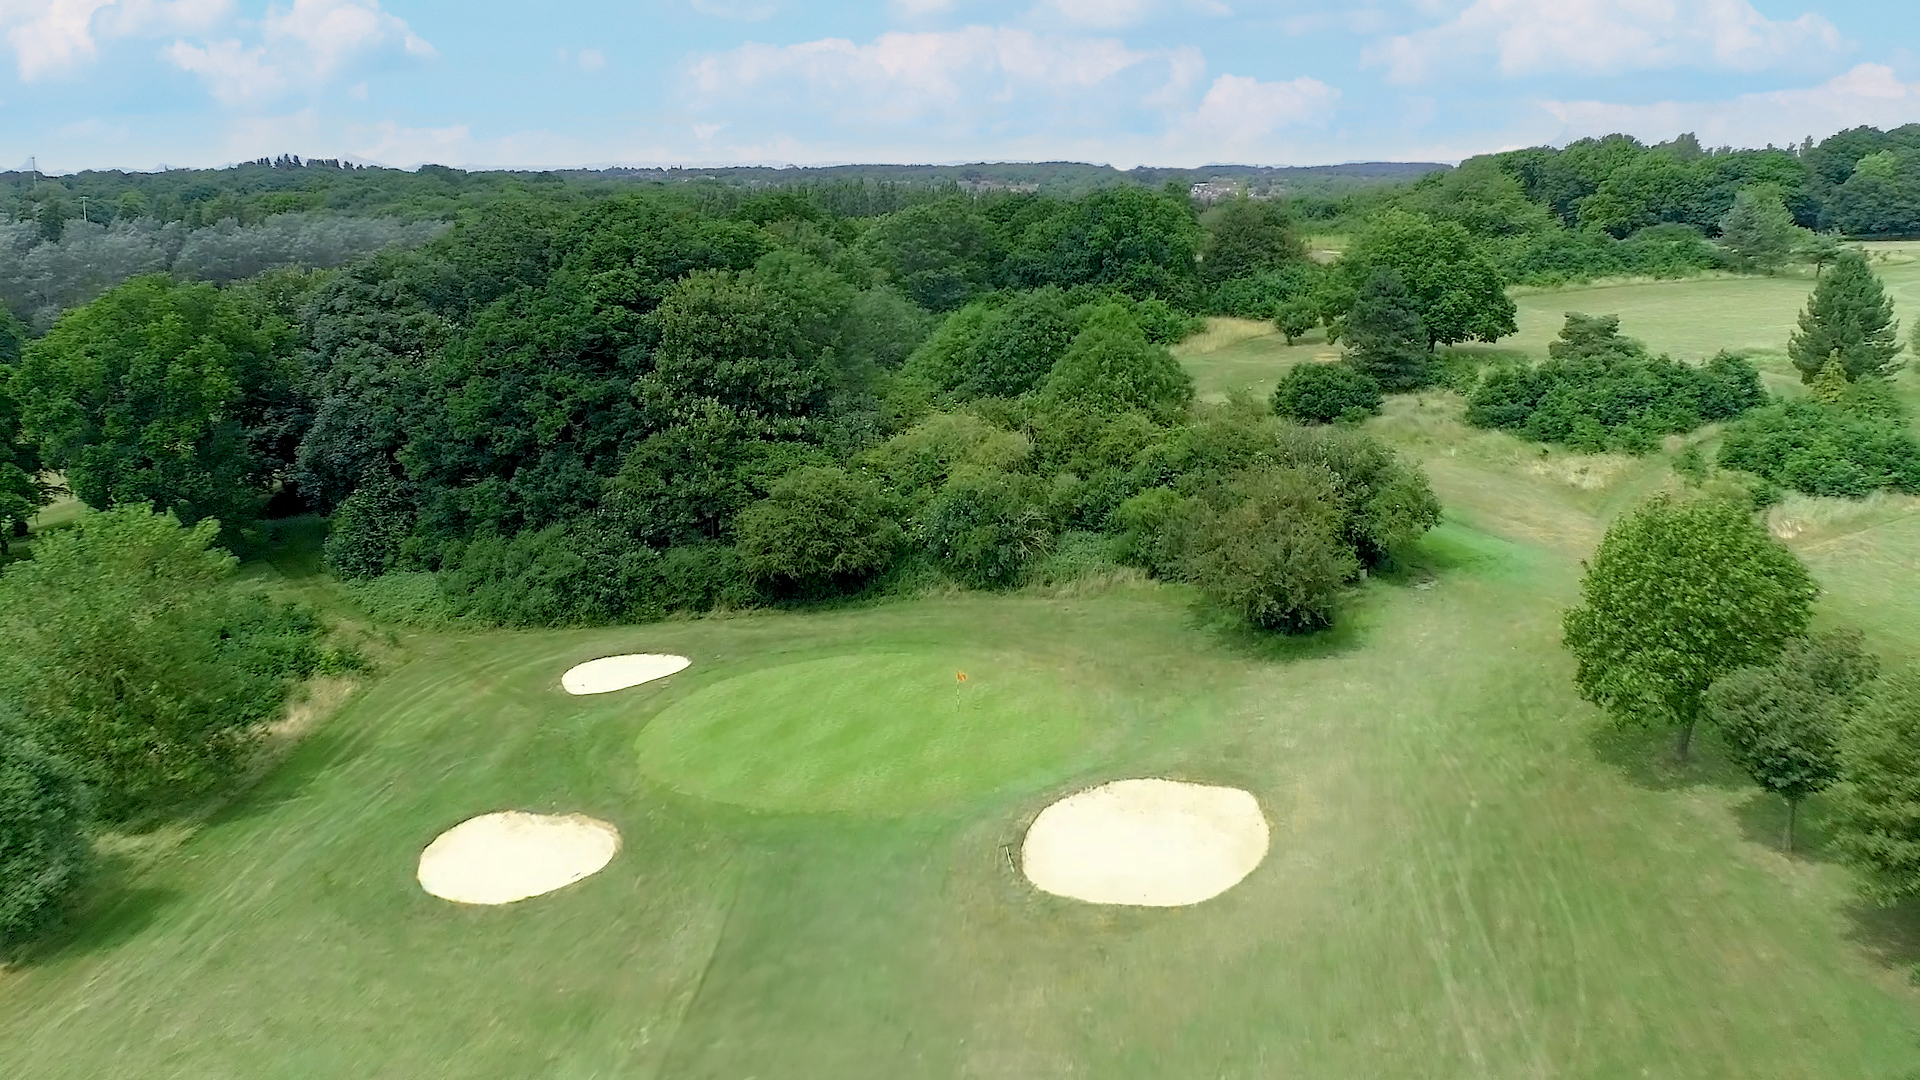
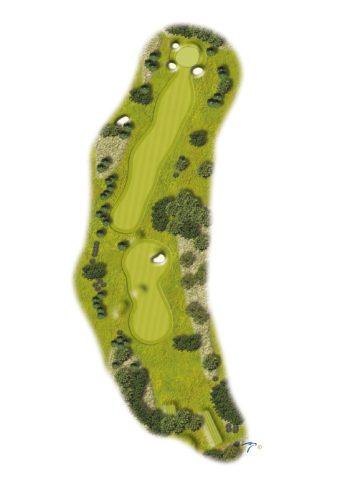
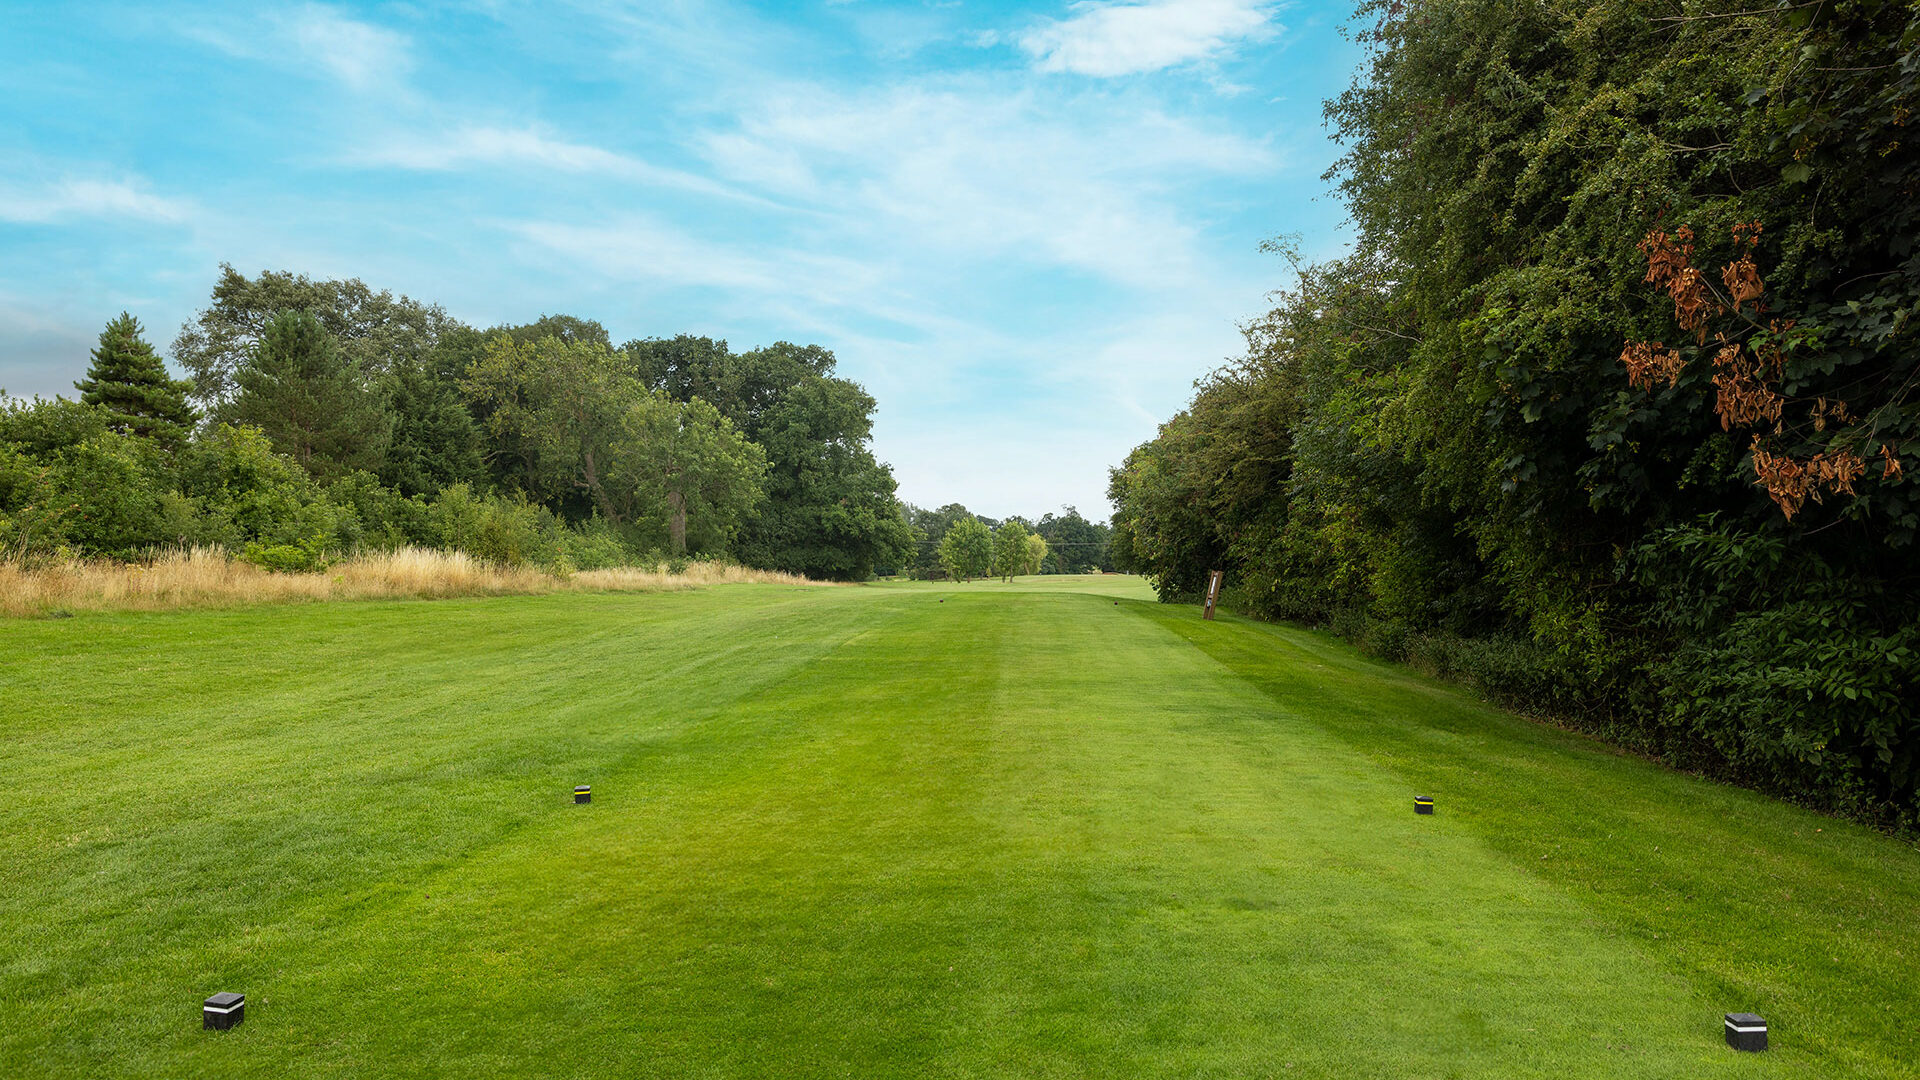
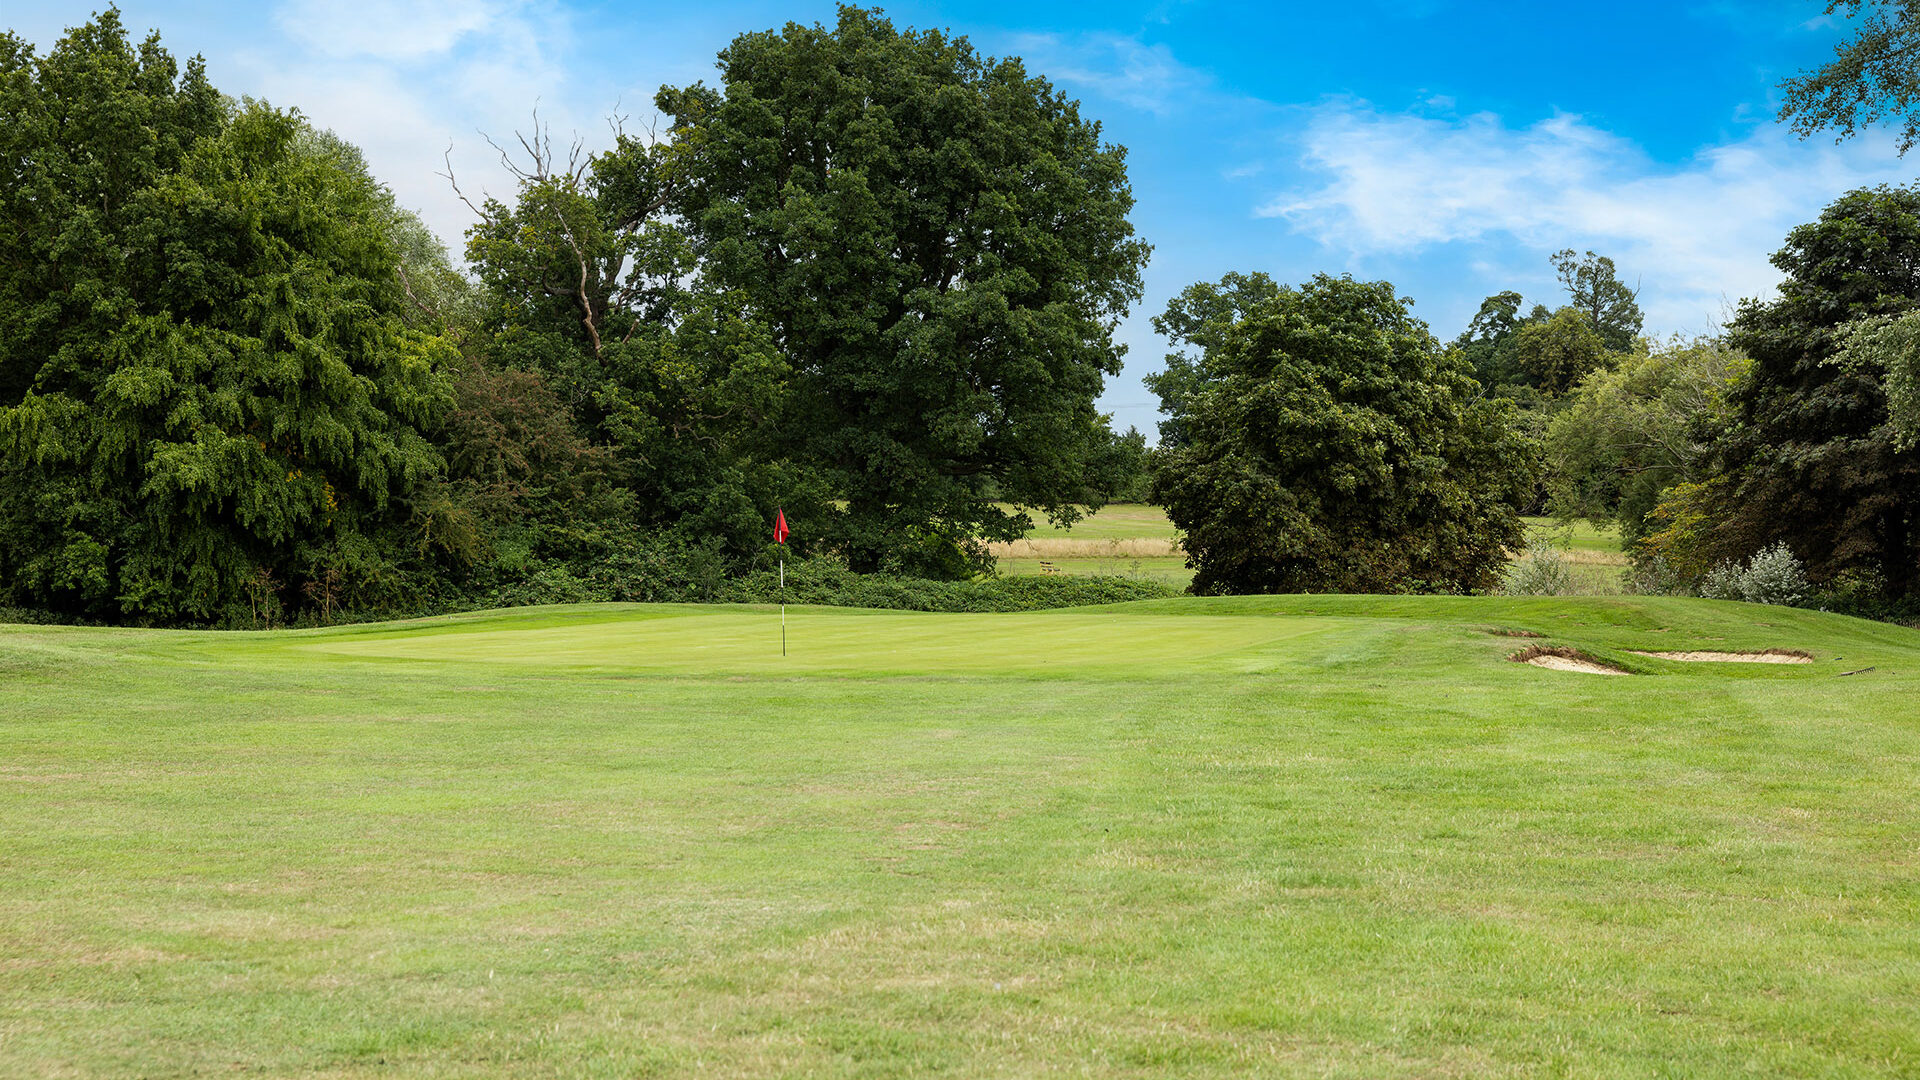
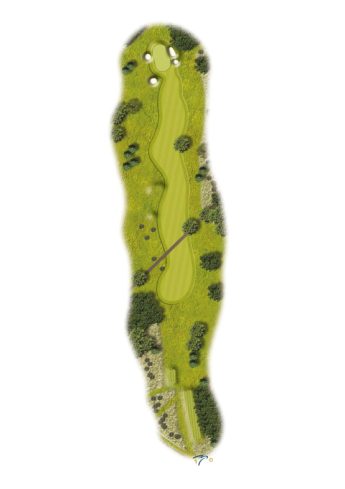
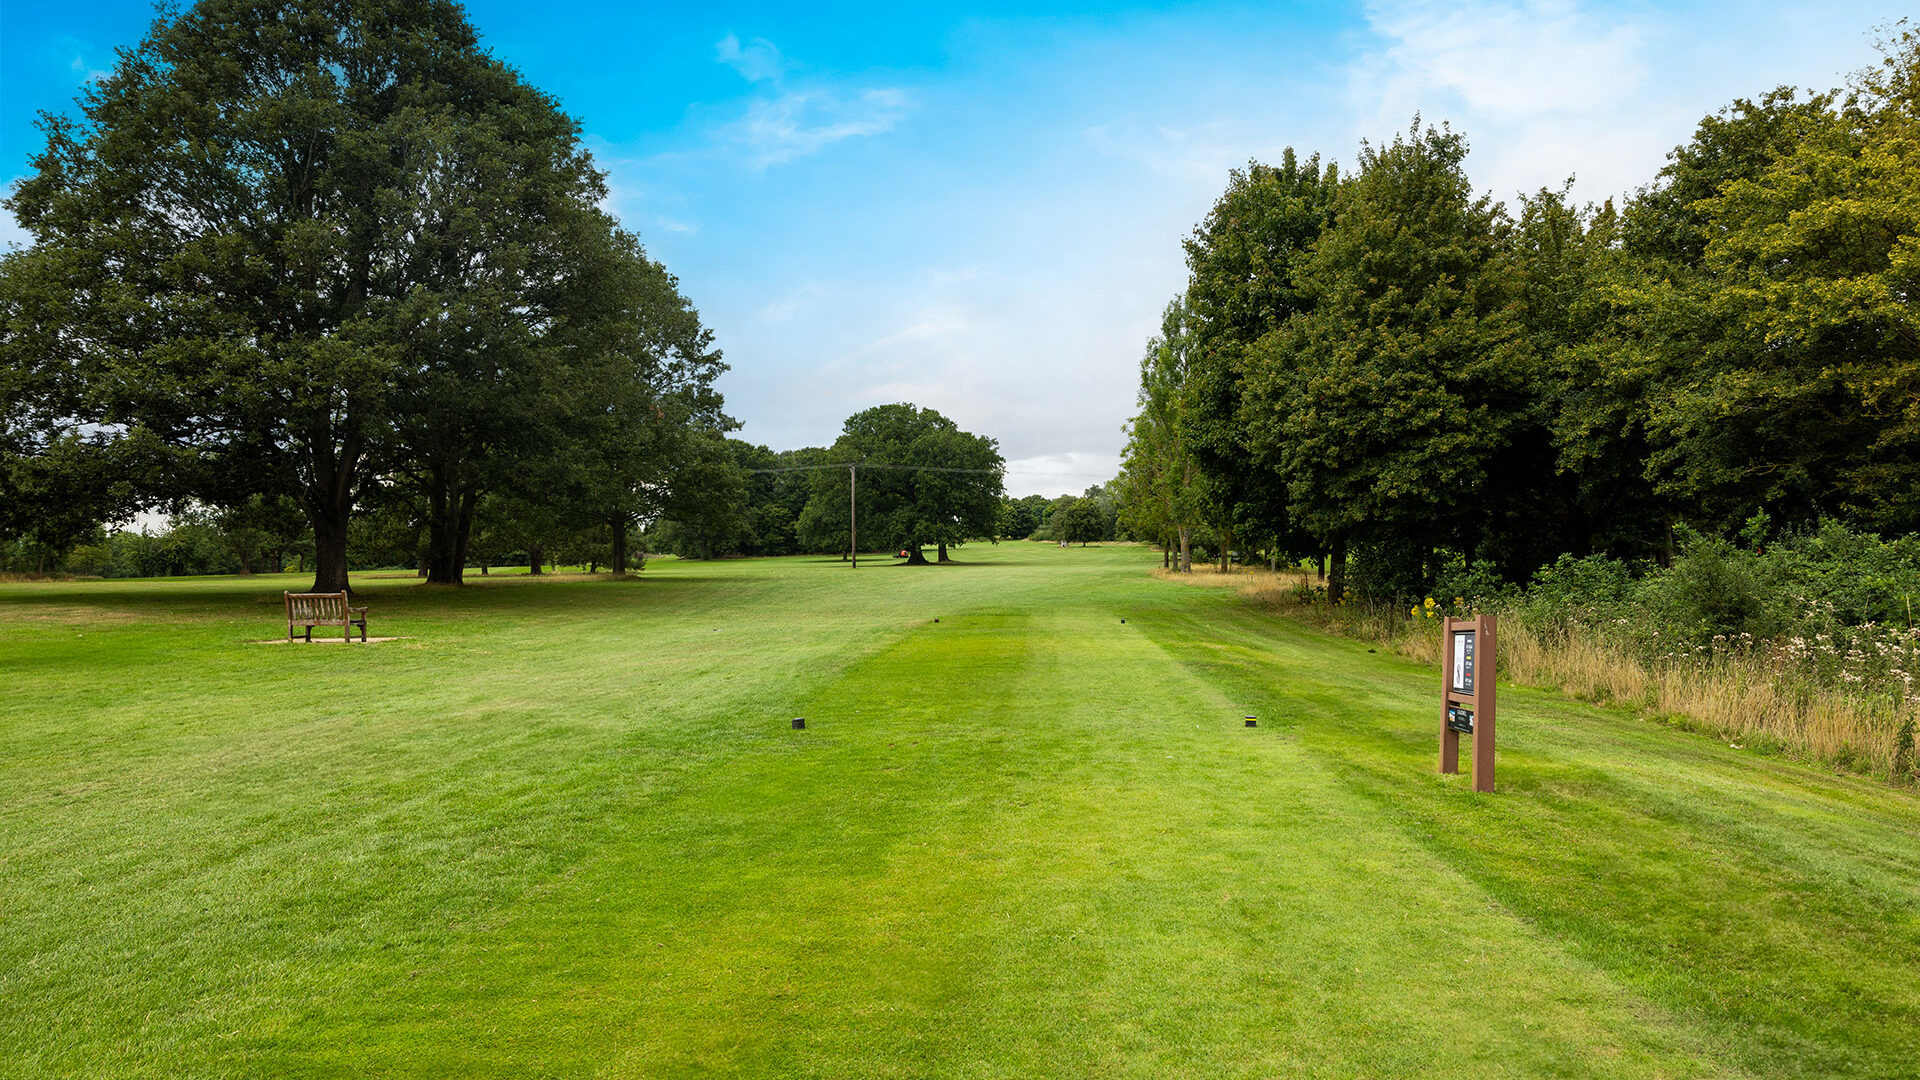
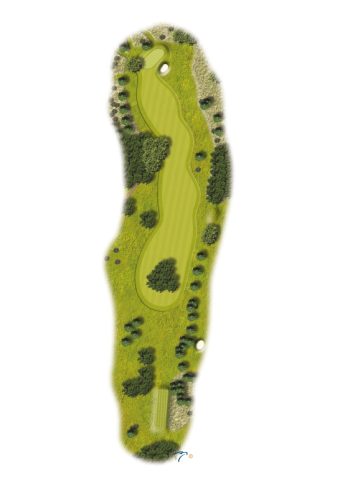
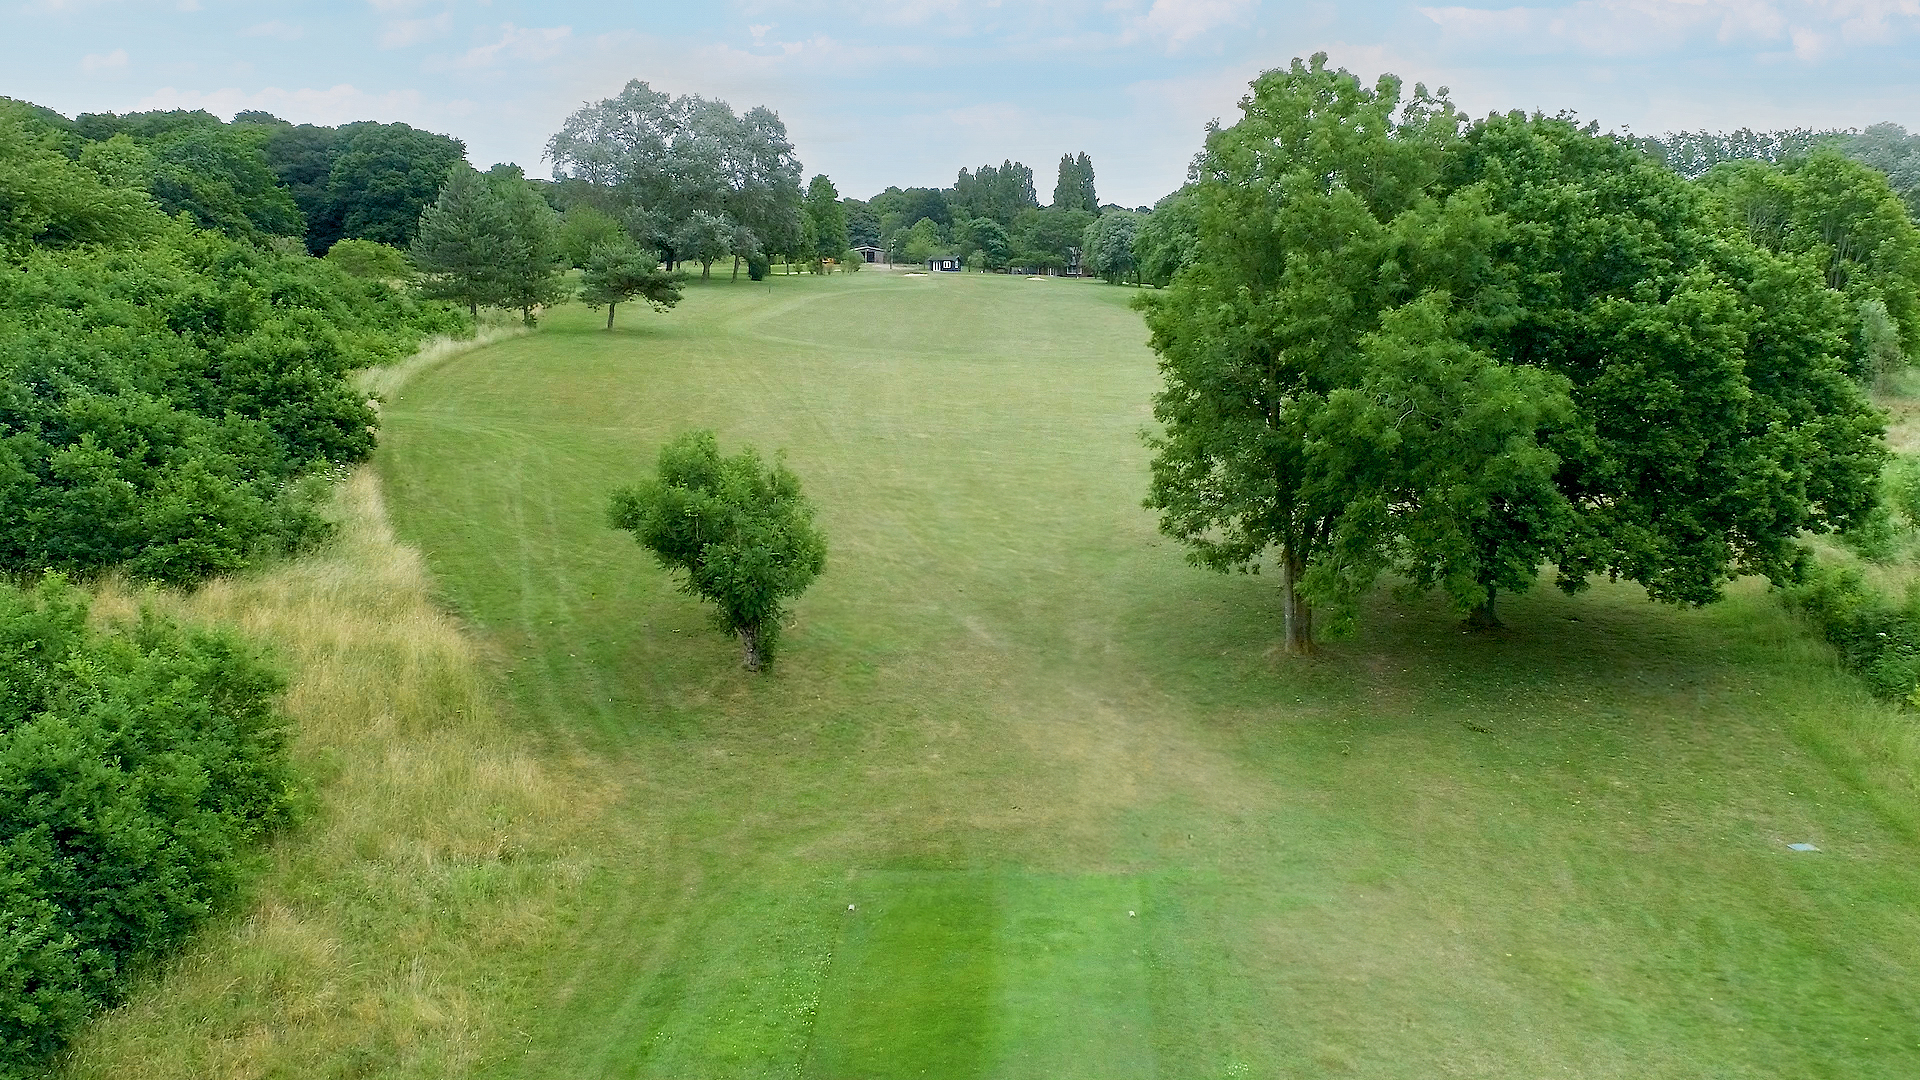
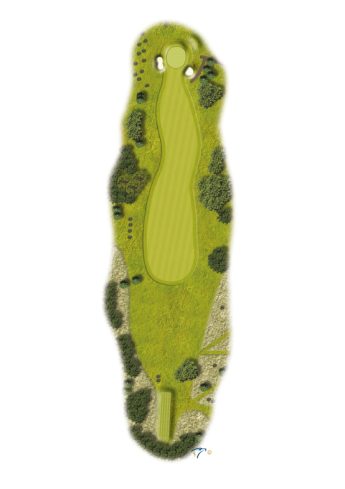
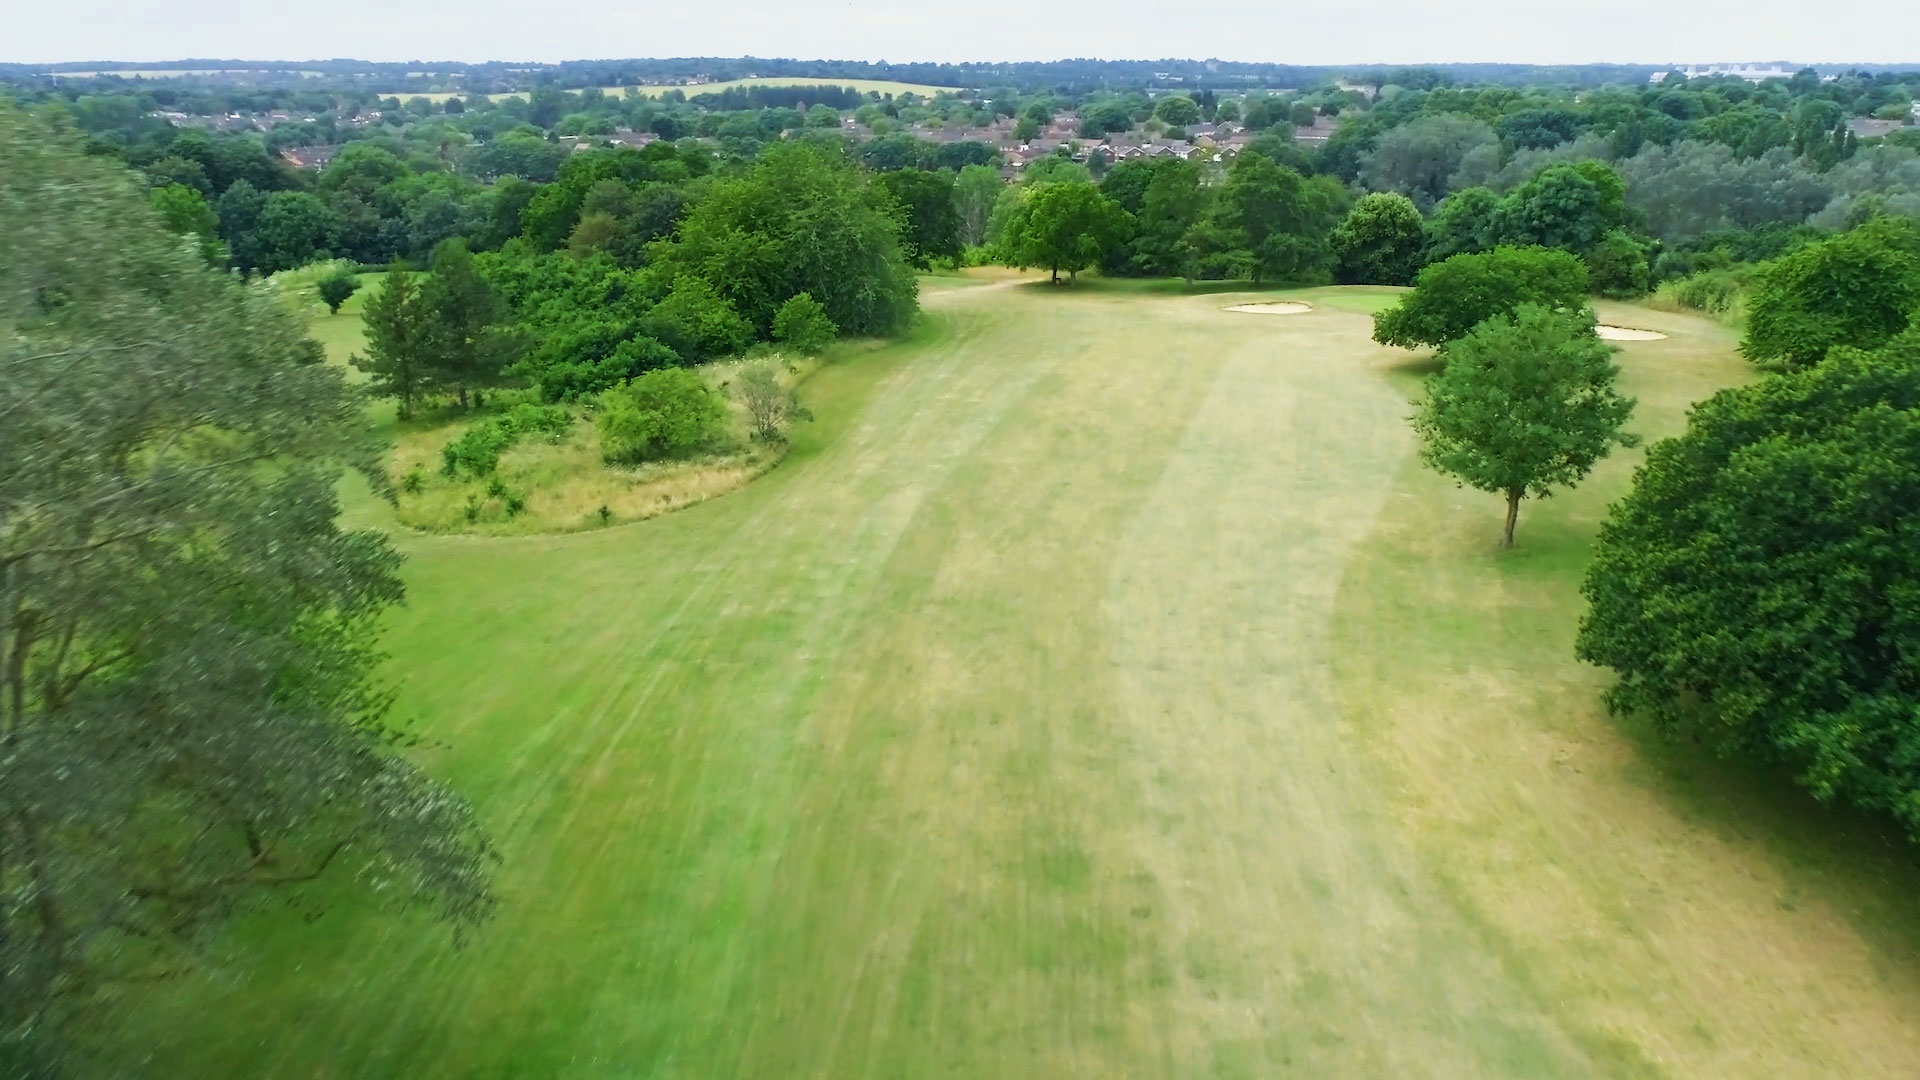
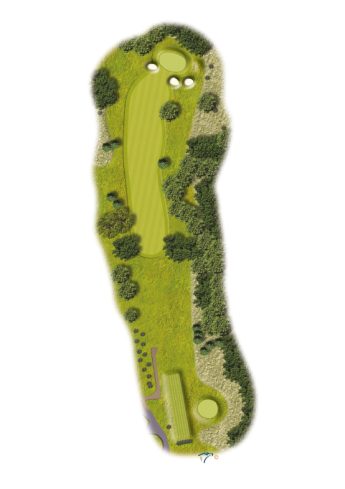
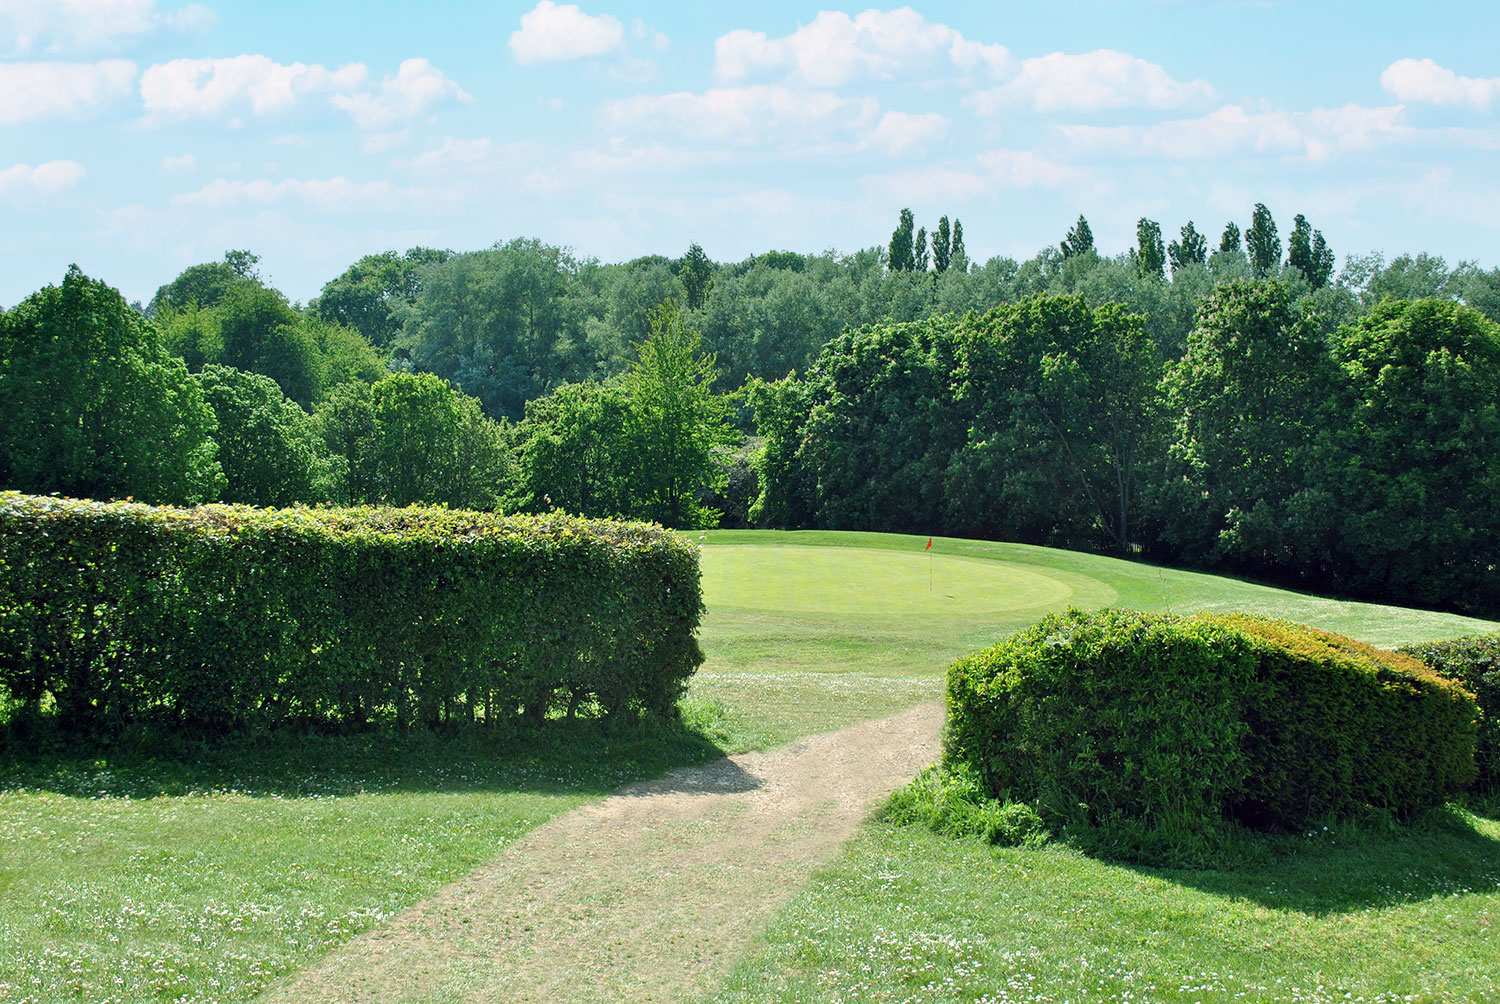
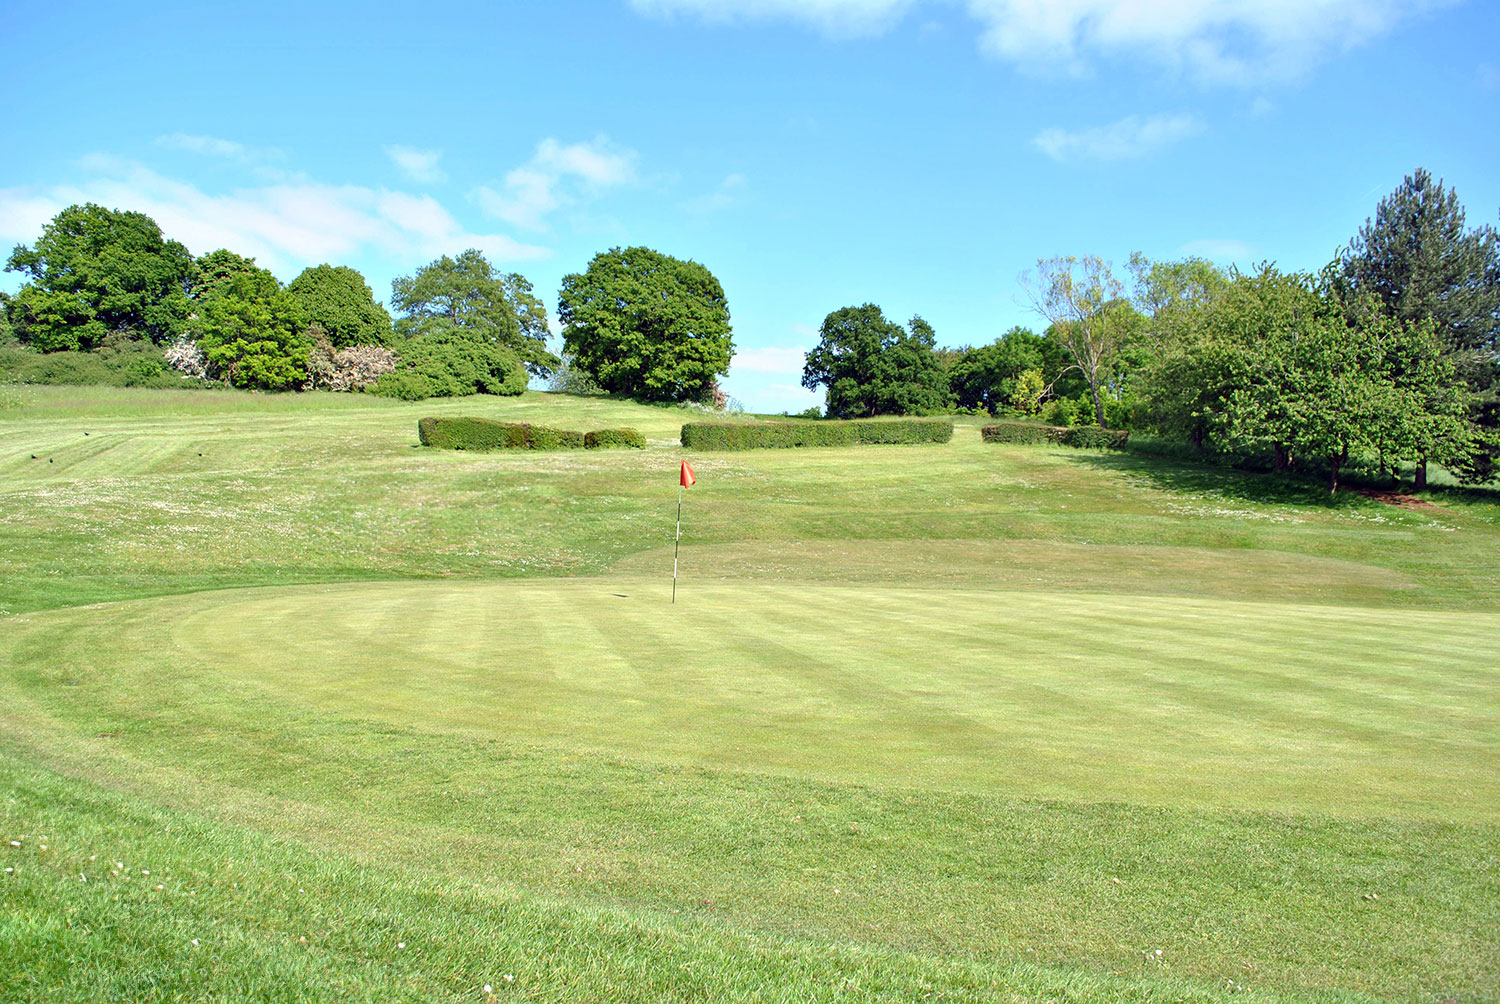
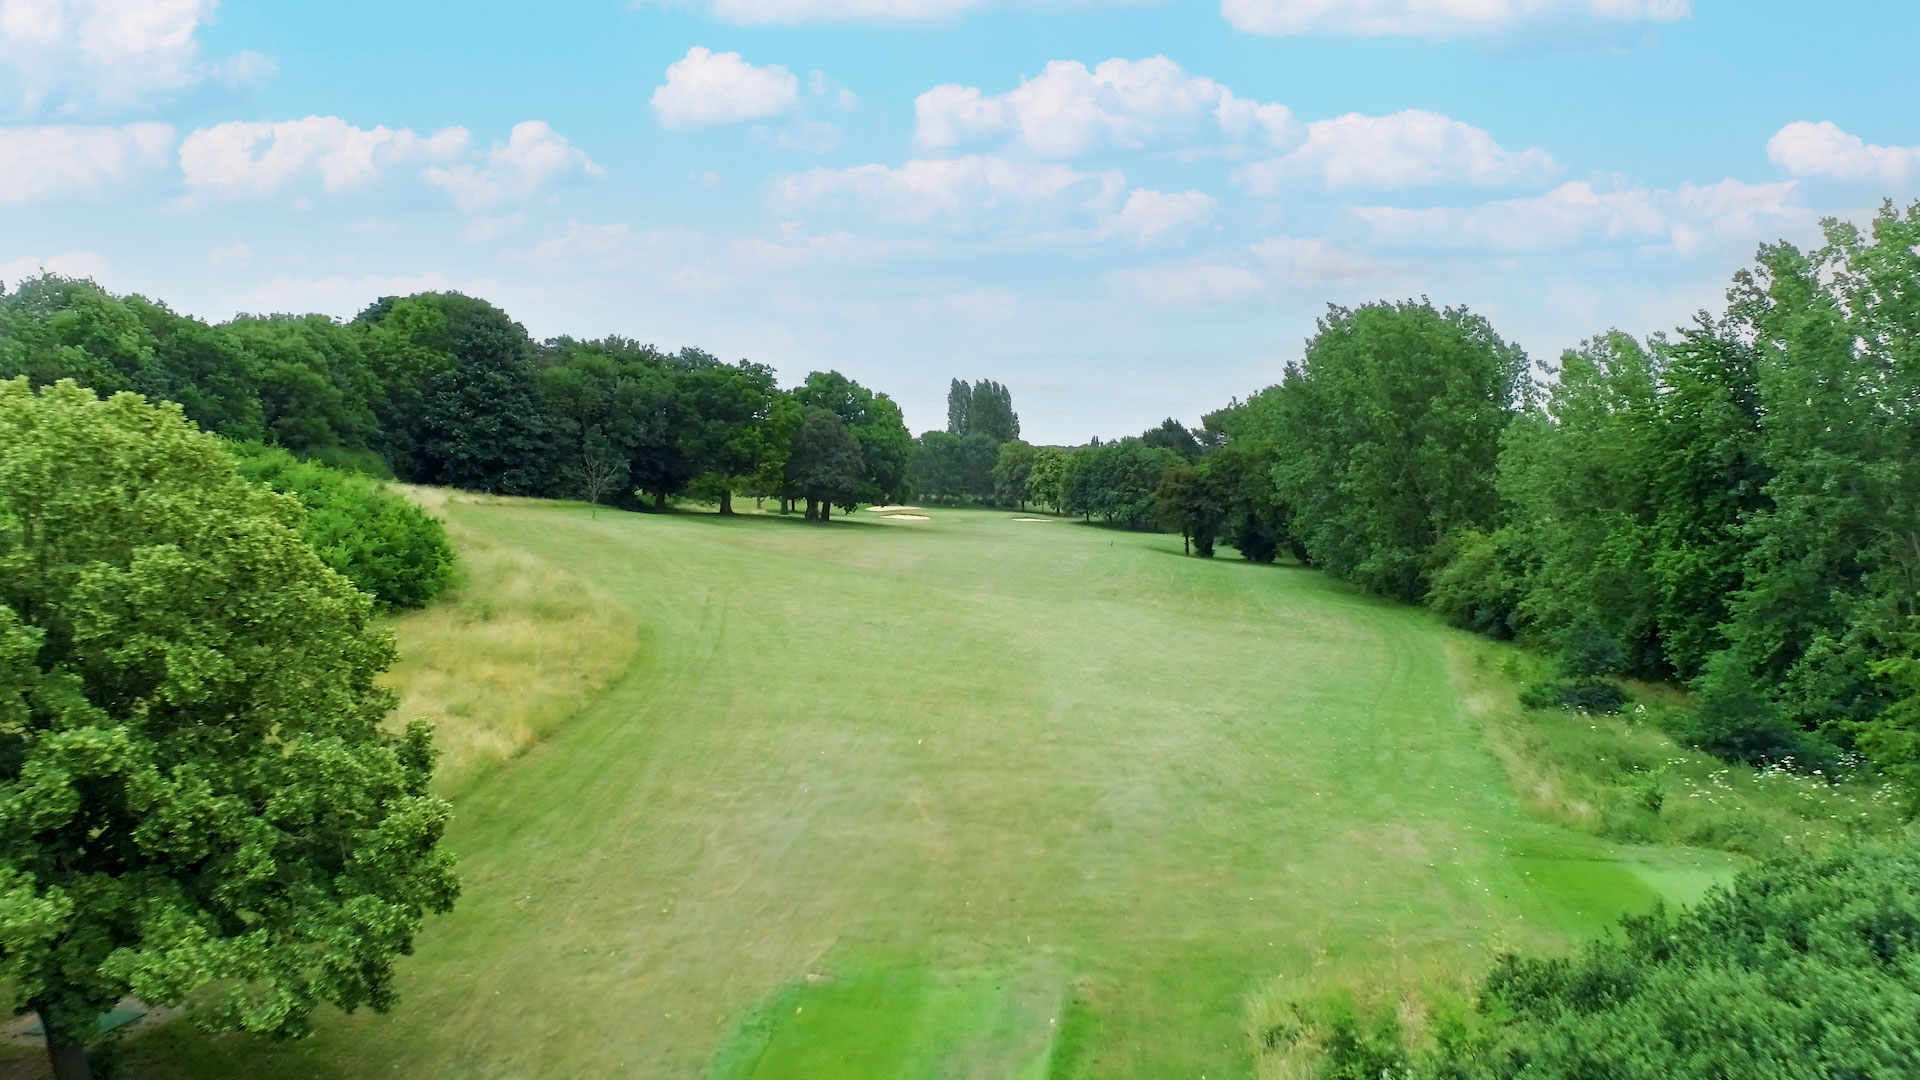
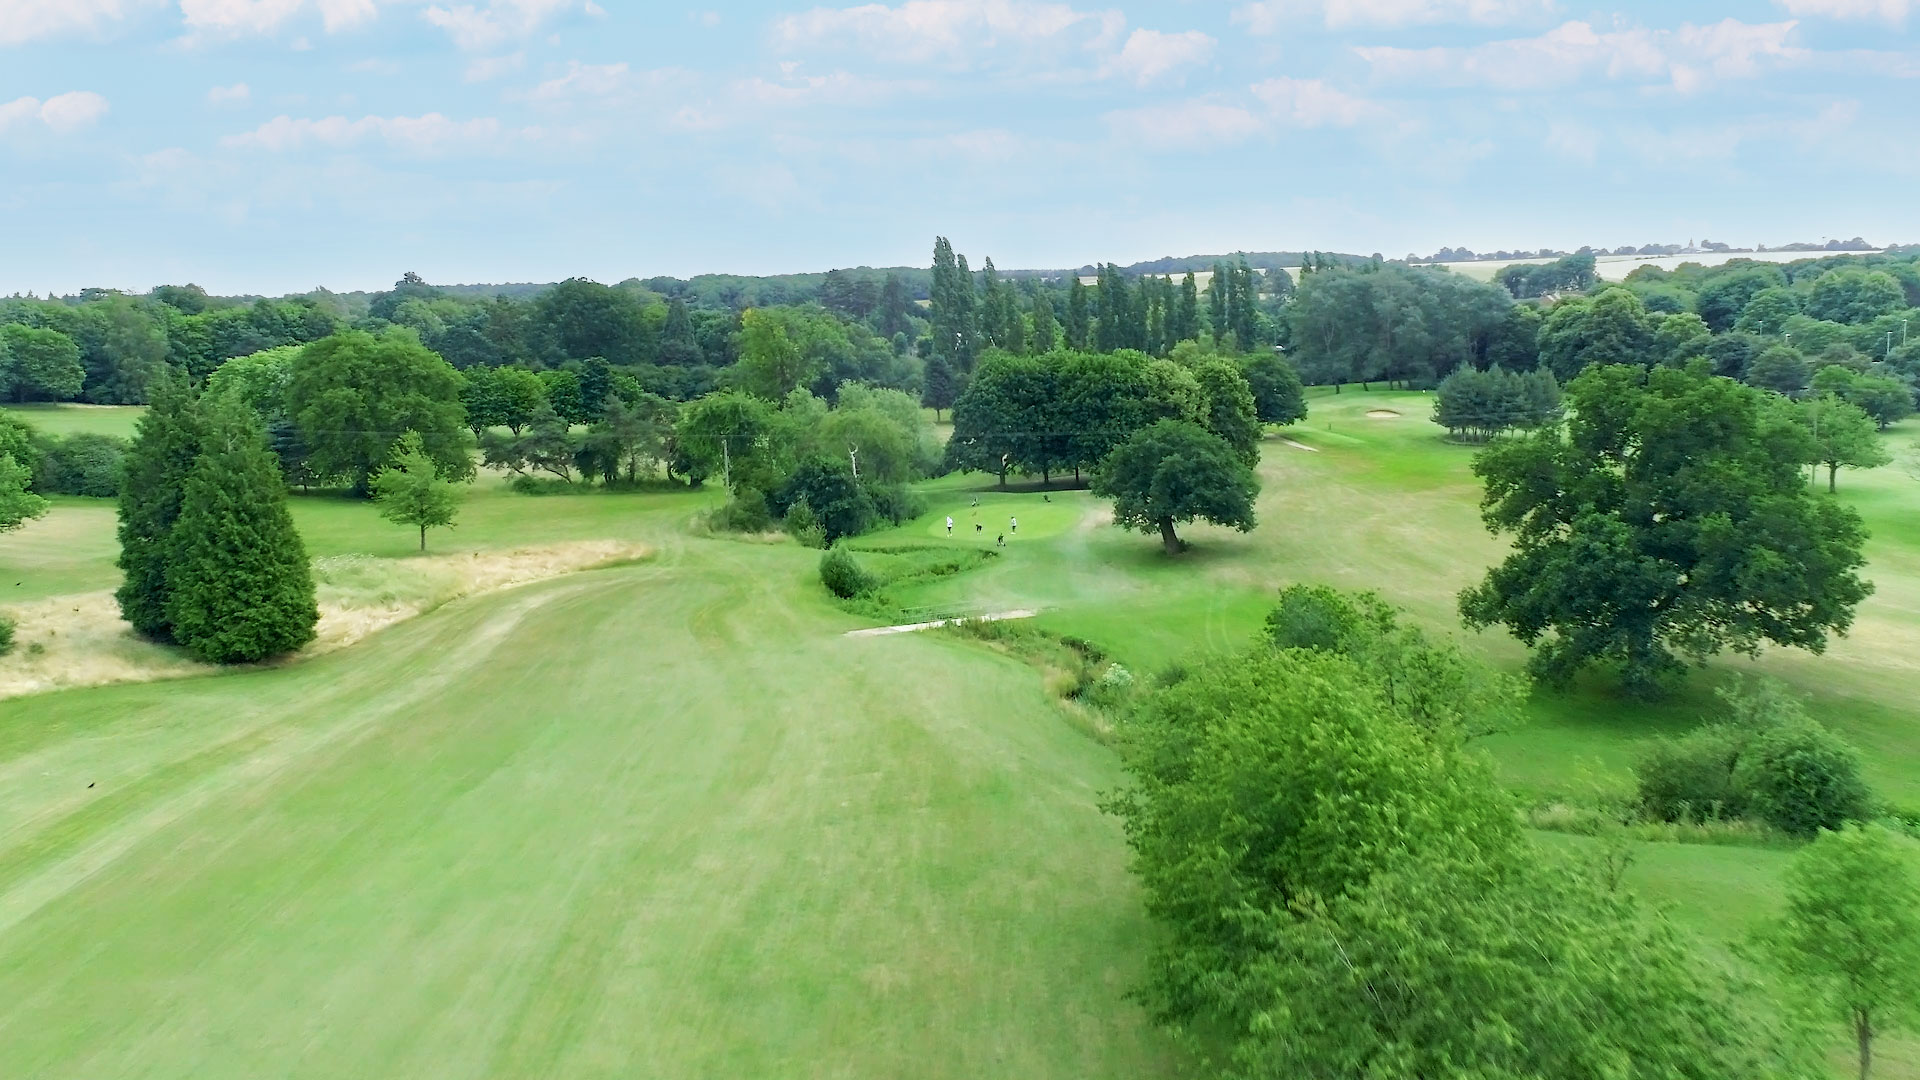
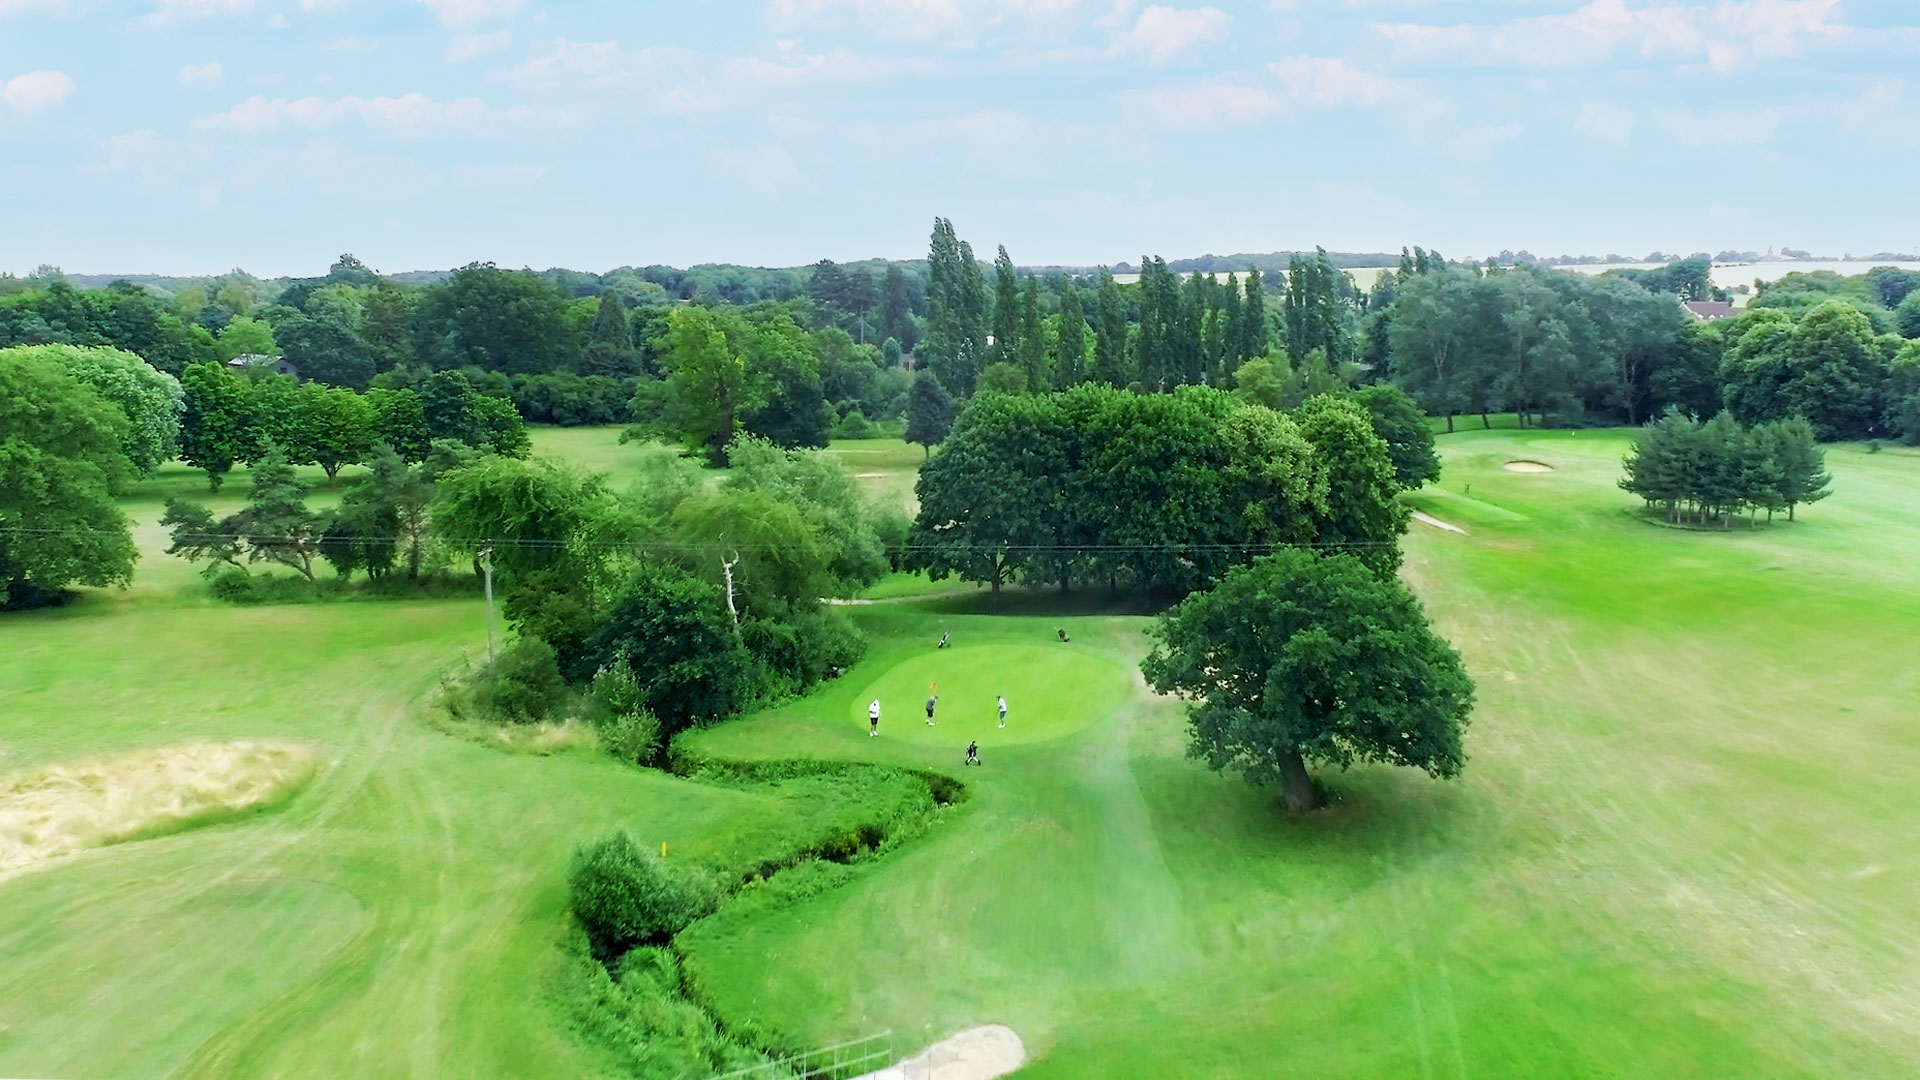
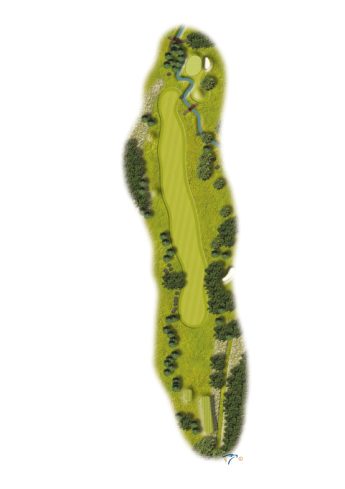
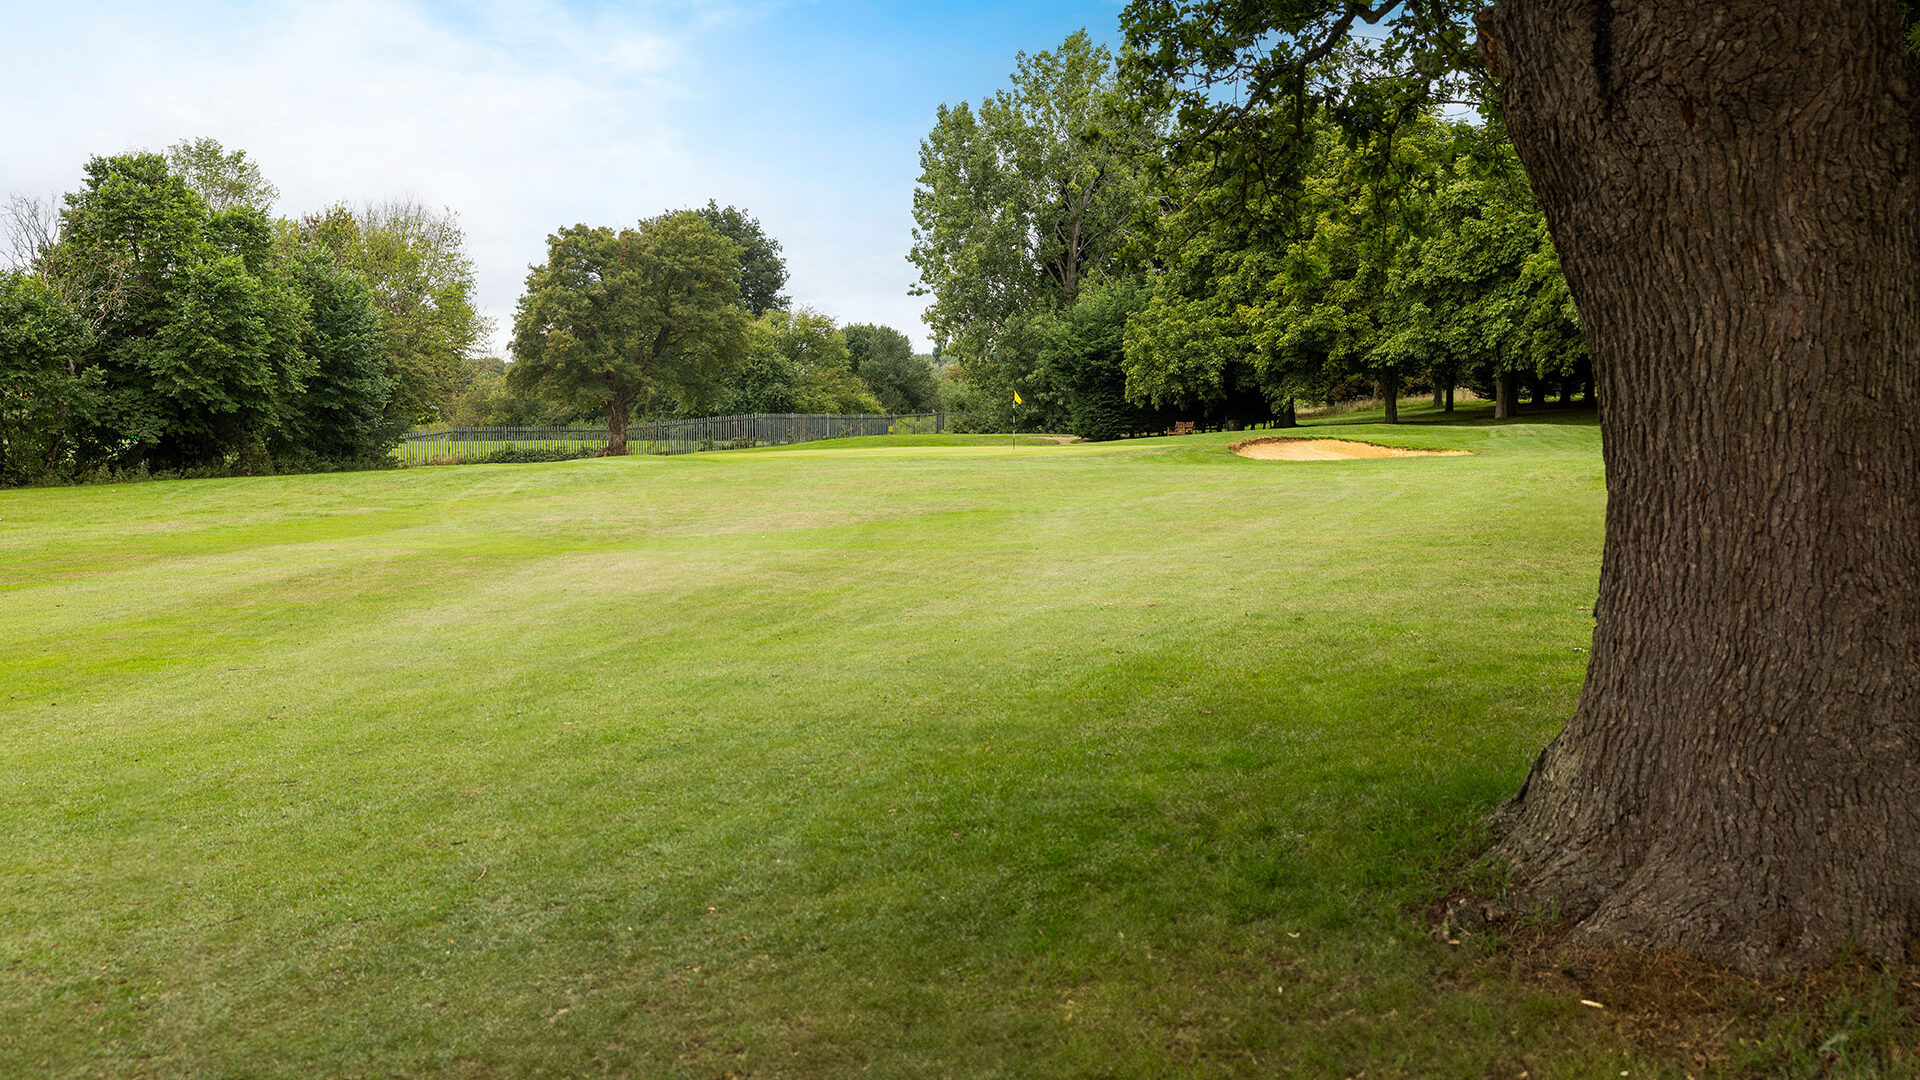
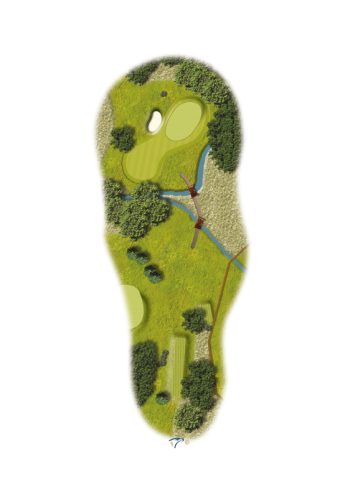
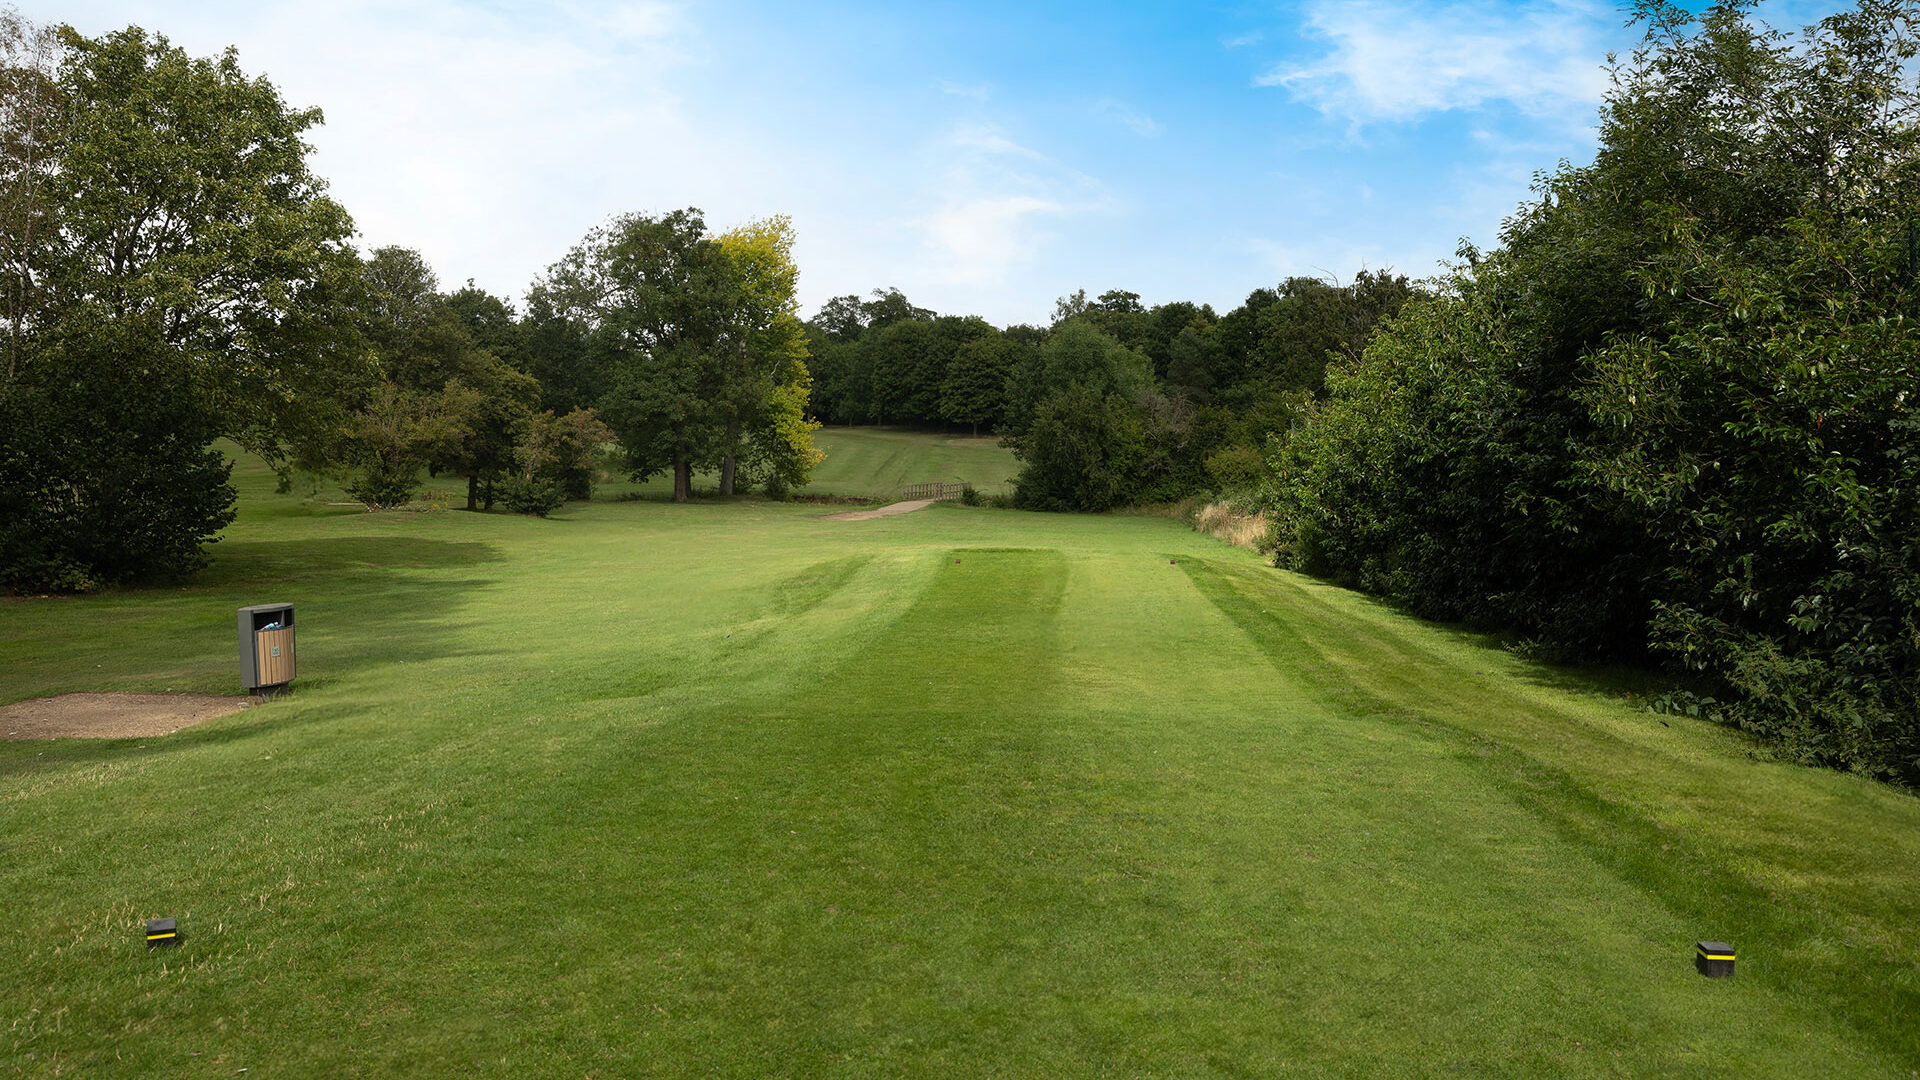
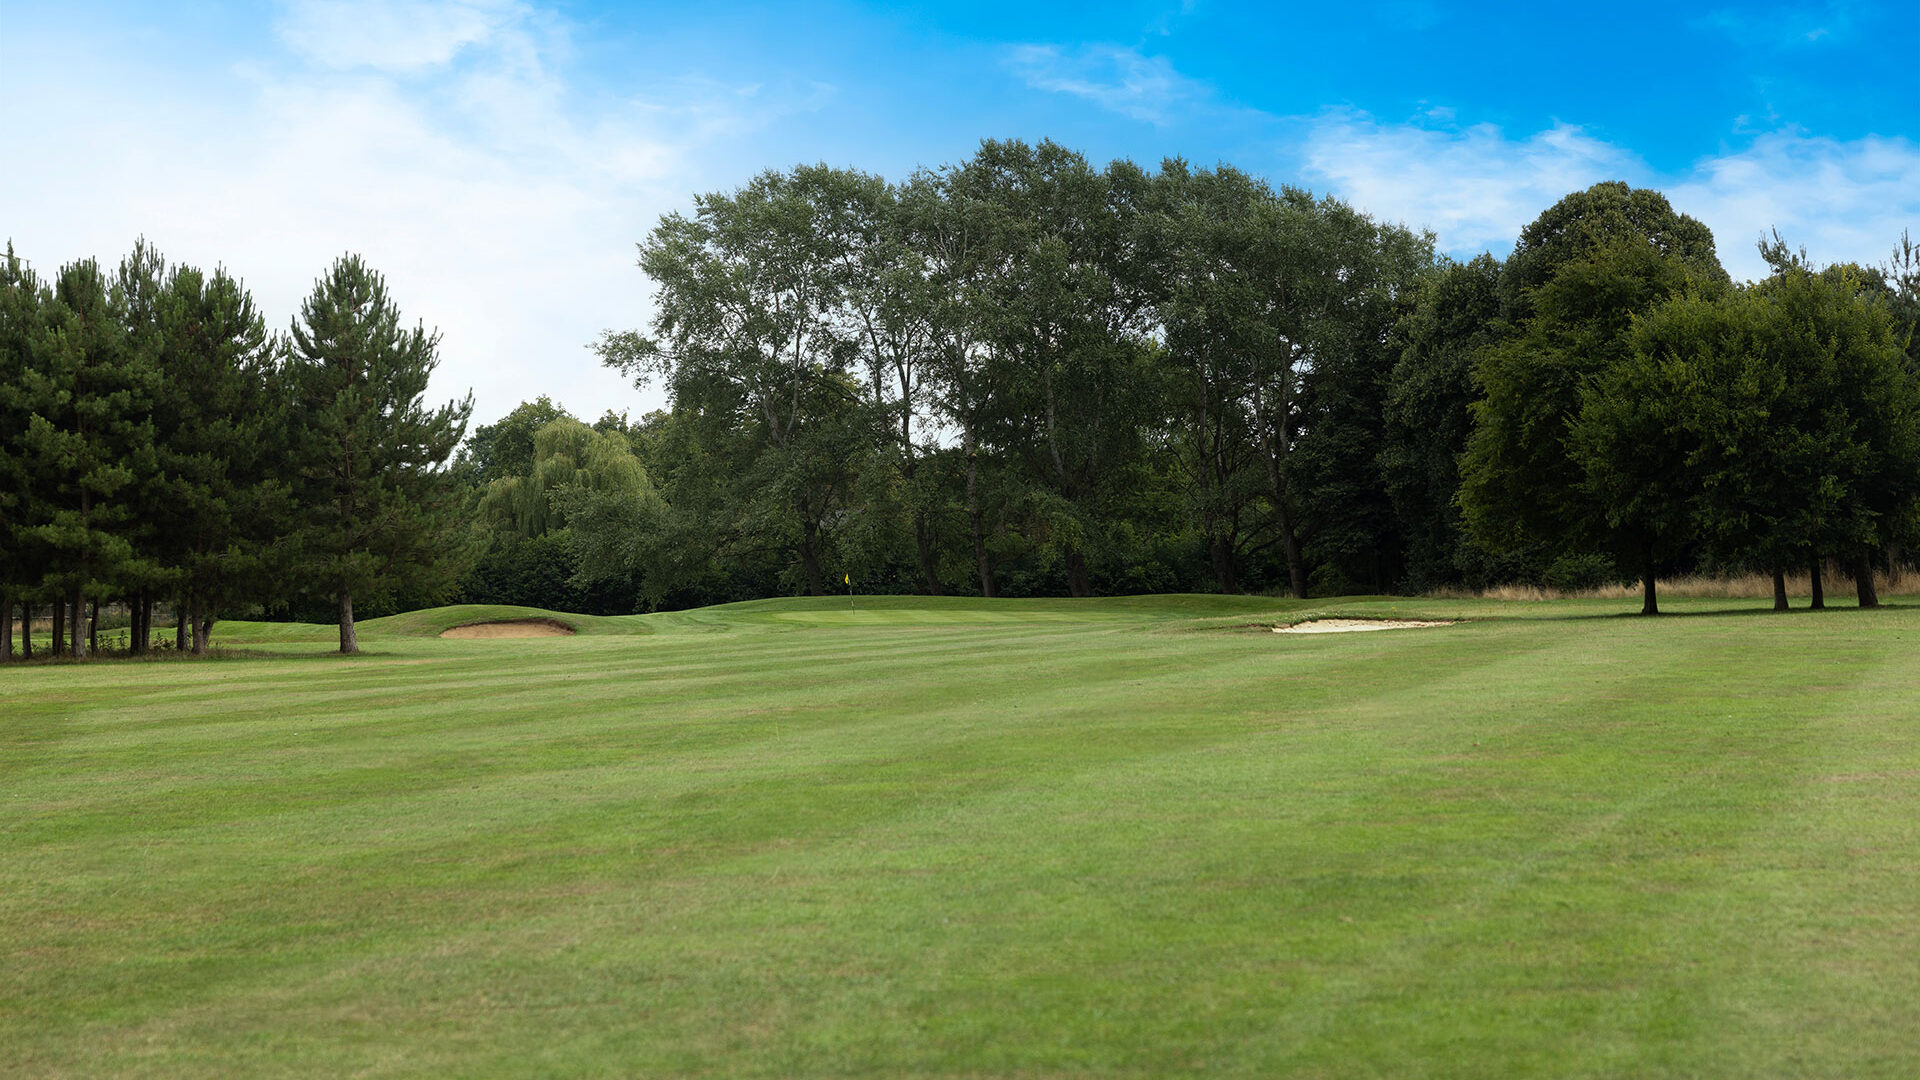
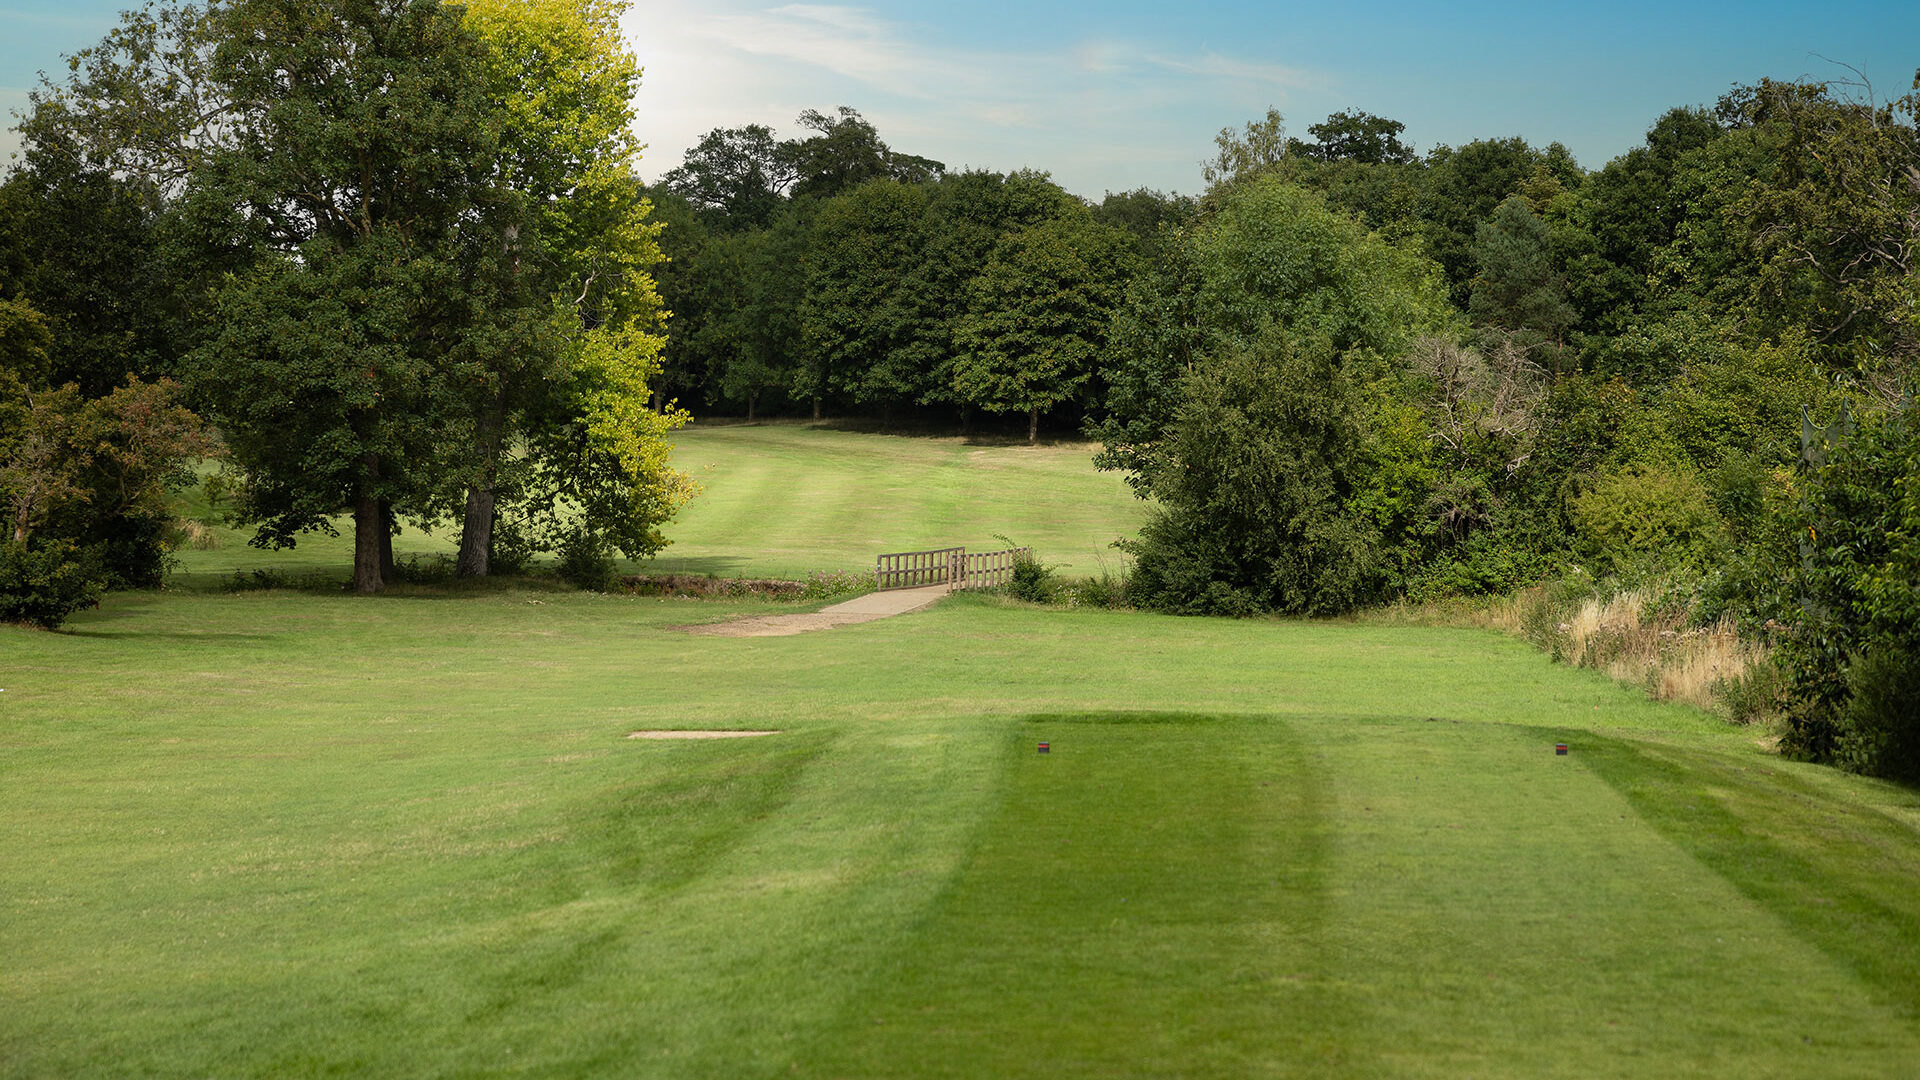
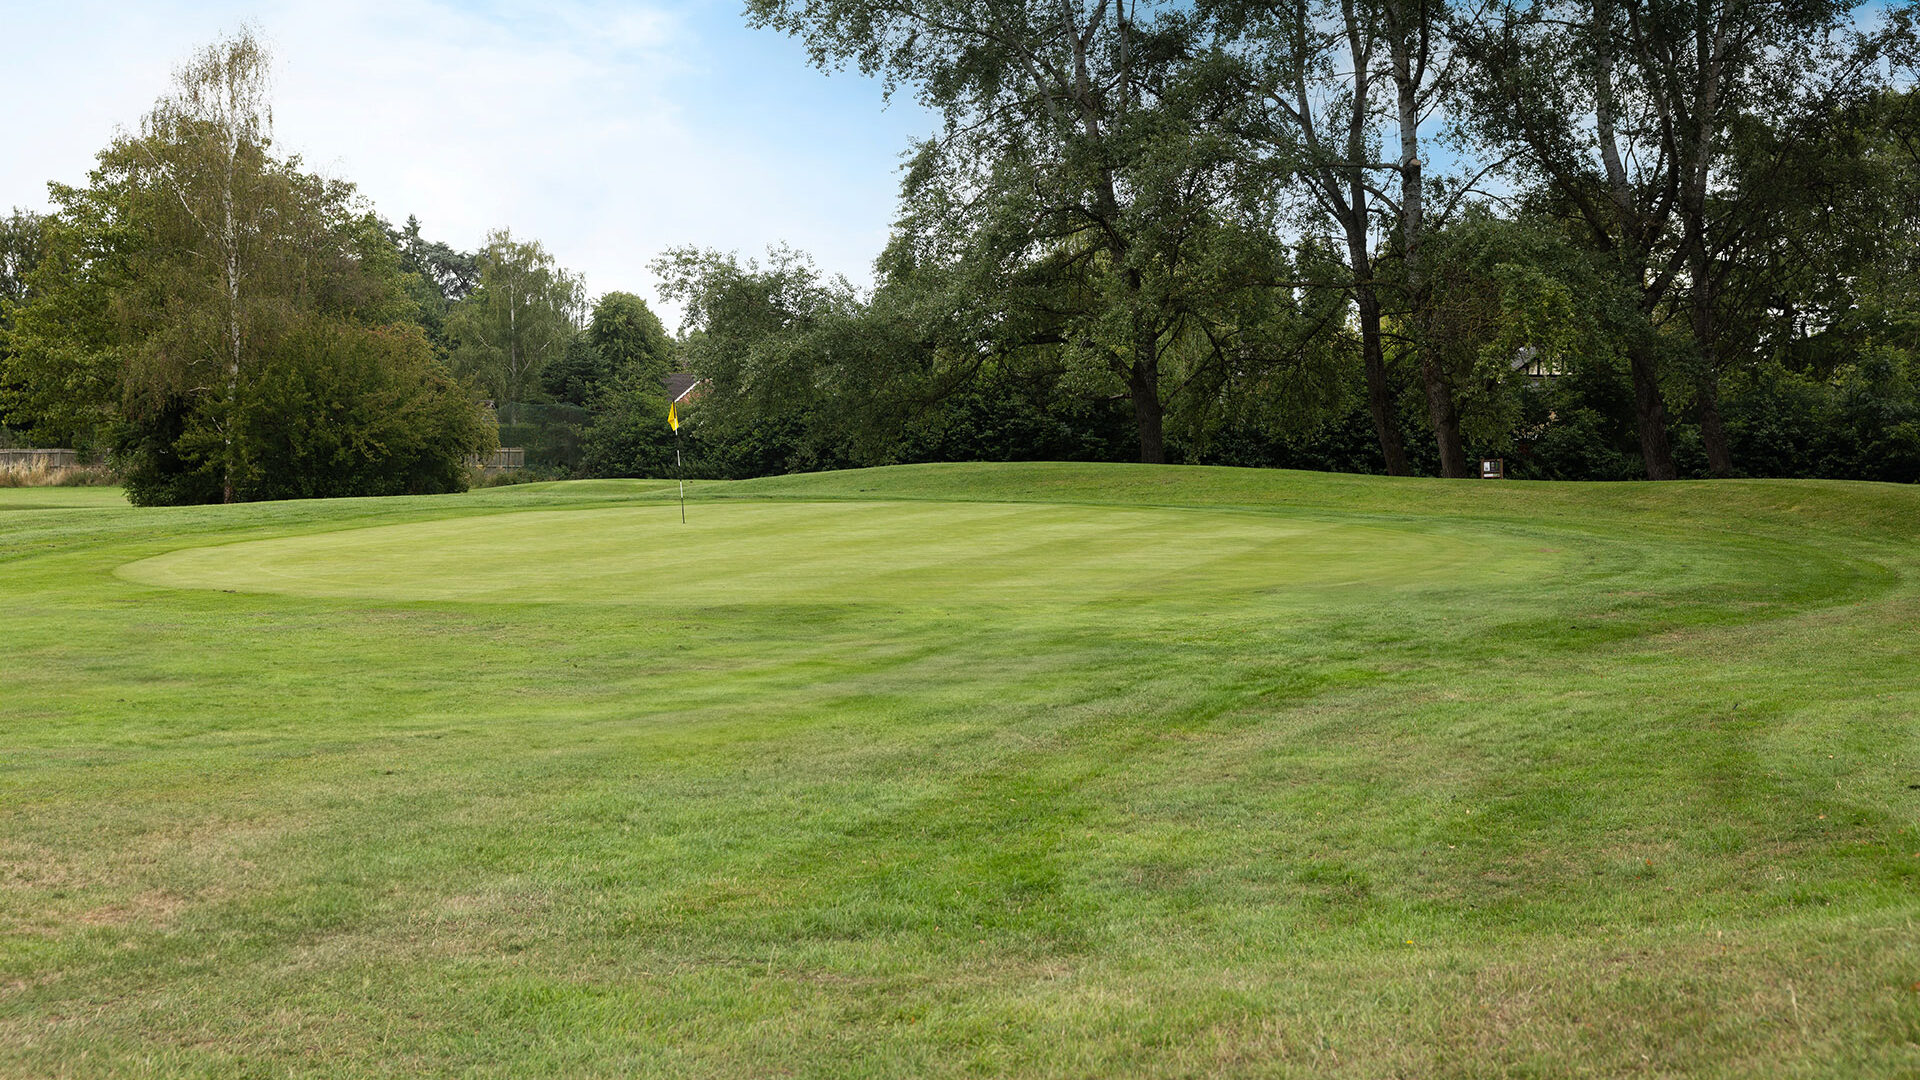
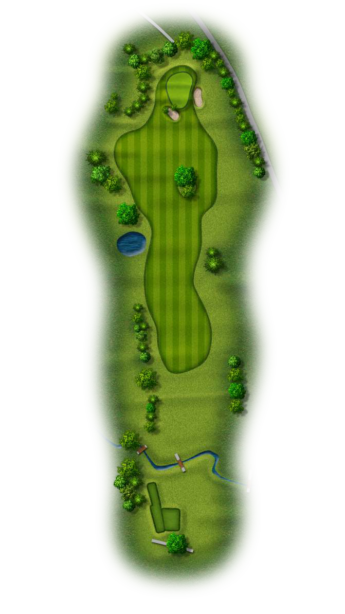
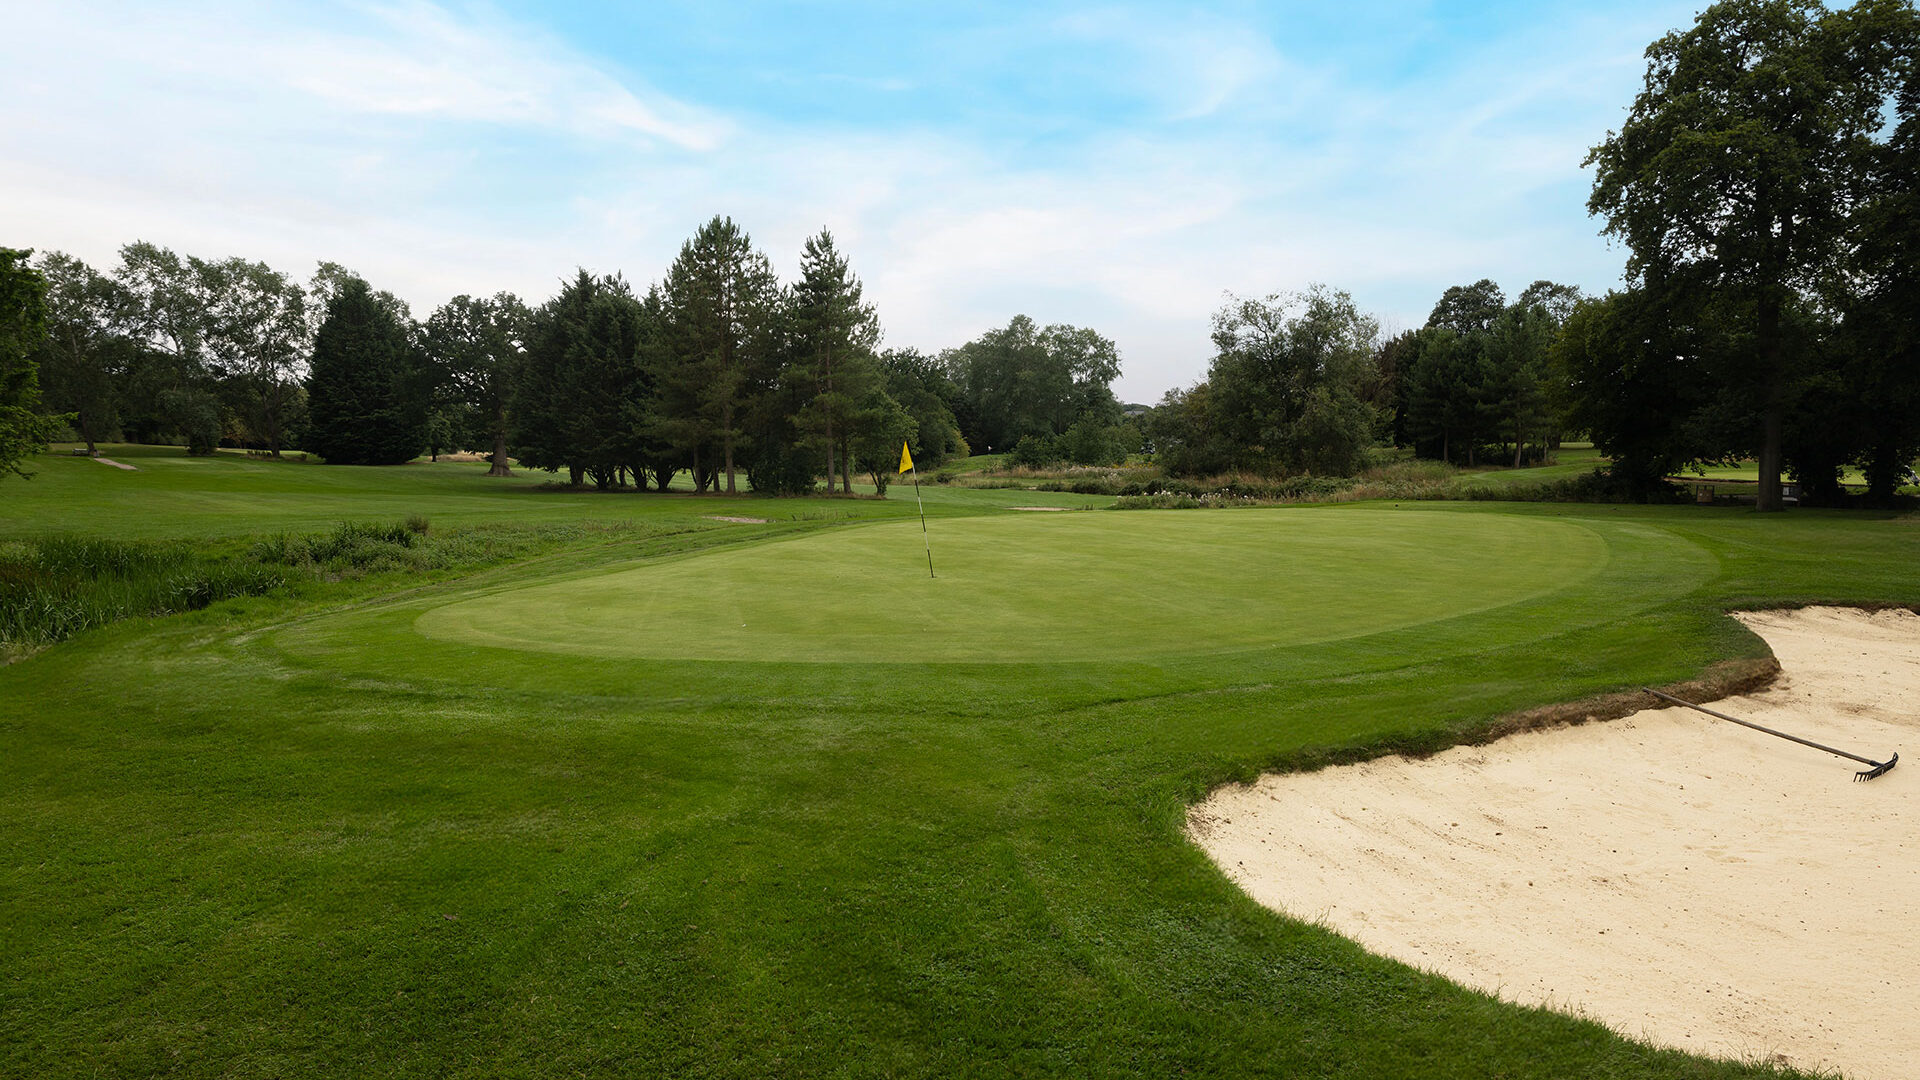
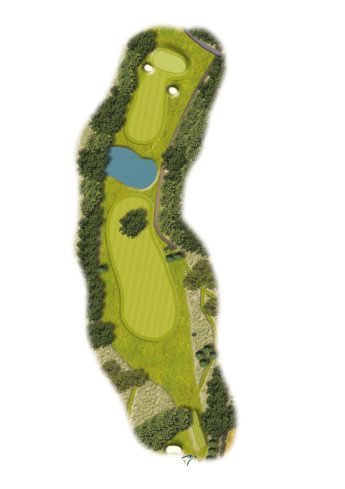
HOLE ONE | COPPERS HOOK
PAR 5, YARDS 494, STROKE INDEX 13


1 of 18
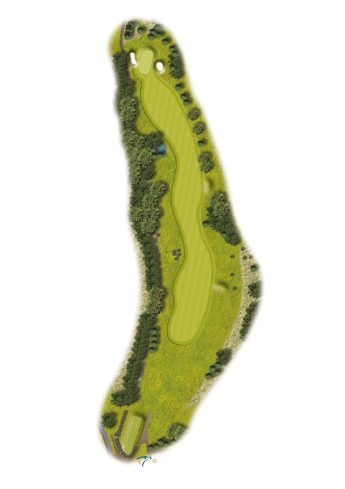
HOLE ONE | COPPERS HOOK
A great par 5 with a sweeping dogleg welcomes you to the course. A good tee shot past the tall trees that line the left of the fairway is required - this hole has a lot of trees to contend with if you stray from the fairway. Make sure to avoid the pond on the left on your second shot to leave a good pitch to the green.
| PAR | YARDS | STROKE | |
|---|---|---|---|
| White Tee | 5 | 494 | 13 |
| Yellow Tee | 5 | 486 | 13 |
| Red Tee | 5 | 466 | 13 |
PRO TIP
Don’t get too greedy from the tee as the risk outweighs the reward. Make the fairway at the dogleg to have set up your approach. Hole Sponsored by

2 of 18
| PAR | YARDS | STROKE | |
|---|---|---|---|
| White Tee | 3 | 157 | 15 |
| Yellow Tee | 3 | 147 | 15 |
| Red Tee | 3 | 137 | 17 |
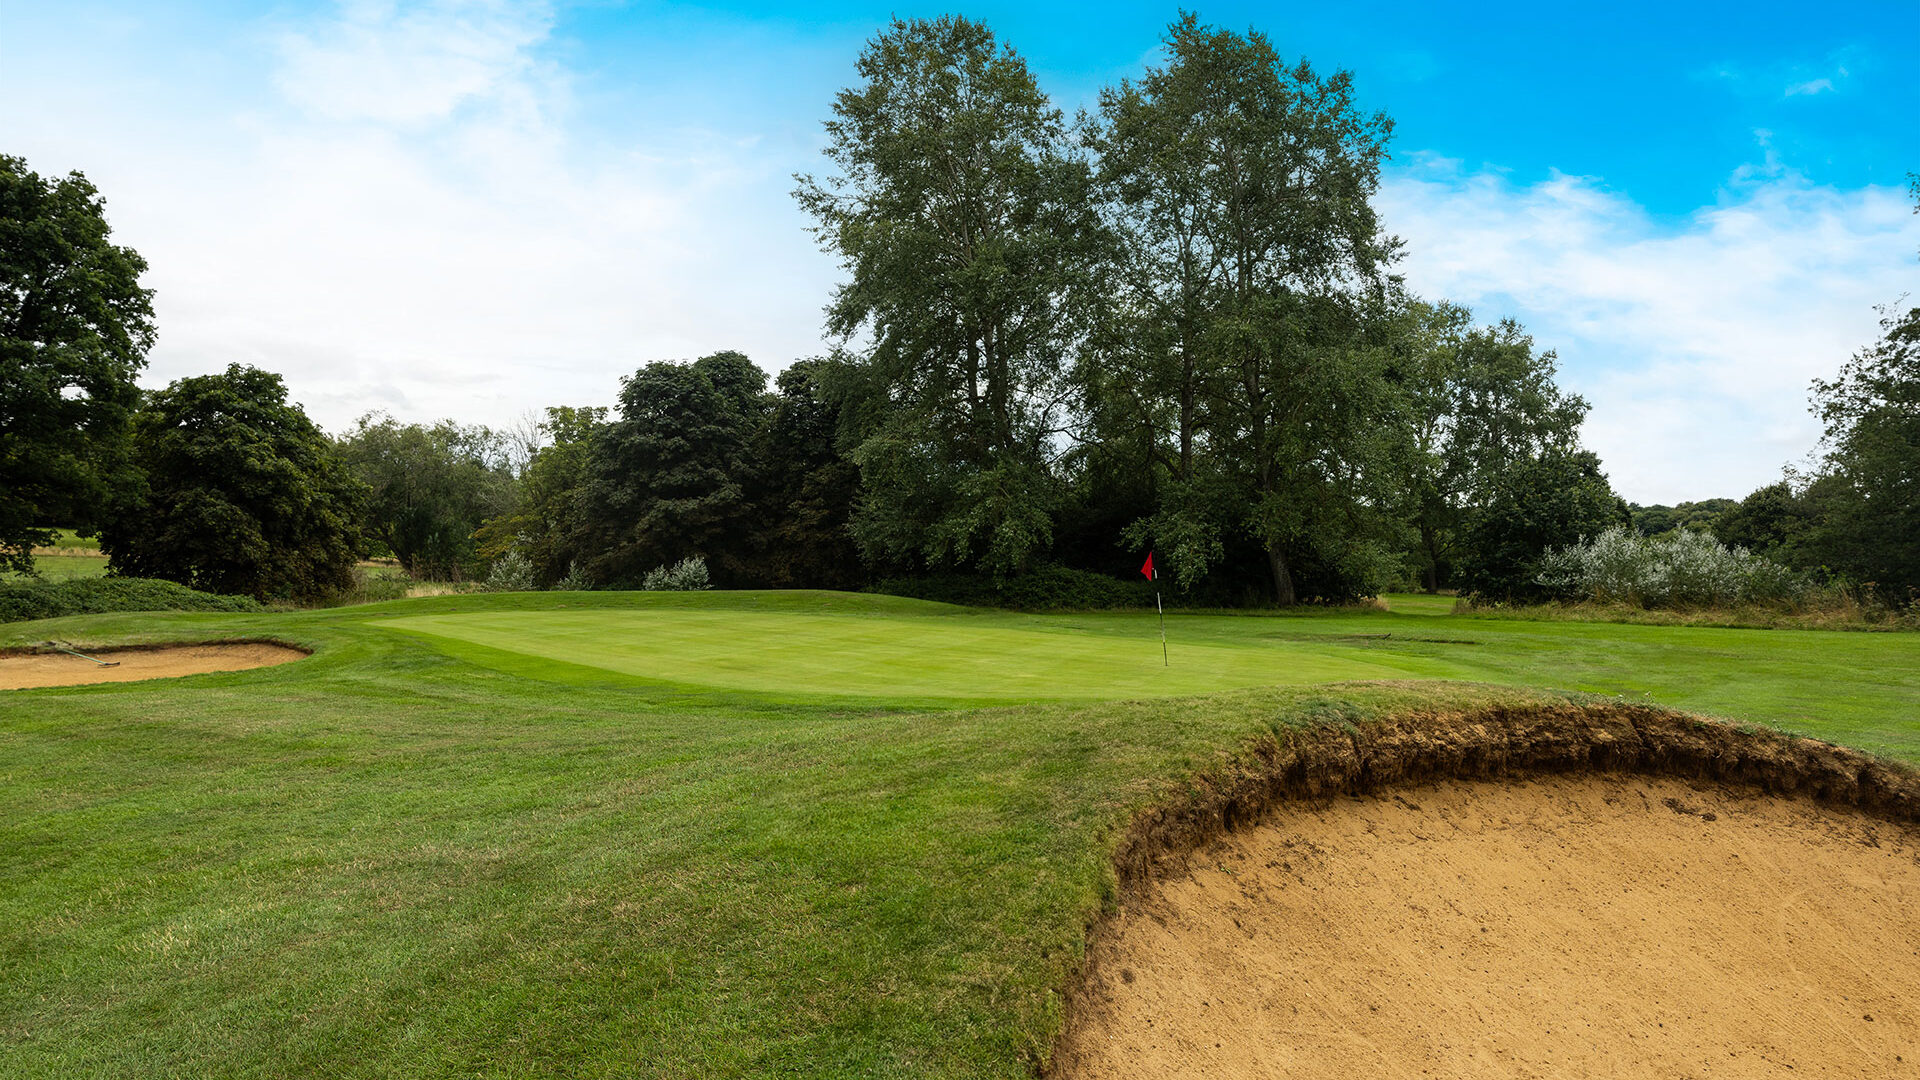
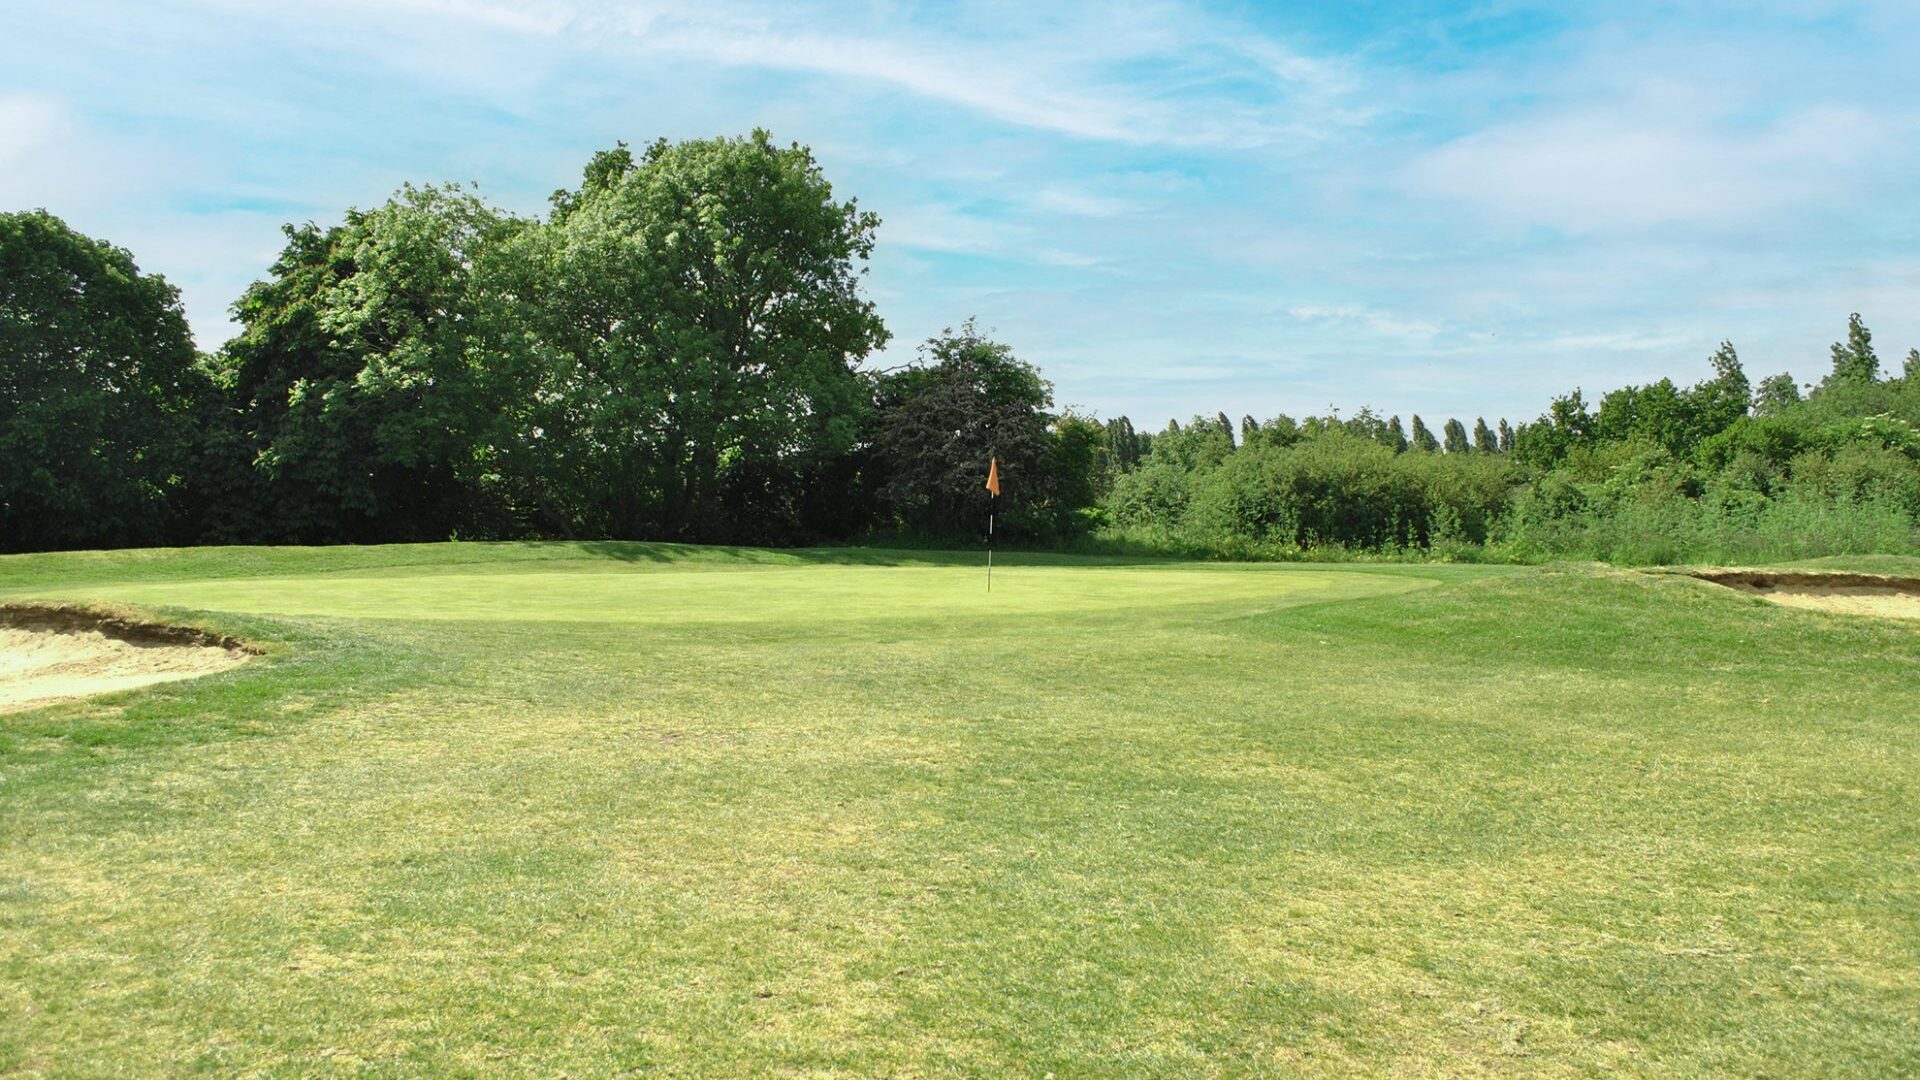
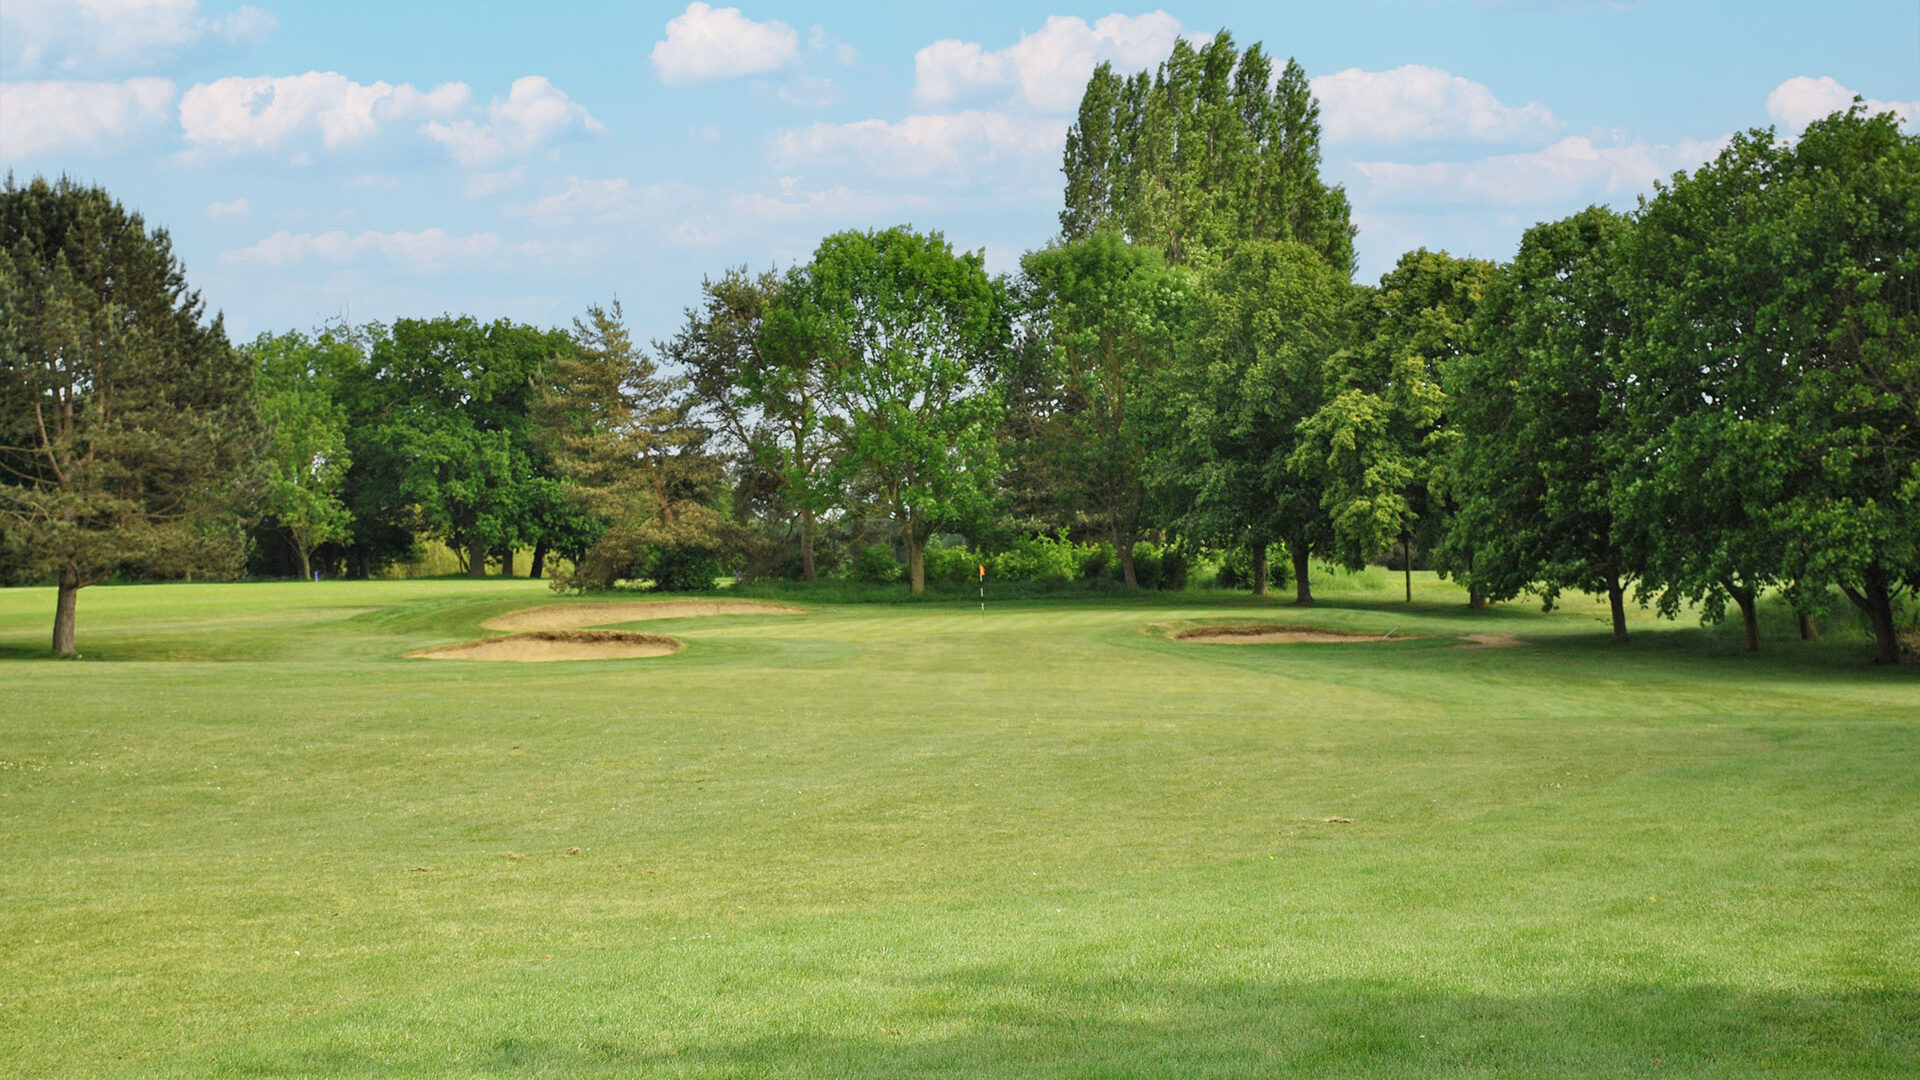
HOLE TWO | OAK SHADOW
PAR 3, YARDS 157, STROKE INDEX 15

2 of 18
HOLE TWO | OAK SHADOW
A short par 3 with a straight run into the three tier green awaits your tee shot. If the flag is on the back tier try not to get too greedy as the bunker that's long and to the right of the green will grab your ball leaving you with a tricky bunker shot.
| PAR | YARDS | STROKE | |
|---|---|---|---|
| White Tee | 3 | 157 | 15 |
| Yellow Tee | 3 | 147 | 15 |
| Red Tee | 3 | 137 | 17 |
PRO TIP
From the tee, hitting the middle of the green is a good shot. Hole Sponsored by

3 of 18
| PAR | YARDS | STROKE | |
|---|---|---|---|
| White Tee | 4 | 367 | 9 |
| Yellow Tee | 4 | 360 | 9 |
| Red Tee | 4 | 348 | 3 |
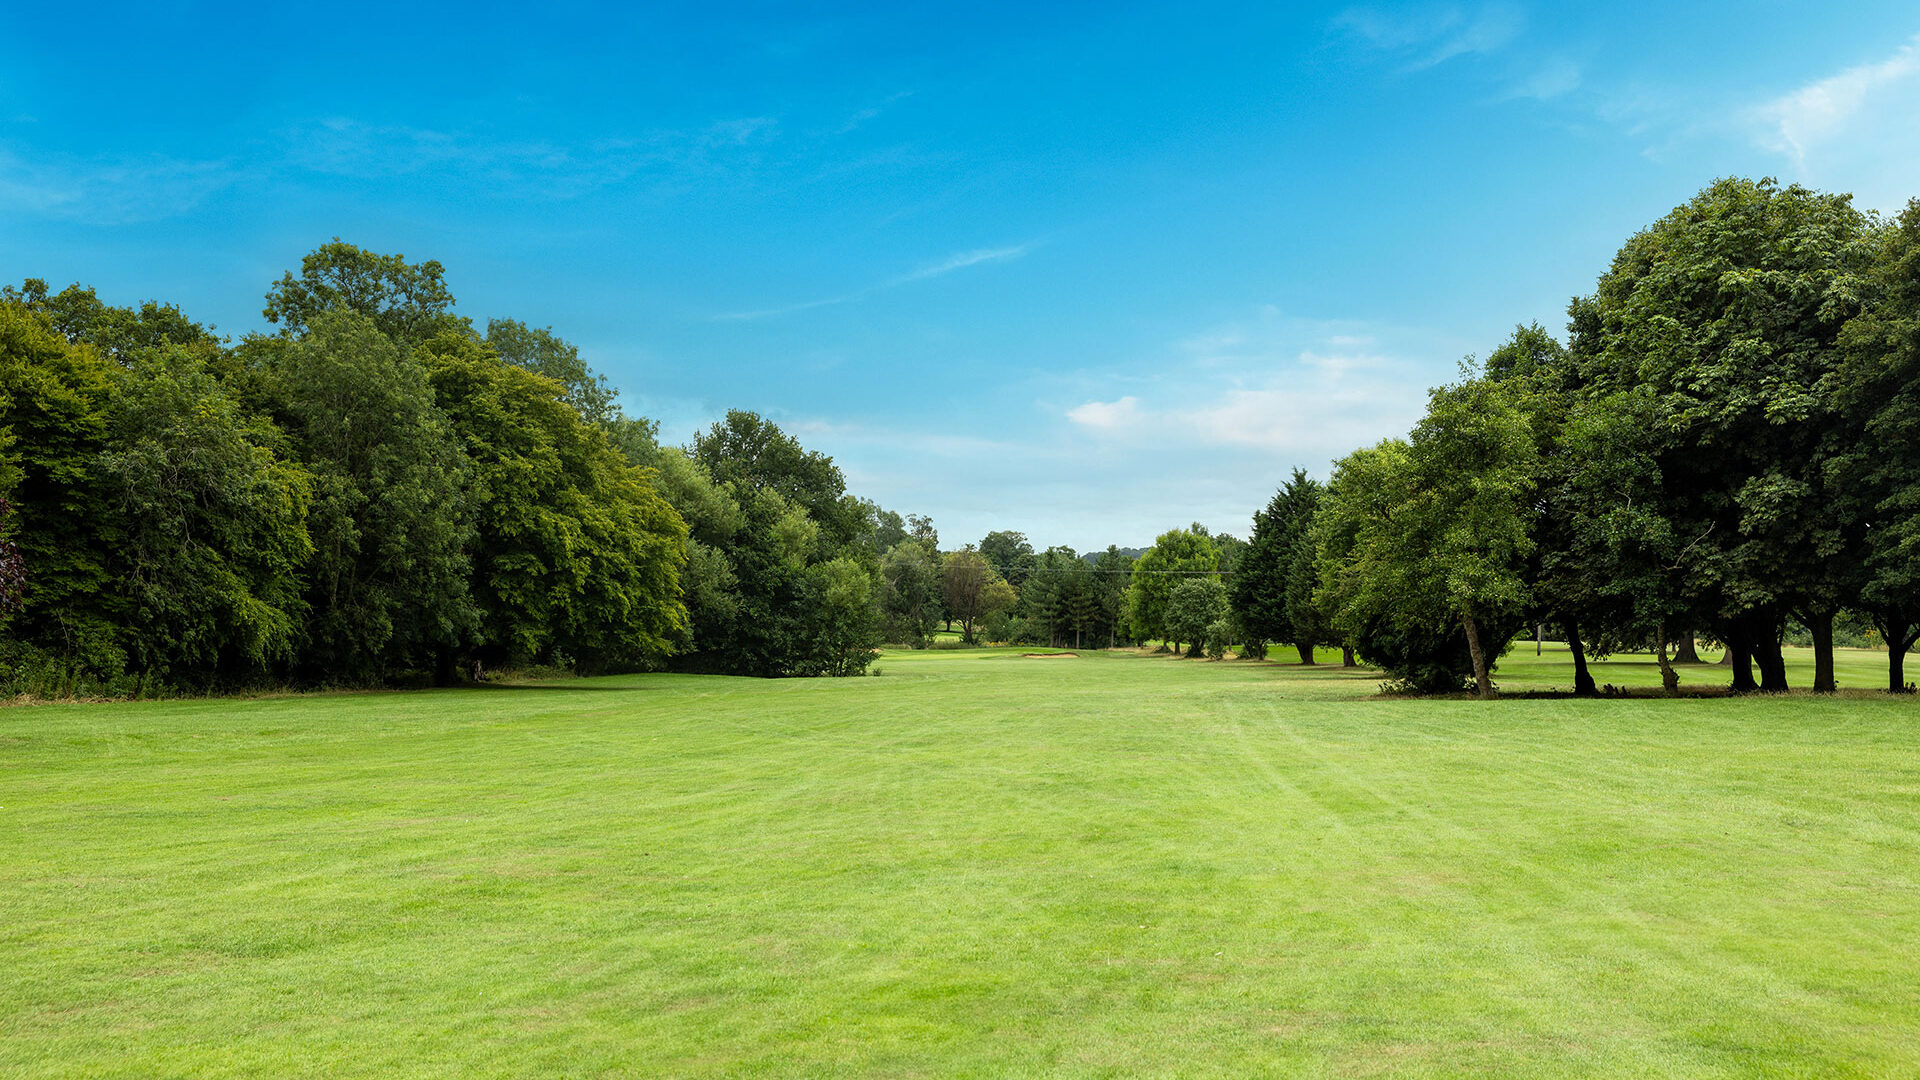
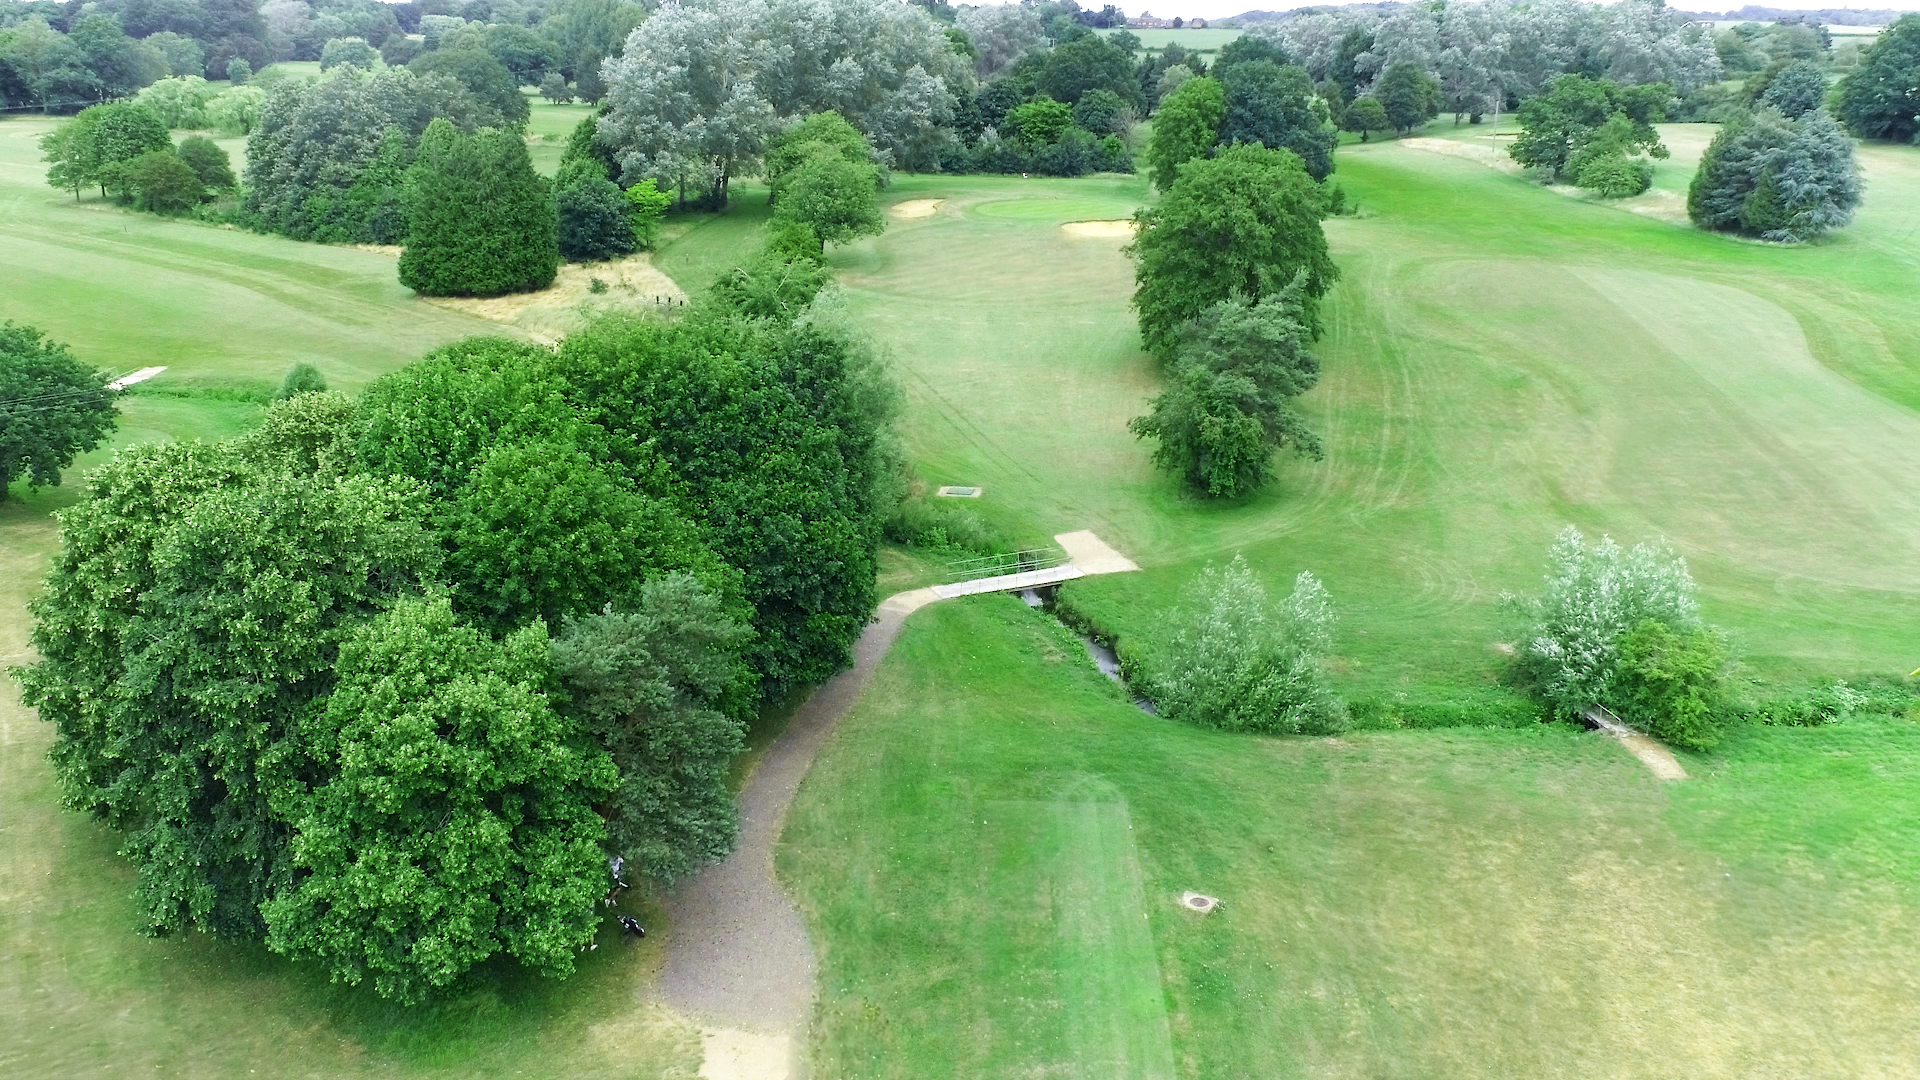
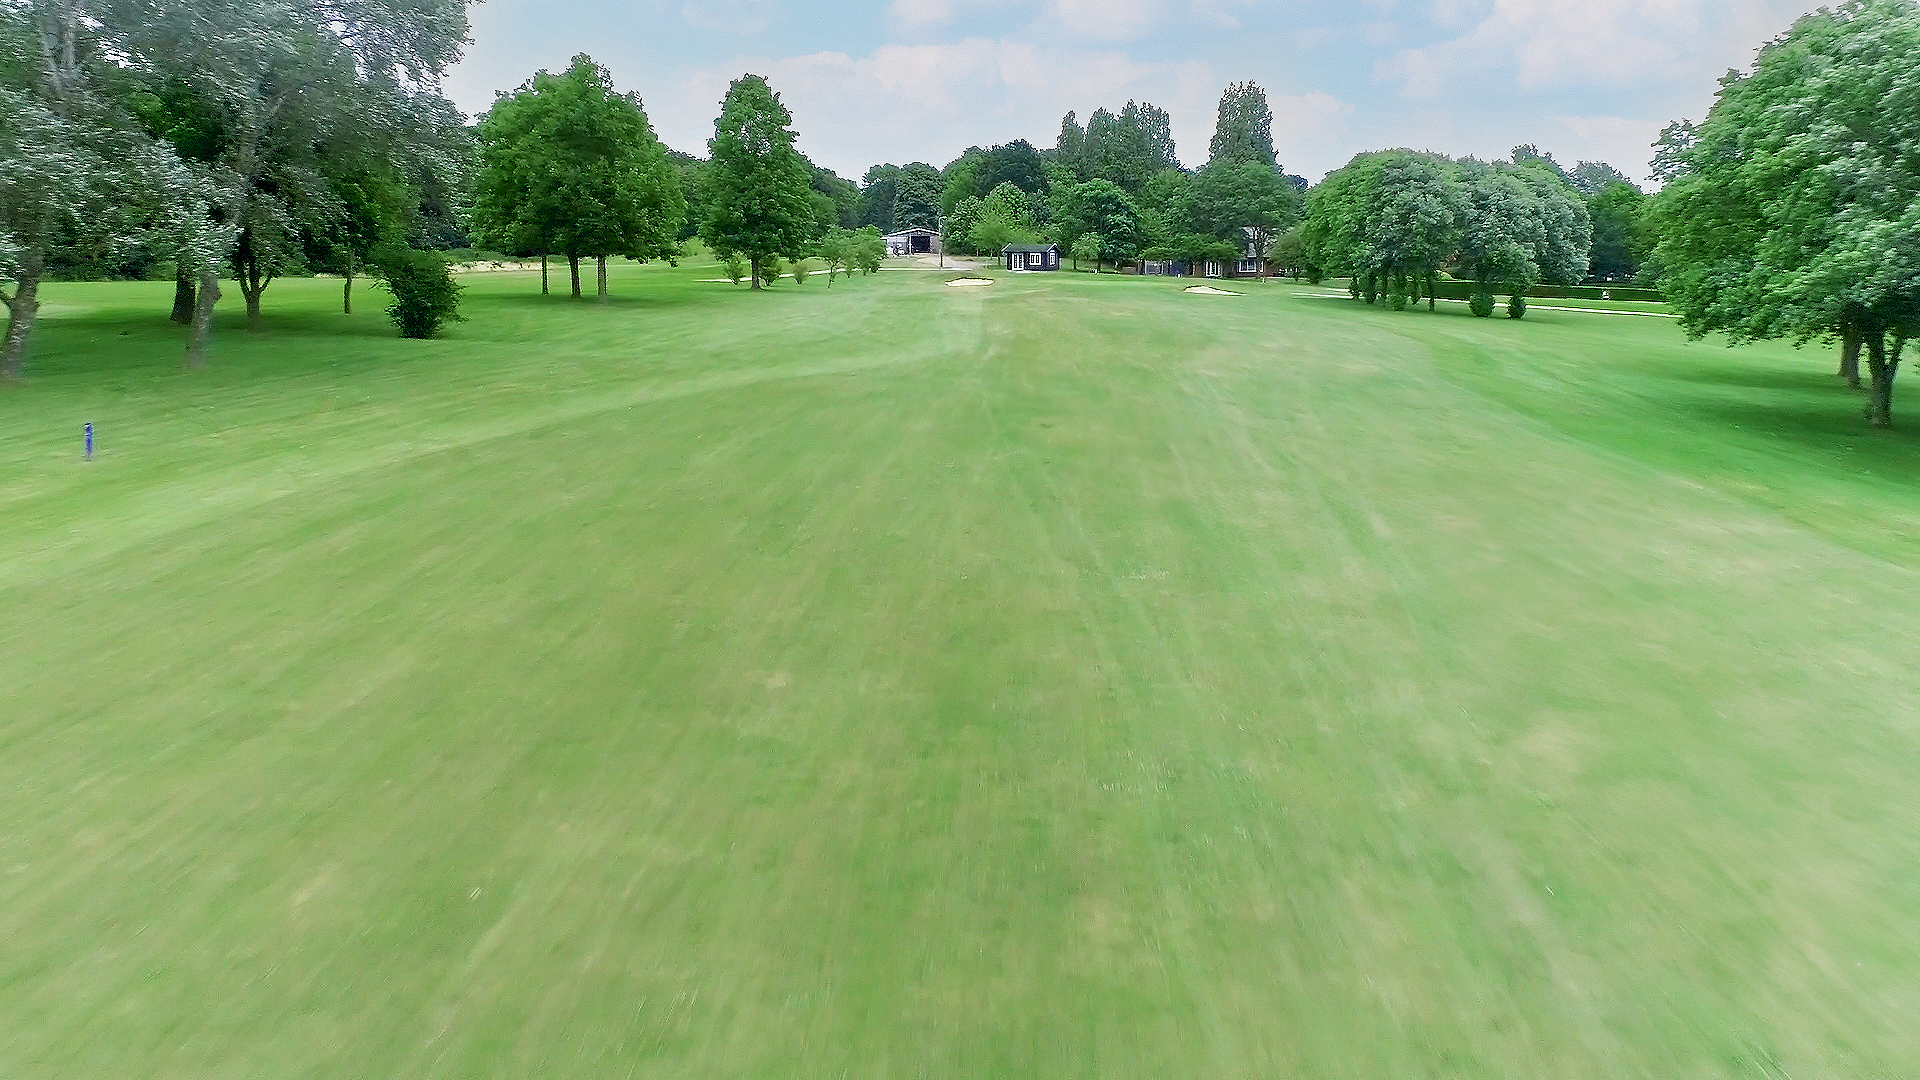
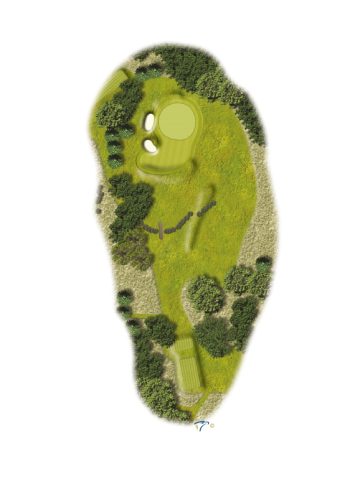
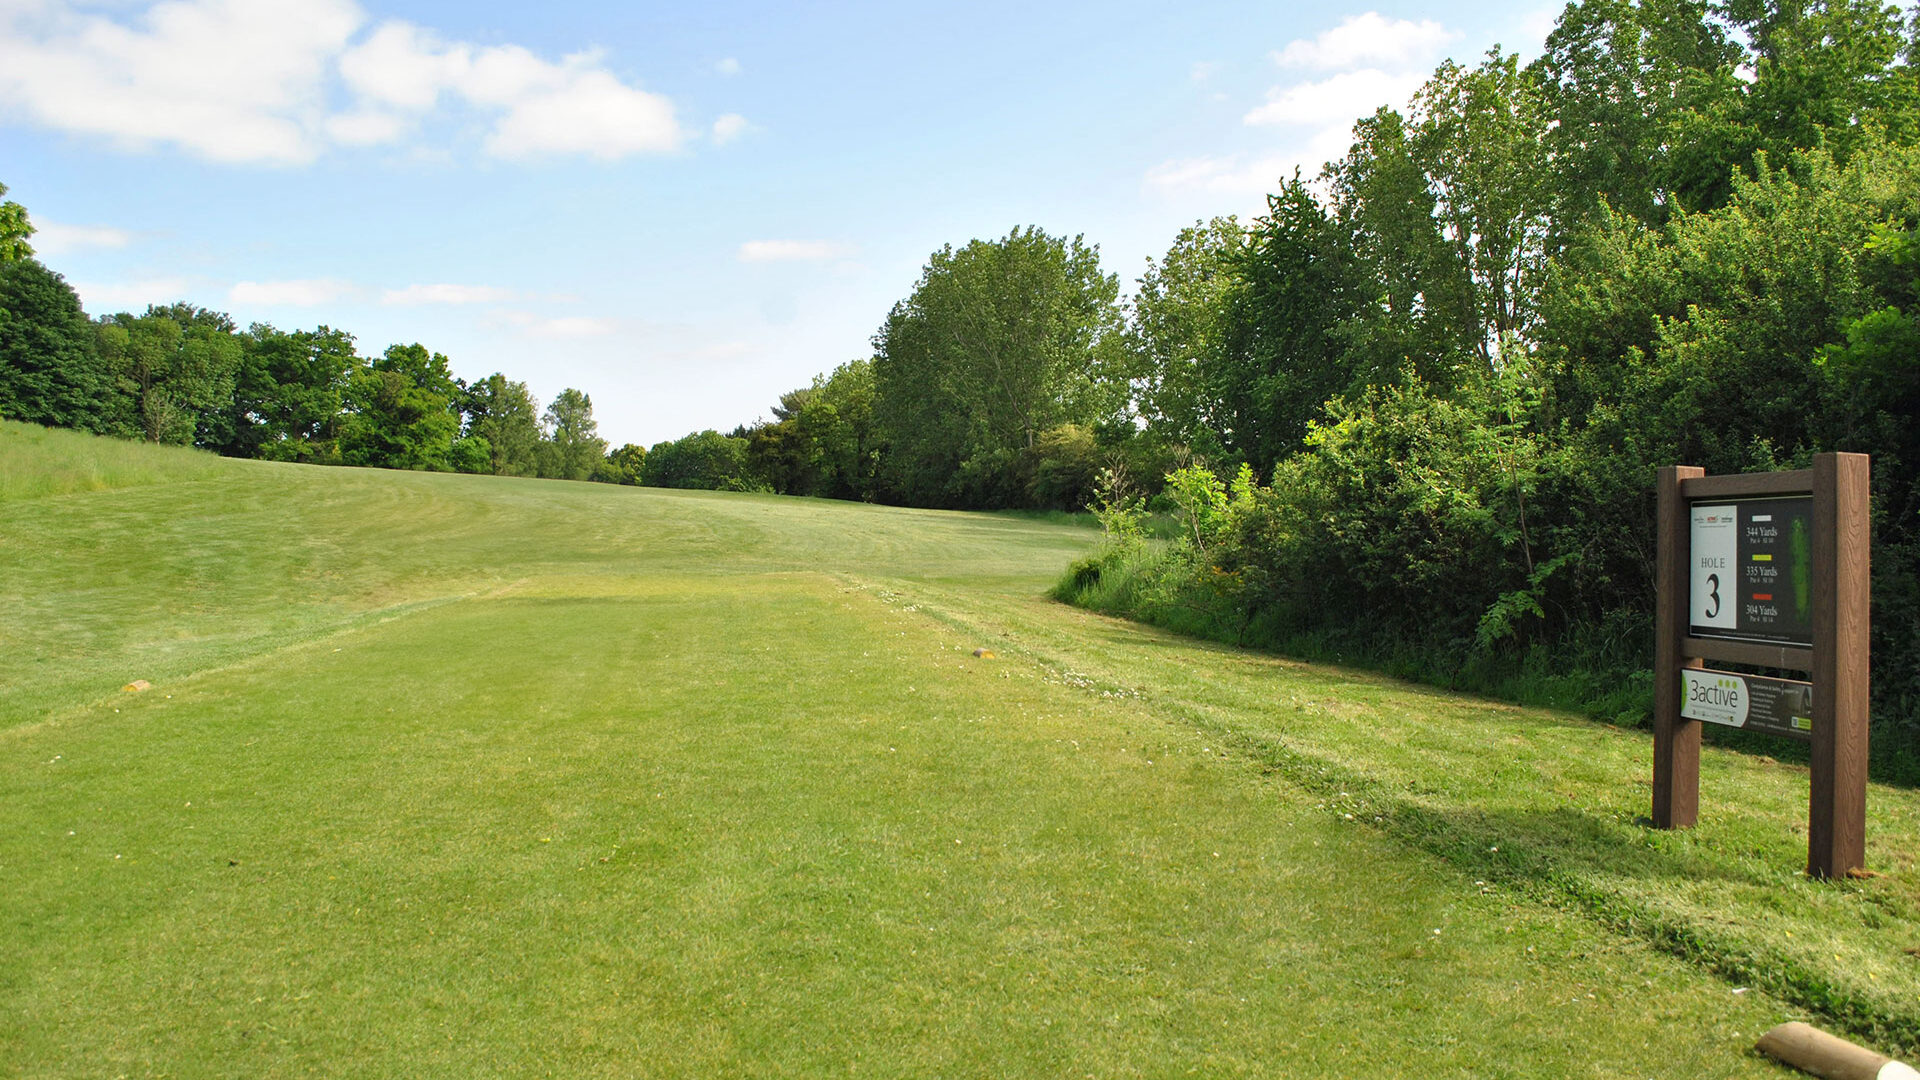
HOLE THREE | CHAUFFEURS COTTAGE
PAR 4, YARDS 367, STROKE INDEX 9
3 of 18
HOLE THREE | CHAUFFEURS COTTAGE
An elevated tee shot leads to a generous fairway. Avoid hugging the right side, where the ditch quickly comes into play. Aim towards the bridge the landing area is more forgiving than the view from the tee suggests. From the fairway, play towards the centre of the green, taking care to avoid the bunkers. Any shot hit long will run through into the run-out area.
| PAR | YARDS | STROKE | |
|---|---|---|---|
| White Tee | 4 | 367 | 9 |
| Yellow Tee | 4 | 360 | 9 |
| Red Tee | 4 | 348 | 3 |
PRO TIP
Aim for the Bridge in the distance. There is more room than there looks. Hole Sponsored by

4 of 18
| PAR | YARDS | STROKE | |
|---|---|---|---|
| White Tee | 3 | 217 | 4 |
| Yellow Tee | 3 | 205 | 4 |
| Red Tee | 3 | 186 | 7 |
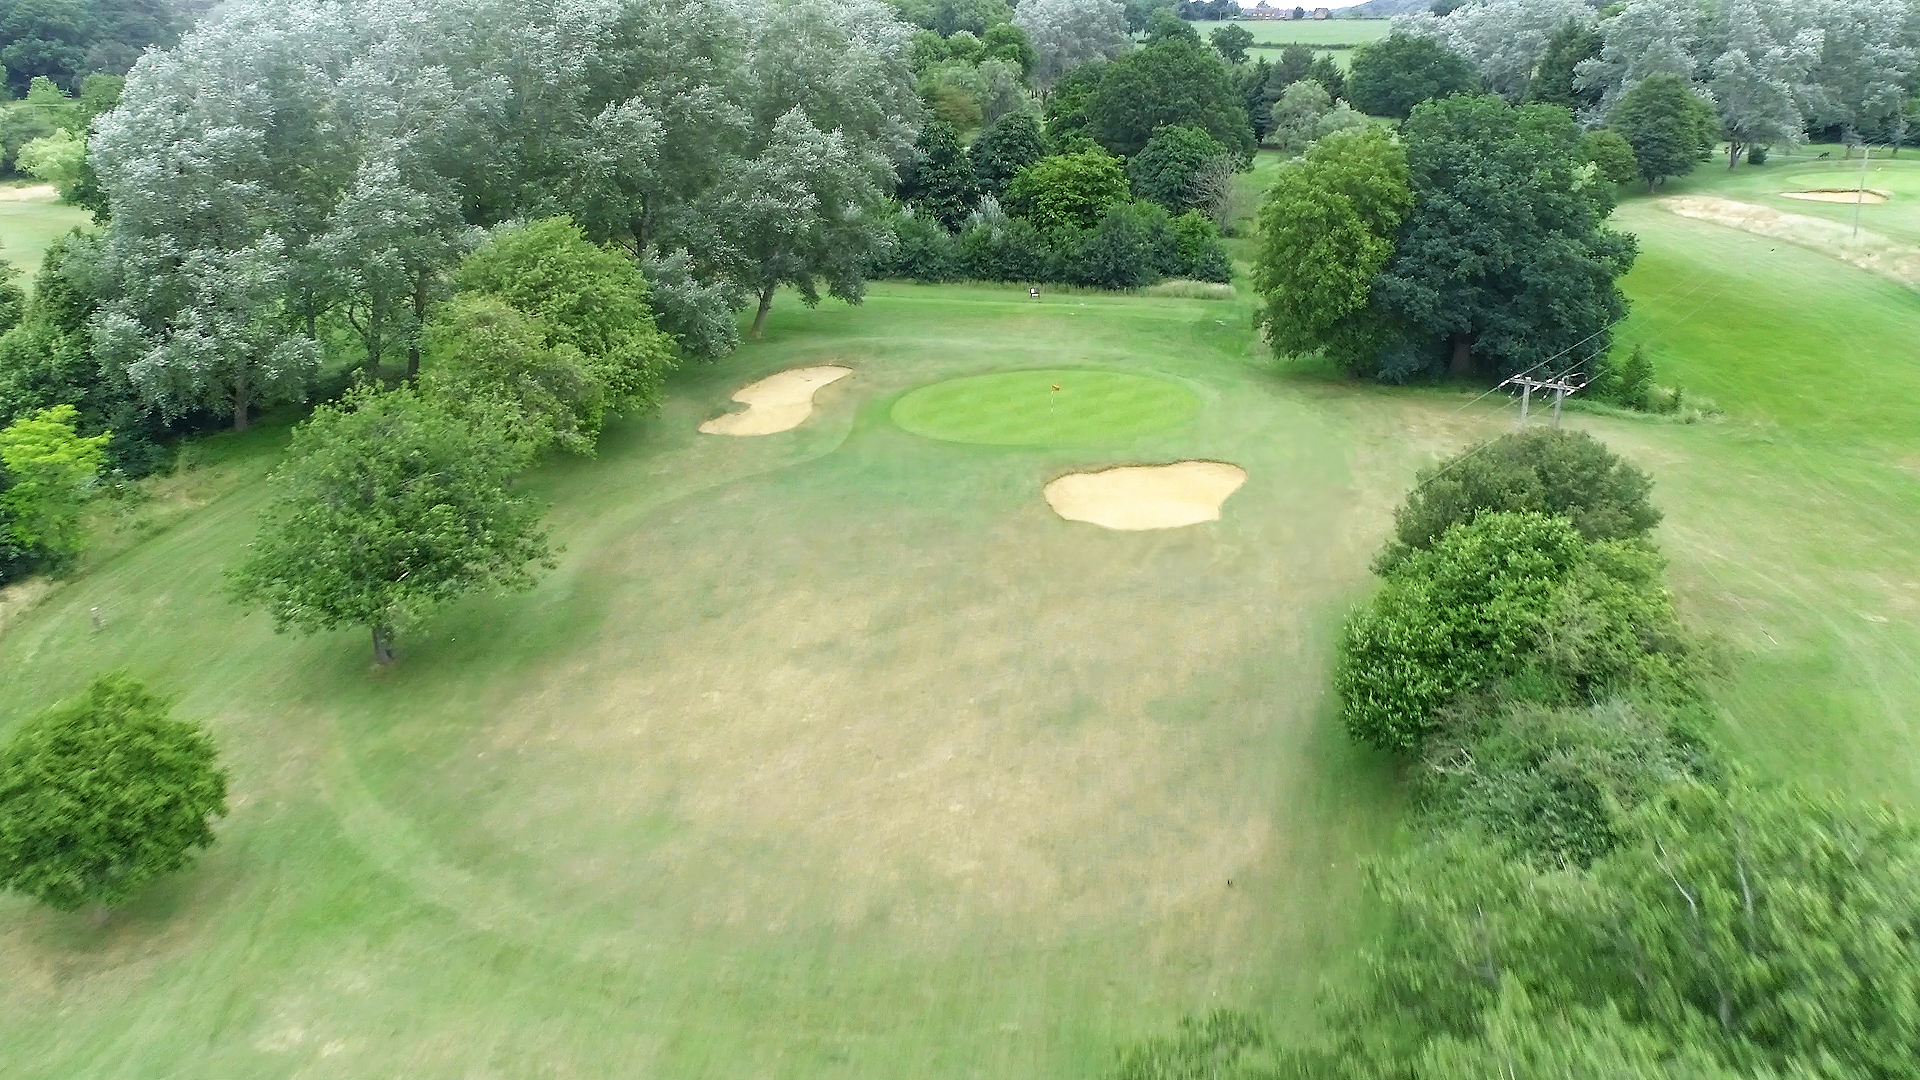
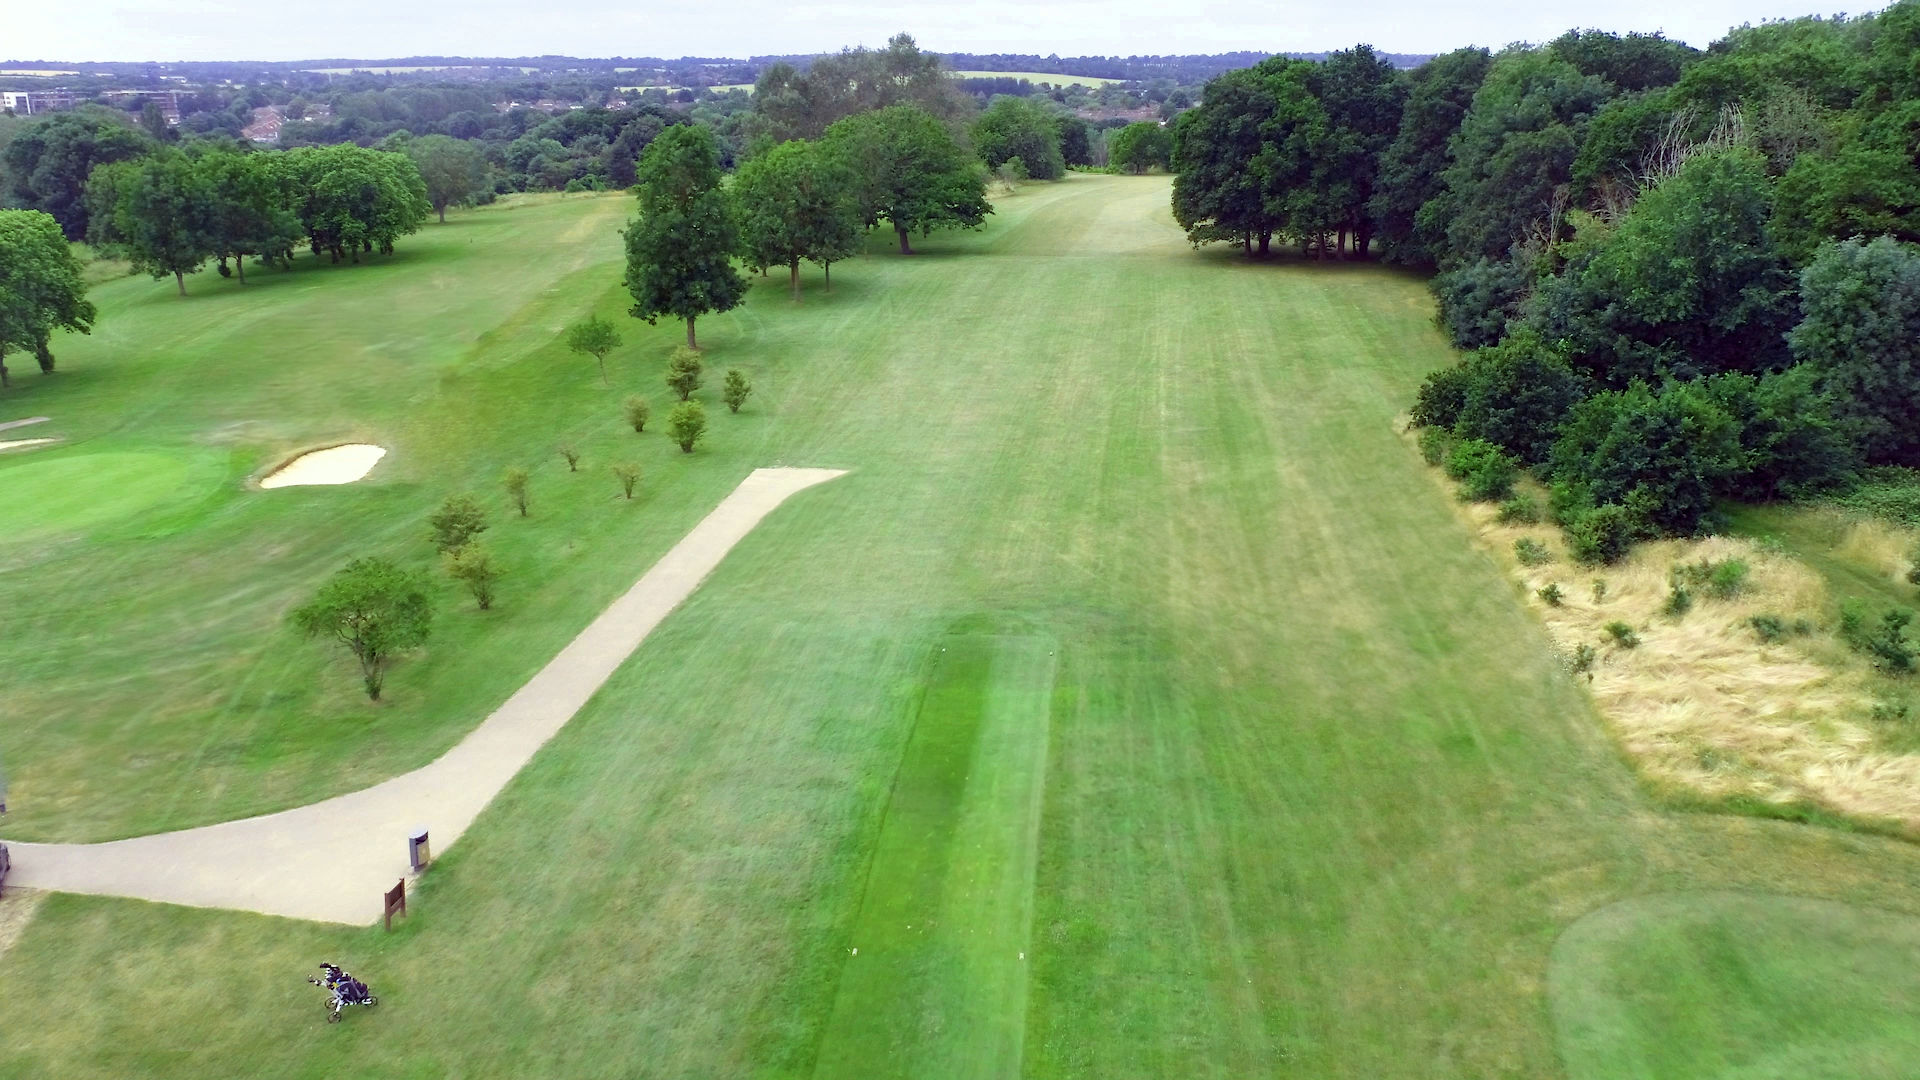
HOLE FOUR | UPHILL APPROACH
PAR 3, YARDS 217, STROKE INDEX 4
4 of 18
HOLE FOUR | UPHILL APPROACH
the longest par 3 at 200 yards and a straight uphill shot is a challenging hole. The stream in front of the teeing should not be in contention. Don’t be shy and take plenty of club and make sure you get it up the hill and avoid the two bunkers blocking the straight run to the green.
| PAR | YARDS | STROKE | |
|---|---|---|---|
| White Tee | 3 | 217 | 4 |
| Yellow Tee | 3 | 205 | 4 |
| Red Tee | 3 | 186 | 7 |
PRO TIP
Don’t be shy and take plenty of club. Par is a good score here. Hole Sponsored by

5 of 18
| PAR | YARDS | STROKE | |
|---|---|---|---|
| White Tee | 5 | 508 | 8 |
| Yellow Tee | 5 | 496 | 8 |
| Red Tee | 5 | 461 | 4 |
HOLE FIVE | LONG WALK
PAR 5, YARDS 508, STROKE INDEX 8

5 of 18
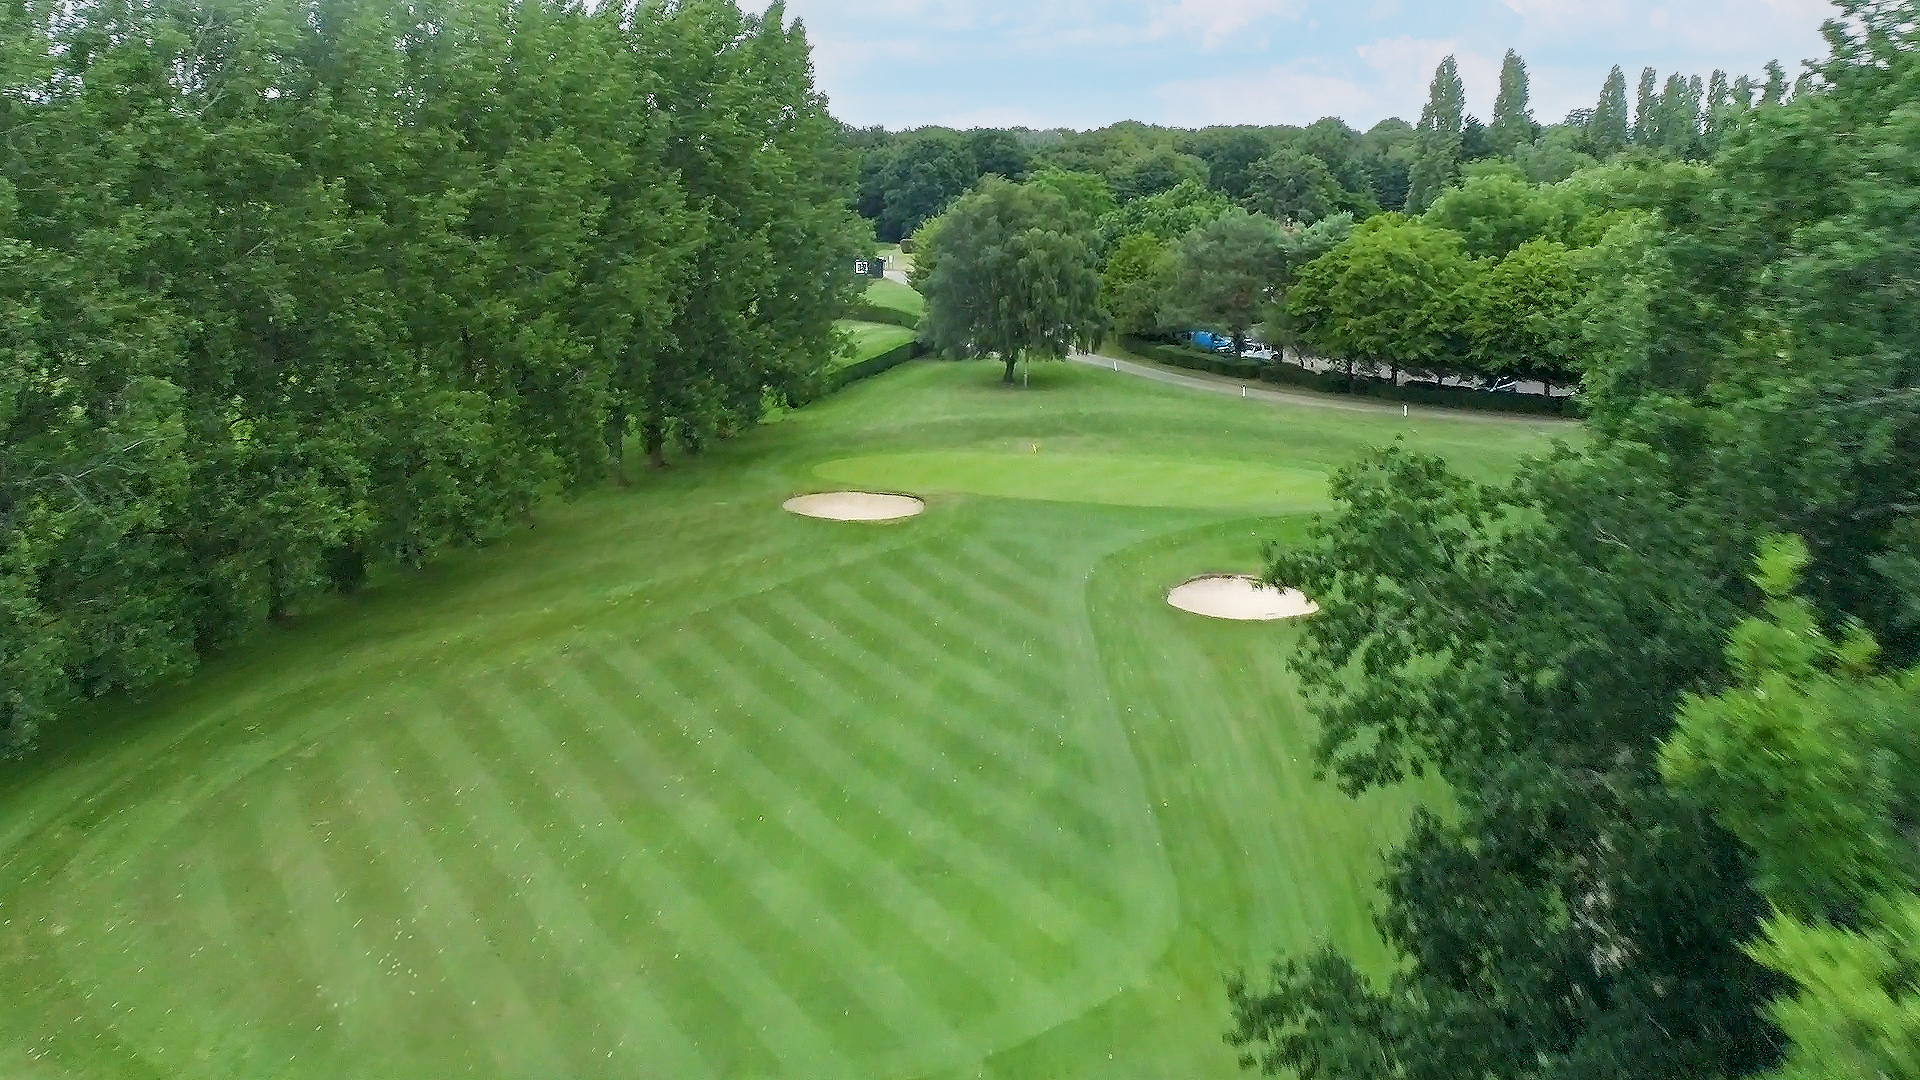
HOLE FIVE | LONG WALK
This hole is a dog leg right and a split fairway and plays longer than the yardage suggests, so make sure you don't leave it short as it will be difficult to recover. From the tee, use the lone oak tree as your guide, use the wide fairway as it favours hitting up the left to open up the second shot. Avoid hitting right from the tee as a single bunker lies in wait, you will be tucked in behind a thicket of trees that will hinder your second shot.
Beyond the oak tree, it's a straight run to the green. The fairway features a few set back trees that shouldn't obstruct your approach shot to a raised green cornered by three bunkers. The green is one of the toughest on the course. Leave your approach shot short and left of the flag for an uphill putt if you can. If you go long, you will be in thick rough and trees.
Beyond the Oak tree, its a straight run to the green. The fairway features a few set back trees that shouldn't obstruct your approach shot to a raised green cornered by three bunkers. The green is one of the toughest on the course. Leave your approach shot short and left of the flag for an uphill putt if you can. If you go long you will be in thick rough and trees.
| PAR | YARDS | STROKE | |
|---|---|---|---|
| White Tee | 5 | 508 | 8 |
| Yellow Tee | 5 | 496 | 8 |
| Red Tee | 5 | 461 | 4 |
PRO TIP
The oak tree at the end of the fairway is a good target. Generally plays as a three shot hole. Hole Sponsored by

6 of 18
| PAR | YARDS | STROKE | |
|---|---|---|---|
| White Tee | 5 | 478 | 18 |
| Yellow Tee | 5 | 469 | 18 |
| Red Tee | 5 | 433 | 15 |
HOLE SIX | THE COPSE
PAR 5, YARDS 478, STROKE INDEX 18
6 of 18
HOLE SIX | THE COPSE
Statistically the easiest hole on the course, this par 5 still needs to be shown respect when playing. Not much to contend with if kept on the fairway, you can make the green in two but avoid the large front bunker in front of the green.
| PAR | YARDS | STROKE | |
|---|---|---|---|
| White Tee | 5 | 478 | 18 |
| Yellow Tee | 5 | 469 | 18 |
| Red Tee | 5 | 433 | 15 |
PRO TIP
Avoid the large oak tree that cuts in 100 yards from the green and par is very achievable. Hole Sponsored by

7 of 18
| PAR | YARDS | STROKE | |
|---|---|---|---|
| White Tee | 4 | 431 | 2 |
| Yellow Tee | 4 | 420 | 2 |
| Red Tee | 5 | 403 | 12 |
HOLE SEVEN | DEADWOOD
PAR 4, YARDS 431, STROKE INDEX 2
7 of 18
HOLE SEVEN | DEADWOOD
This is the hardest hole on the front nine. This uphill par 4 plays all of its yardage. Two trees that can be in contention from the tee. The tricky two tier green is a small target for the length of the hole. Another shallow green that sites diagonally left to right with the teir sitting in the middle of the green.
| PAR | YARDS | STROKE | |
|---|---|---|---|
| White Tee | 4 | 431 | 2 |
| Yellow Tee | 4 | 420 | 2 |
| Red Tee | 5 | 403 | 12 |
PRO TIP
Favour the right side of the fairway to avoid being blocked from reaching the green on your approach. Hole Sponsored by

8 of 18
| PAR | YARDS | STROKE | |
|---|---|---|---|
| White Tee | 4 | 372 | 12 |
| Yellow Tee | 4 | 364 | 12 |
| Red Tee | 4 | 344 | 9 |
HOLE EIGHT | BRAIN'S LEGACY
PAR 4, YARDS 372, STROKE INDEX 12
8 of 18
HOLE EIGHT | BRAIN'S LEGACY
A good straight par 4 to finish the front nine as it heads back towards the clubhouse. A semi blind tee shot to a left to right sloping fairway. A tough green to approach due to the slope.
| PAR | YARDS | STROKE | |
|---|---|---|---|
| White Tee | 4 | 372 | 12 |
| Yellow Tee | 4 | 364 | 12 |
| Red Tee | 4 | 344 | 9 |
PRO TIP
Pick the halfway house as your line off the tee shot. A tough green that slopes away and to the right of the approach shot. Hole Sponsored by

9 of 18
| PAR | YARDS | STROKE | |
|---|---|---|---|
| White Tee | 4 | 368 | 6 |
| Yellow Tee | 4 | 355 | 6 |
| Red Tee | 4 | 323 | 10 |
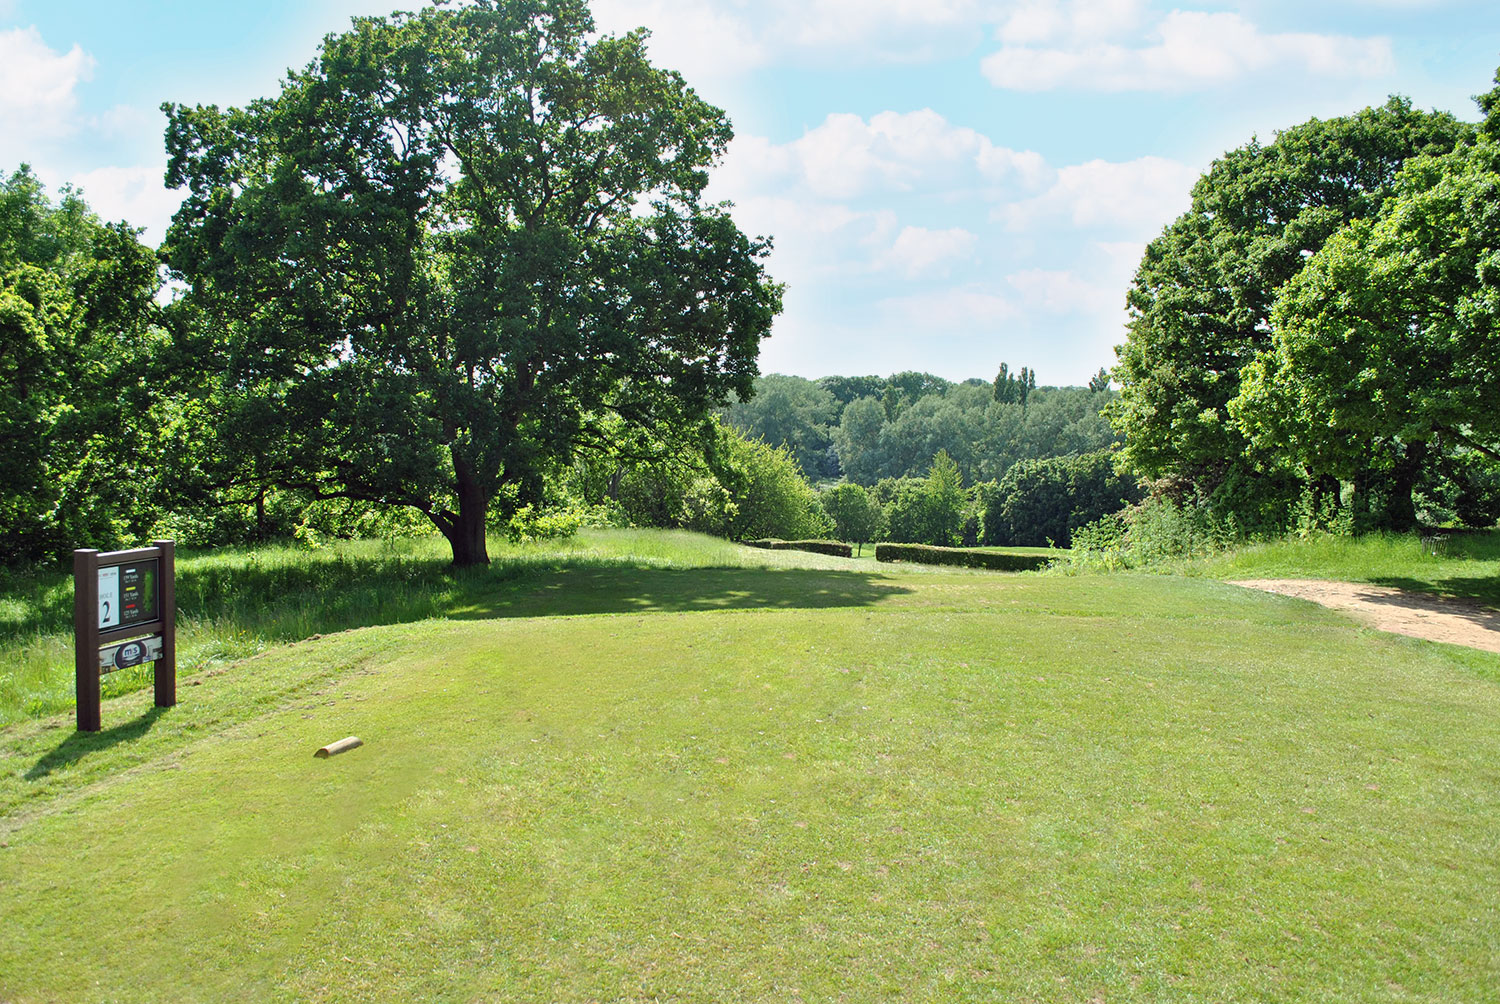
HOLE NINE | THE CHAMBERS
PAR 4, YARDS 368, STROKE INDEX 6
9 of 18
HOLE NINE | THE CHAMBERS
This par 4 opening hole has a slight dog leg right to a protected green. From the tee you are welcomed with a nice open fairway that then pitches with a tree either side to narrow your route through. Down the right of the fairway is a wooden area that blocks your view of the green. Hitting to the left of the fairway will give you the best approach to the green. This will open up the green which is guarded by three bunkers at the front of the green.
| PAR | YARDS | STROKE | |
|---|---|---|---|
| White Tee | 4 | 368 | 6 |
| Yellow Tee | 4 | 355 | 6 |
| Red Tee | 4 | 323 | 10 |
PRO TIP
A tricky opening tee shot where hitting the fairway is important. Ideally the left side of the fairway will open up a tough approach shot. Hole Sponsored by

10 of 18
| PAR | YARDS | STROKE | |
|---|---|---|---|
| White Tee | 3 | 159 | 16 |
| Yellow Tee | 3 | 151 | 16 |
| Red Tee | 3 | 125 | 18 |
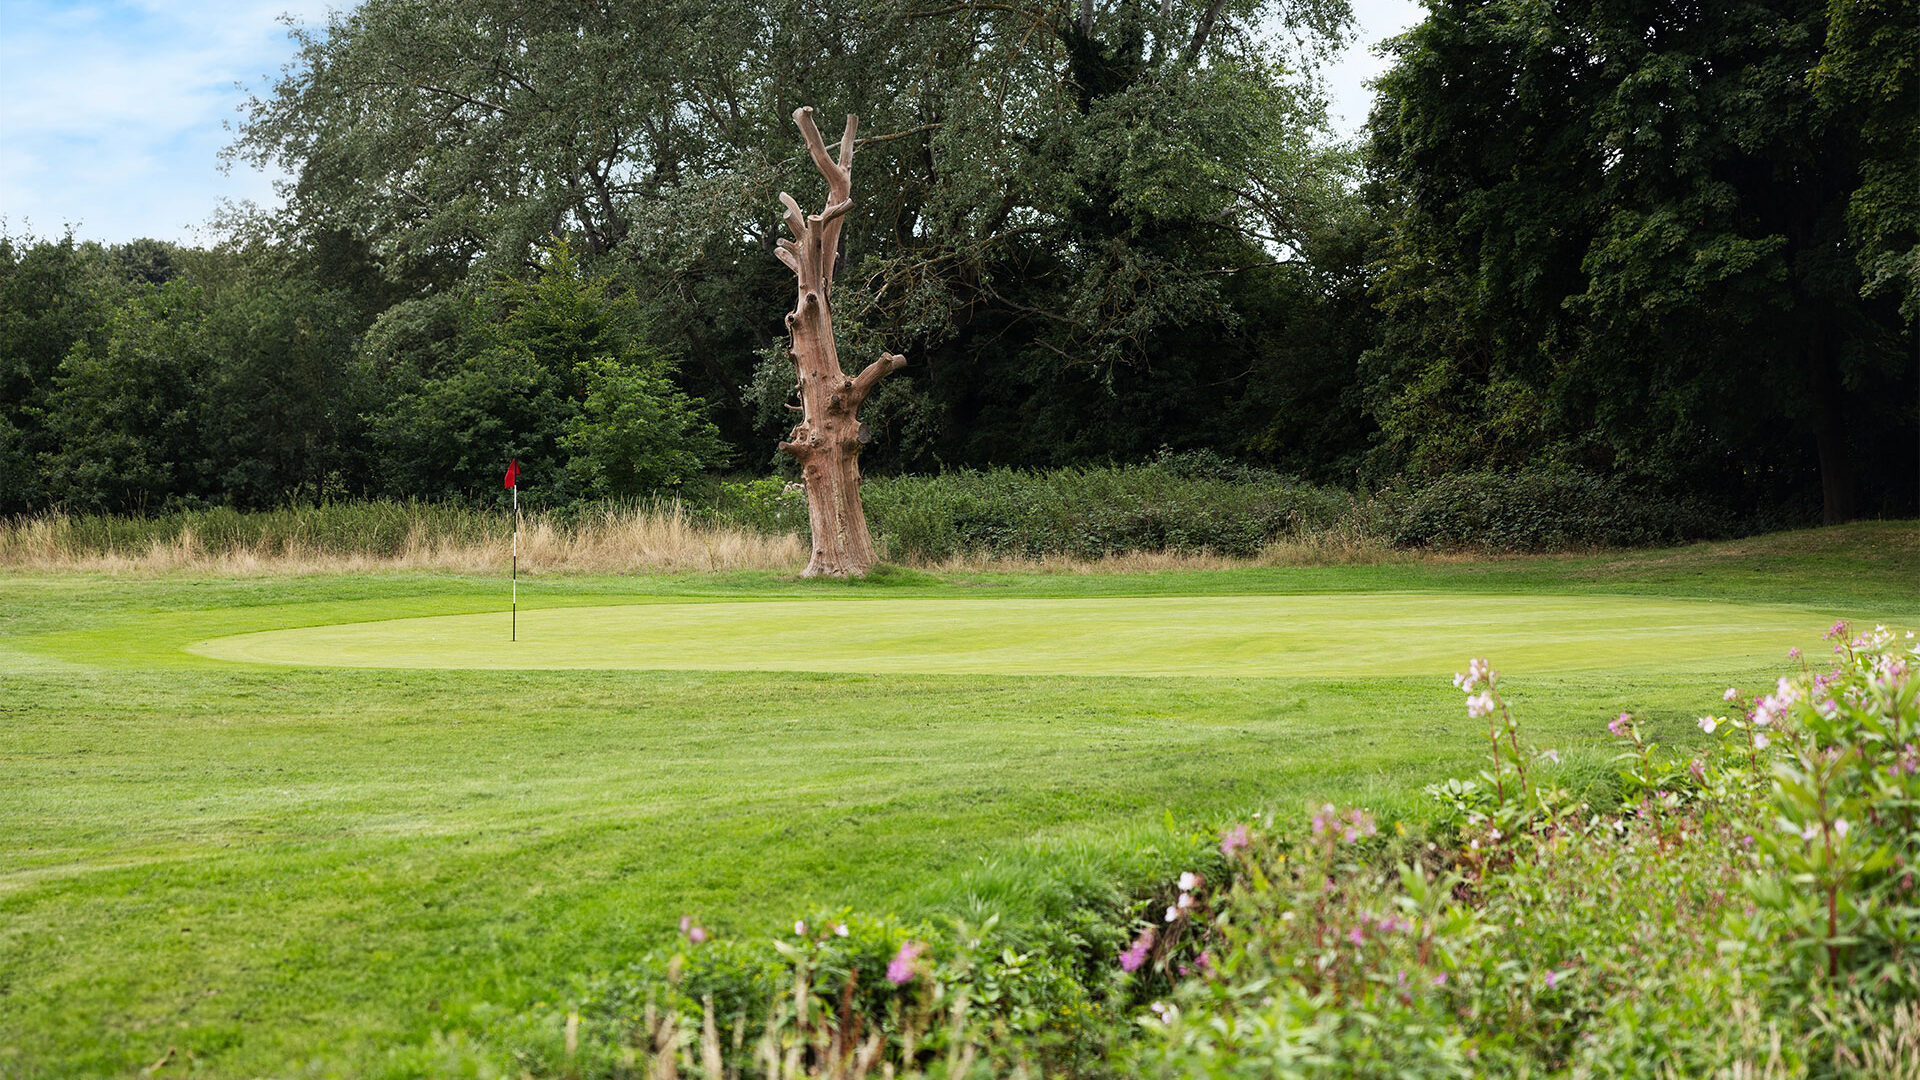
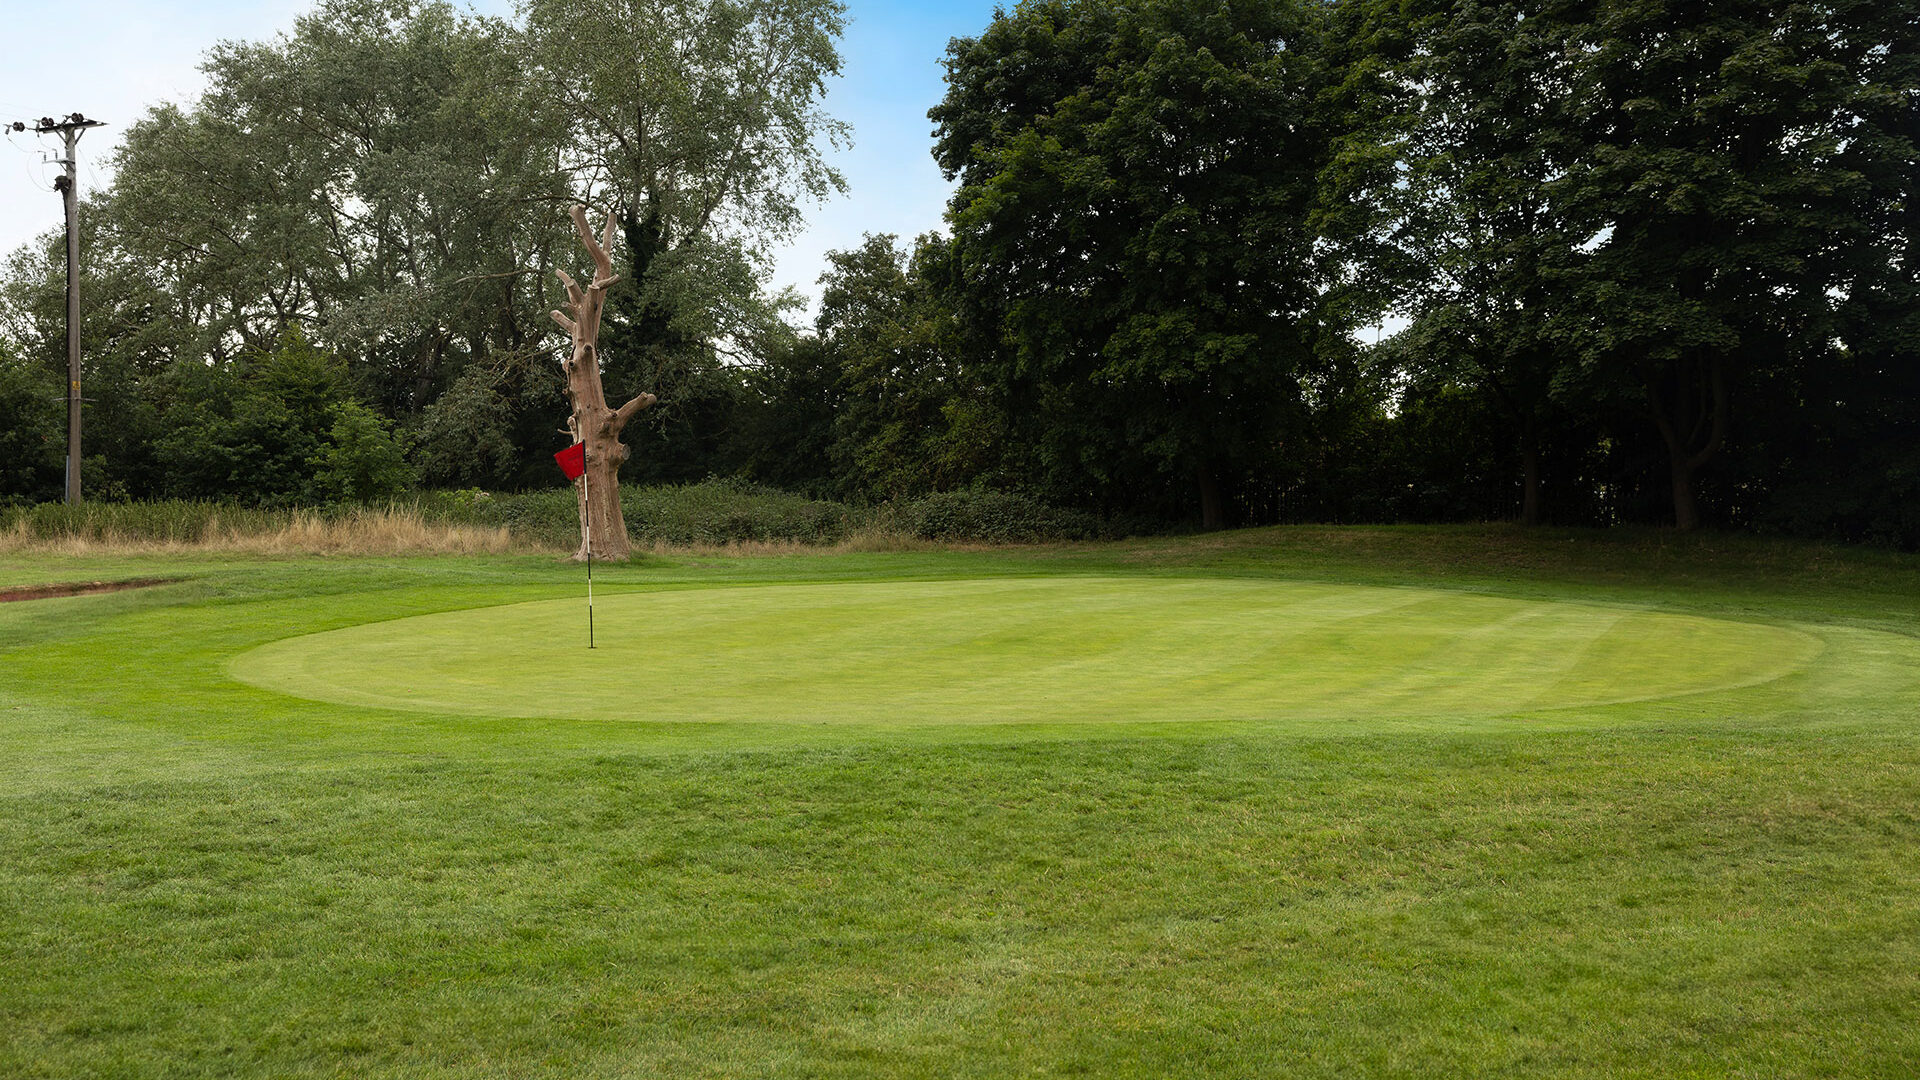
HOLE TEN | HIGH VIEW
PAR 3, YARDS 159, STROKE INDEX 16
10 of 18
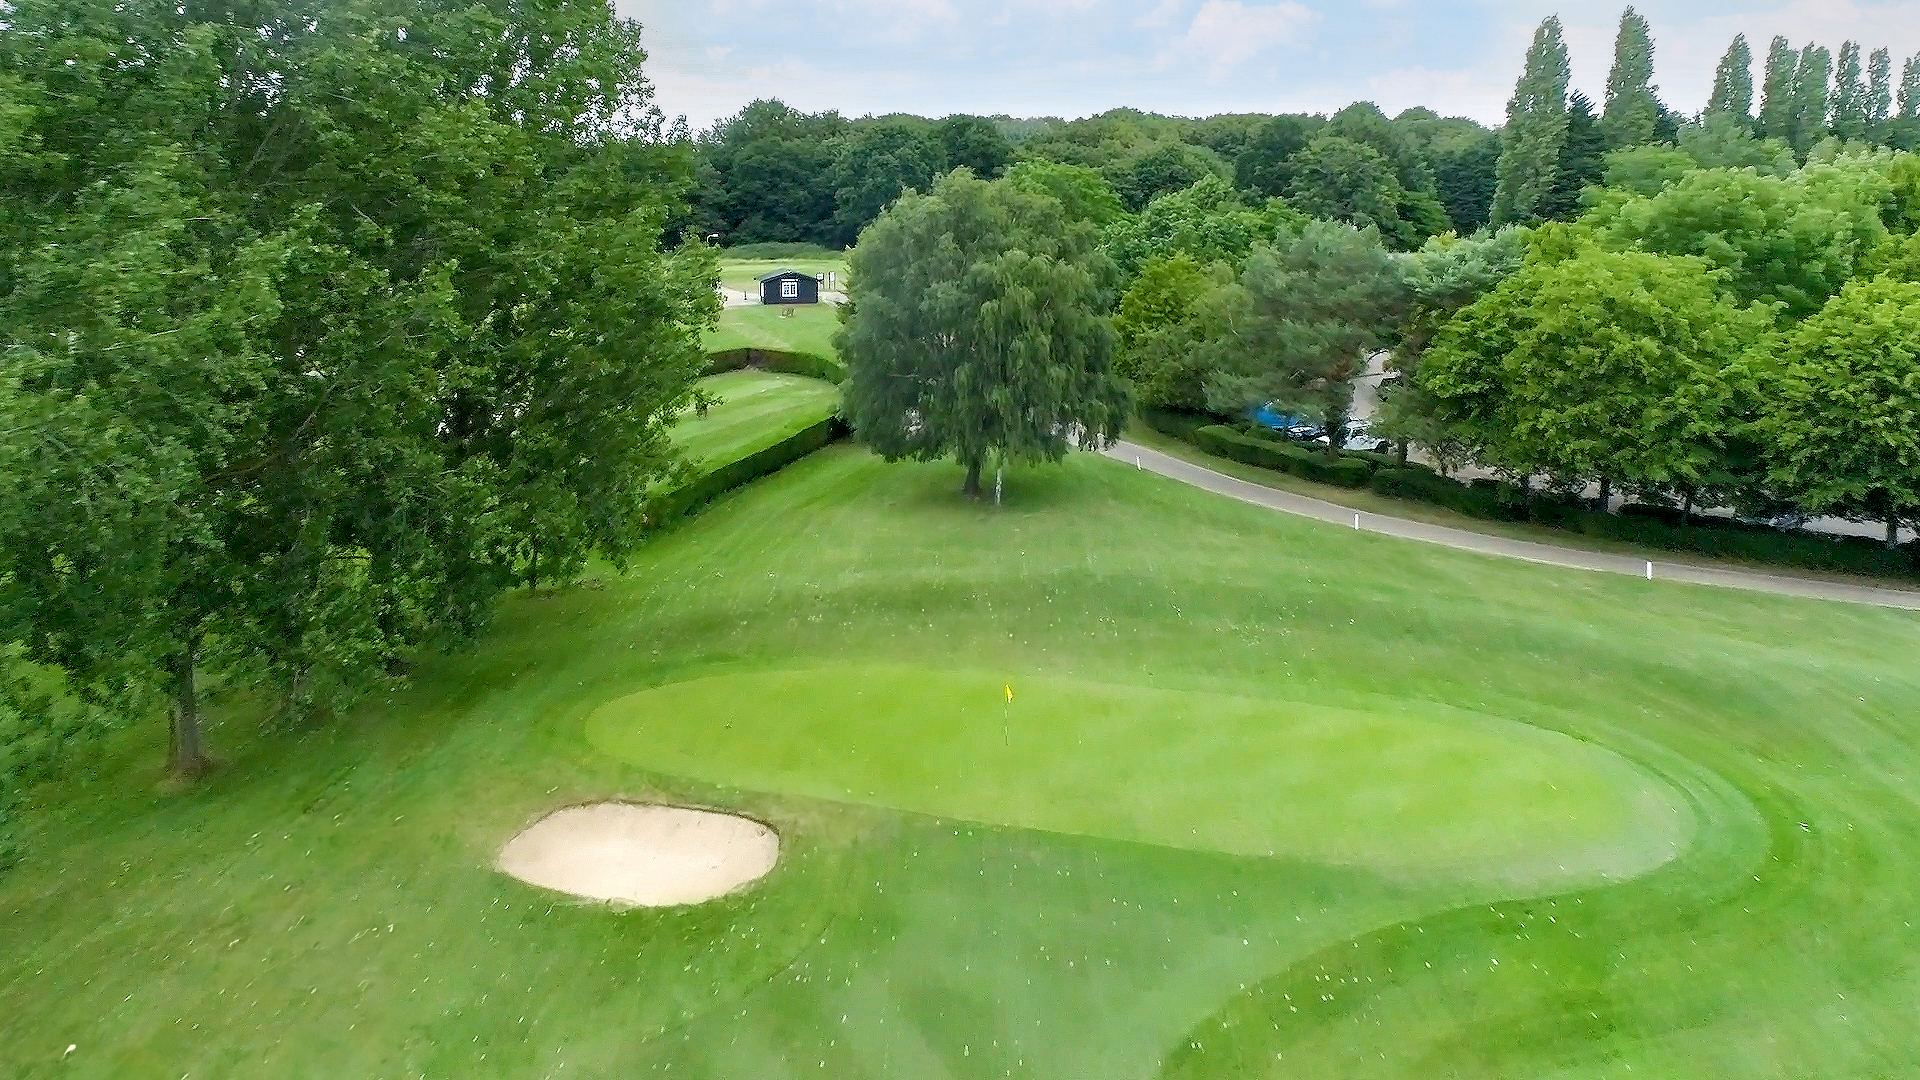
HOLE TEN | HIGH VIEW
Hole two is the easiest par 3 on the course. It's a deceptive hole that requires more club than you would usually take. Playing from an elevated tee down to a wide green that slopes back to front. The hole opens up once past the hedgerow that runs the width of the hole and use the natural slope as this runs down hill towards the green that is particially hidden from your view on the tee. There are two medium sized bunkers to the left of the green and a wide run off area to the right. If you play this too long, you are in danger of losing your ball as there is a big drop at the back of the green to a dense wooded area. A wide flat welcoming green gives a big target to hit.
| PAR | YARDS | STROKE | |
|---|---|---|---|
| White Tee | 3 | 159 | 16 |
| Yellow Tee | 3 | 151 | 16 |
| Red Tee | 3 | 125 | 18 |
PRO TIP
A downhill approach that plays shorter than the yardage suggests. Anything short will bounce down to the green anything long will be in trouble. Hole Sponsored by

11 of 18
| PAR | YARDS | STROKE | |
|---|---|---|---|
| White Tee | 4 | 344 | 10 |
| Yellow Tee | 4 | 335 | 10 |
| Red Tee | 4 | 304 | 14 |
HOLE ELEVEN | STATION 12
PAR 4, YARDS 344, STROKE INDEX 10
11 of 18
HOLE ELEVEN | STATION 12
From the tee you are playing to a blind green, use the trees as your reference points, as these will guide you to the ideal position. A bank of trees on the left and a thick tree line sat back from the fairway on the right are your only obstacles on this hole. Aim down the left-hand side as the fairway slightly slopes left to right, this will give you a good approach to the green.
Around the green, there are three bunkers to navigate, two either side of the front fringe and one at the back. Be cautious not to over hit the green as this will run down into trees and long rough or leave you with a niggly bunker shot.
| PAR | YARDS | STROKE | |
|---|---|---|---|
| White Tee | 4 | 344 | 10 |
| Yellow Tee | 4 | 335 | 10 |
| Red Tee | 4 | 304 | 14 |
PRO TIP
From the tee hug the trees on the left for the best chance of holding the fairway. The tall poplar trees in the distance is the line. Hole Sponsored by

12 of 18
| PAR | YARDS | STROKE | |
|---|---|---|---|
| White Tee | 5 | 477 | 14 |
| Yellow Tee | 5 | 467 | 14 |
| Red Tee | 5 | 439 | 2 |
HOLE TWELVE | ASTON CREEK
PAR 5, YARDS 477, STROKE INDEX 14
12 of 18
HOLE TWELVE | ASTON CREEK
You can afford to take a risk with a long drive, the downhill fairway will give you a good roll and open your options for your second shot. A generous fairway to aim for will favour a little draw shot to find the centre of the fairway. Long hitters can get there in two shots for a chance at an eagle, but anything short and left will find a watery grave, while anything right will find the sand. The conservative shot will be to lay up before the stream for a short chip onto the green. A two tier green with a single bunker to the right will make you concentrate to the end.
| PAR | YARDS | STROKE | |
|---|---|---|---|
| White Tee | 5 | 477 | 14 |
| Yellow Tee | 5 | 467 | 14 |
| Red Tee | 5 | 439 | 2 |
PRO TIP
A great risk and reward par 5. Another blind tee shot to a downhill fairway. The small telegraph pole in the distance is the line. Hole Sponsored by
13 of 18
| PAR | YARDS | STROKE | |
|---|---|---|---|
| White Tee | 4 | 395 | 1 |
| Yellow Tee | 4 | 384 | 1 |
| Red Tee | 4 | 303 | 6 |
HOLE THIRTEEN | TWIN OAKS
PAR 4, YARDS 395, STROKE INDEX 1

13 of 18
HOLE THIRTEEN | TWIN OAKS
This is the toughest hole on the course and difficult to get a good second shot. The second part of the fairway is blocked by a large gathering of trees and a brook running through the hole. The second half of the fairway features a large tree in the middle and more overhanging trees on the right. If you make it past the trees you will have a good shot into the green.
| PAR | YARDS | STROKE | |
|---|---|---|---|
| White Tee | 4 | 395 | 1 |
| Yellow Tee | 4 | 384 | 1 |
| Red Tee | 4 | 303 | 6 |
PRO TIP
Try to get it as far up the fairway as possible to open up your second shot to the green. Hole Sponsored by

14 of 18
| PAR | YARDS | STROKE | |
|---|---|---|---|
| White Tee | 3 | 171 | 11 |
| Yellow Tee | 3 | 154 | 11 |
| Red Tee | 3 | 112 | 11 |
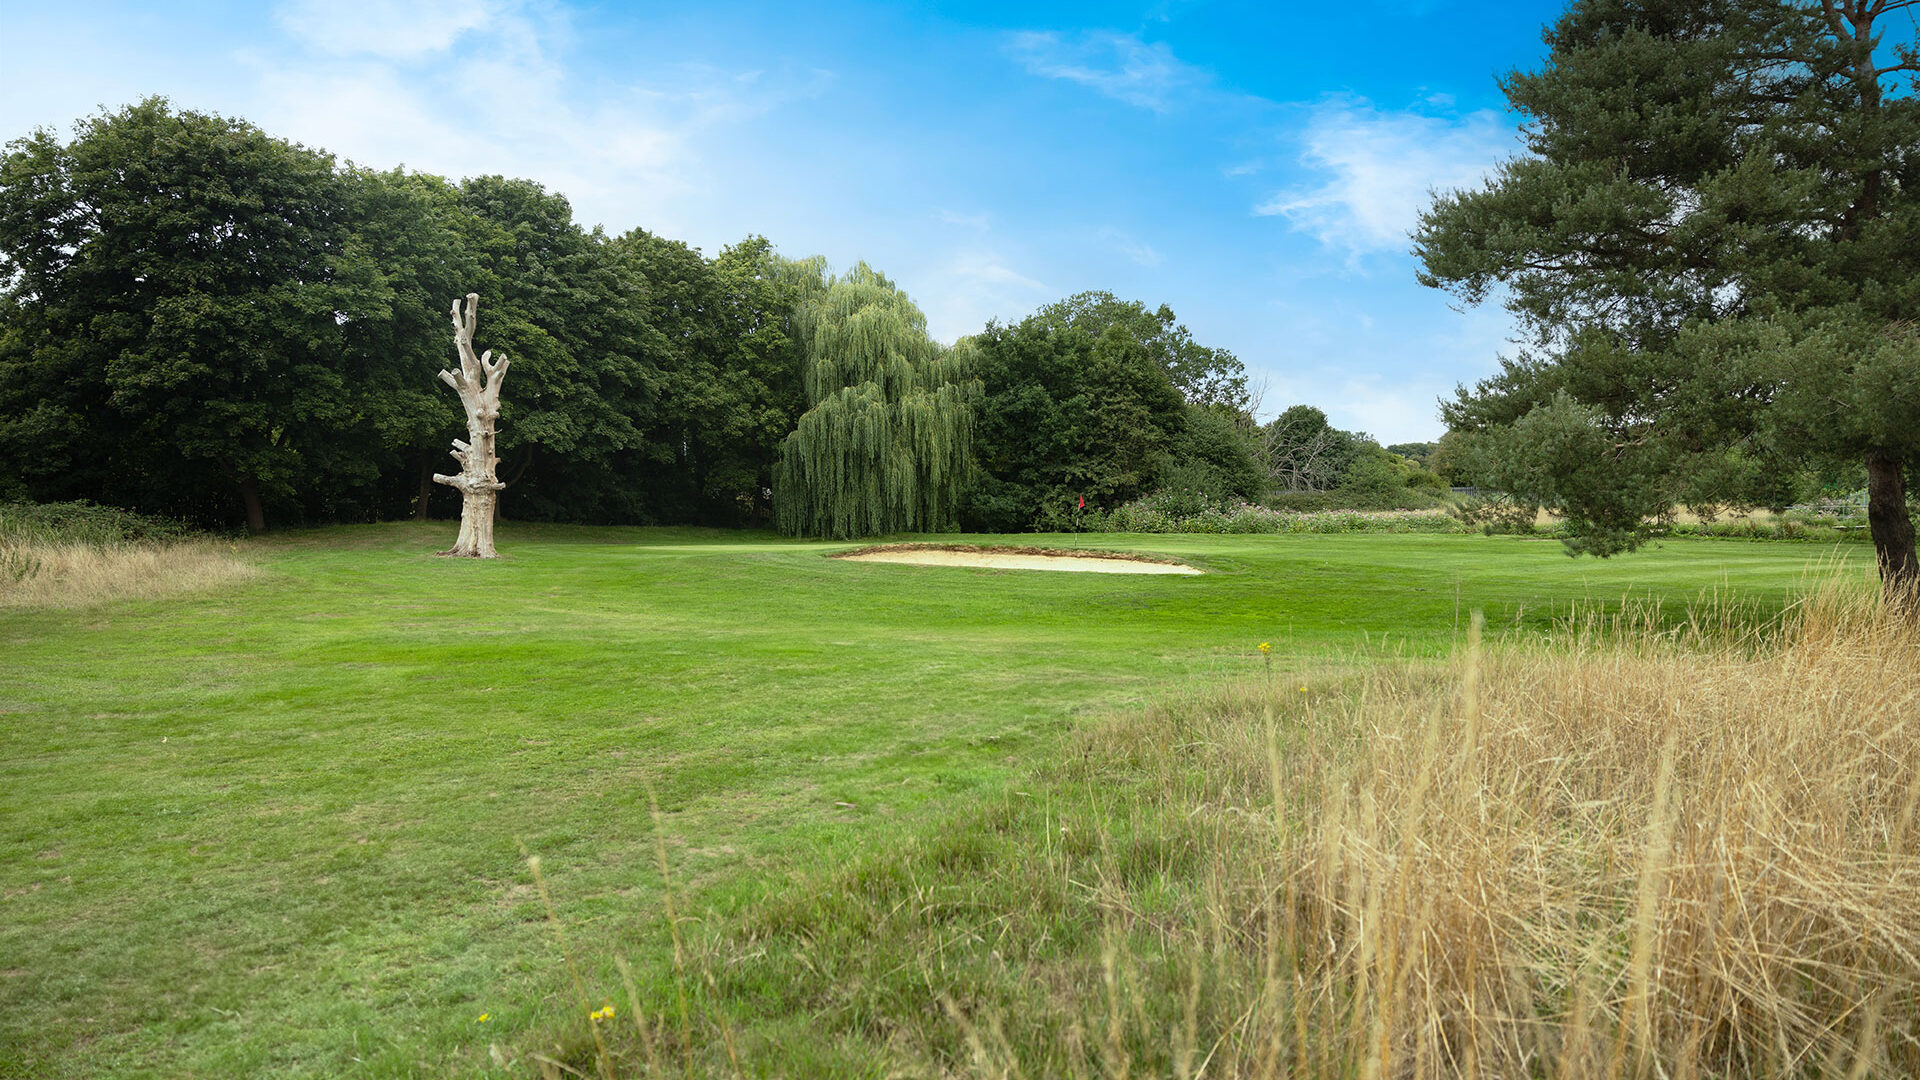
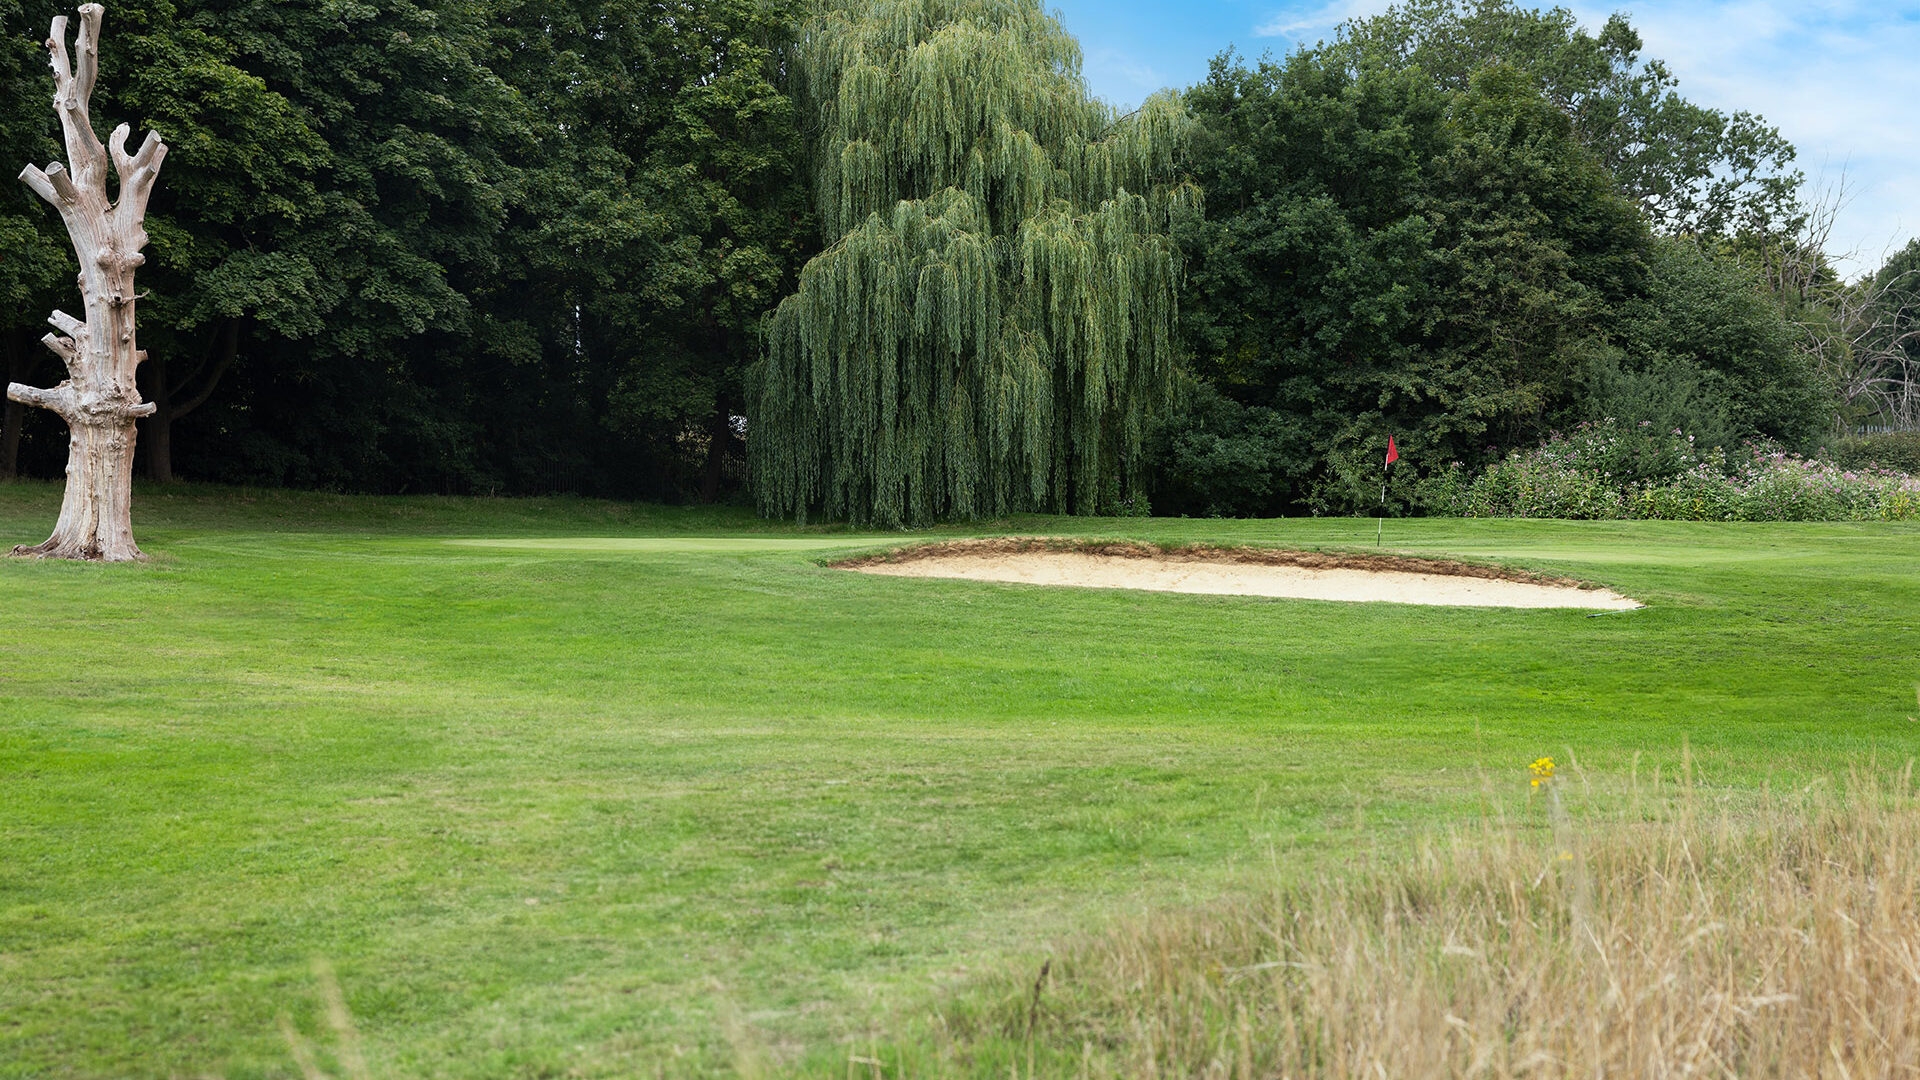
HOLE FOURTEEN | THE GUARDED GREEN
PAR 3, YARDS 171, STROKE INDEX 11
14 of 18
HOLE FOURTEEN | THE GUARDED GREEN
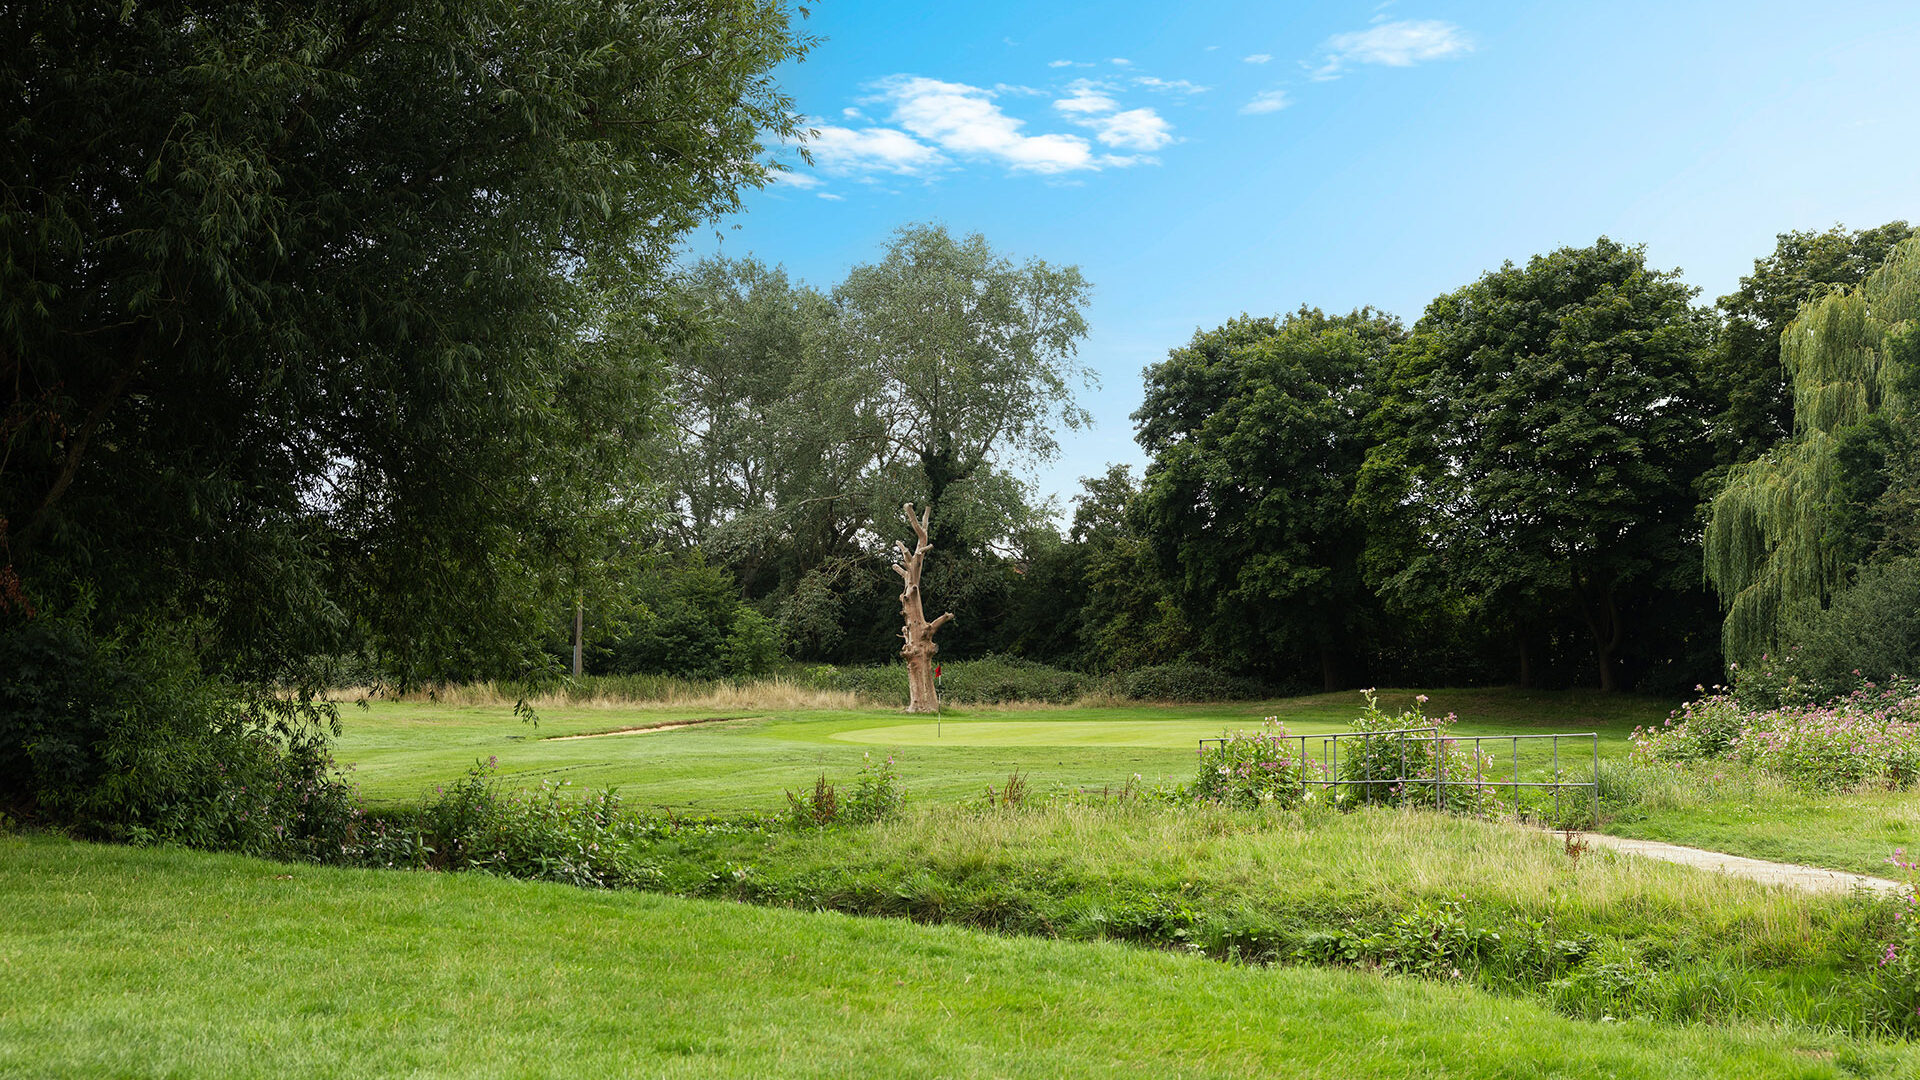
A nice par 3 that requires a solid strike to clear the water hazard, long rough and bunker that sits at the front of the green. There is a small fairway around the green but this is guarded by trees. Play for the green as the it slopes from back to front and will help hold the ball.
| PAR | YARDS | STROKE | |
|---|---|---|---|
| White Tee | 3 | 171 | 11 |
| Yellow Tee | 3 | 154 | 11 |
| Red Tee | 3 | 112 | 11 |
PRO TIP
The dead tree at the back of the green is often a good target. Hole Sponsored by

15 of 18
| PAR | YARDS | STROKE | |
|---|---|---|---|
| White Tee | 4 | 340 | 17 |
| Yellow Tee | 4 | 328 | 17 |
| Red Tee | 4 | 298 | 16 |
HOLE FIFTEEN | THE ROAD HOLE
PAR 4, YARDS 340, STROKE INDEX 17
15 of 18
HOLE FIFTEEN | THE ROAD HOLE
A fairly straight forward par 4 hole to a good sized green. Play this straight at the green to avoid the large bunker half way down the thin fairway. This will give you a good run into the green for a relatively scoreable par 4.
| PAR | YARDS | STROKE | |
|---|---|---|---|
| White Tee | 4 | 340 | 17 |
| Yellow Tee | 4 | 328 | 17 |
| Red Tee | 4 | 298 | 16 |
PRO TIP
You're playing to a thin fairway, so don't miss it by trying to go too big. Hole Sponsored by

16 of 18
| PAR | YARDS | STROKE | |
|---|---|---|---|
| White Tee | 4 | 358 | 2 |
| Yellow Tee | 4 | 349 | 2 |
| Red Tee | 4 | 339 | 2 |
HOLE SIXTEEN | THE HIDDEN BROOK
PAR 4, YARDS 358, STROKE INDEX 2
16 of 18
HOLE SIXTEEN | THE HIDDEN BROOK
A demanding uphill par 4 that requires a strong strike from the tee to carry far enough beyond the two oaks. If you are unable to launch the ball high enough to clear the bunker guarding the front of the green, aim for the front right portion and look to get up and down from there.
As stroke index 2, make full use of any shots received, as a net par is an excellent score.
| PAR | YARDS | STROKE | |
|---|---|---|---|
| White Tee | 4 | 358 | 2 |
| Yellow Tee | 4 | 349 | 2 |
| Red Tee | 4 | 339 | 2 |
PRO TIP
If you can't get your tee shot past the tree, aim down the left to make sure you are not blocked out by it. Hole Sponsored by

17 of 18
| PAR | YARDS | STROKE | |
|---|---|---|---|
| White Tee | 3 | 198 | 3 |
| Yellow Tee | 3 | 187 | 3 |
| Red Tee | 3 | 164 | 8 |
HOLE SEVENTEEN | THE WATERS EDGE
PAR 3, YARDS 198, STROKE INDEX 3
17 of 18
HOLE SEVENTEEN | THE WATERS EDGE
Arguably the hardest par 3 on the course. The green is set on an angle away from the tee, the more attacking you play to the right the further you will need to play your shot to avoid the water. Make sure to clear the water to make the green, there is a bunker at the back of the green to catch any shots that go long on the hole.
| PAR | YARDS | STROKE | |
|---|---|---|---|
| White Tee | 3 | 198 | 3 |
| Yellow Tee | 3 | 187 | 3 |
| Red Tee | 3 | 164 | 8 |
PRO TIP
Don't leave your shot short, otherwise the ball will get wet. Hole Sponsored by

18 of 18
| PAR | YARDS | STROKE | |
|---|---|---|---|
| White Tee | 4 | 380 | 5 |
| Yellow Tee | 4 | 370 | 5 |
| Red Tee | 4 | 351 | 1 |
HOLE EIGHTEEN | LADIES WOOD
PAR 4, YARDS 380, STROKE INDEX 5


18 of 18
HOLE EIGHTEEN | LADIES WOOD
The final hole is a par 4 that requires the player to think about their shot selection to avoid the hazards. Use the tree as the target for your tee shot - ideally you want your shot to be just pass the left side of the tree to give the most open line to the hole. Don't let the water hazard distract you from your second shot. A uphill shot over water to the green that's guarded by two small bunkers. Take a extra club to make the wide green.
| PAR | YARDS | STROKE | |
|---|---|---|---|
| White Tee | 4 | 380 | 5 |
| Yellow Tee | 4 | 370 | 5 |
| Red Tee | 4 | 351 | 1 |
PRO TIP
Club up on your approach to make the green and don't be distracted by the water. Hole Sponsored by

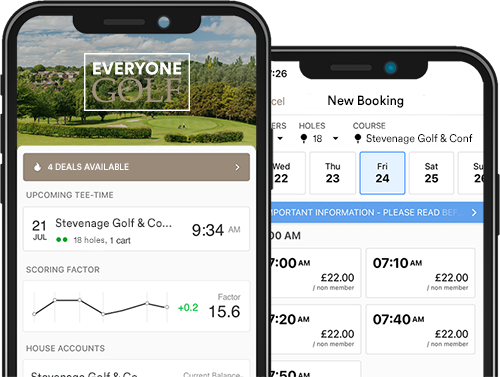
BOOK ANYTIME, ANYWHERE WITH
OUR APP
OUR APP
Easy to use and saves you time. Book with our mobile app. Available on iOS & Android.