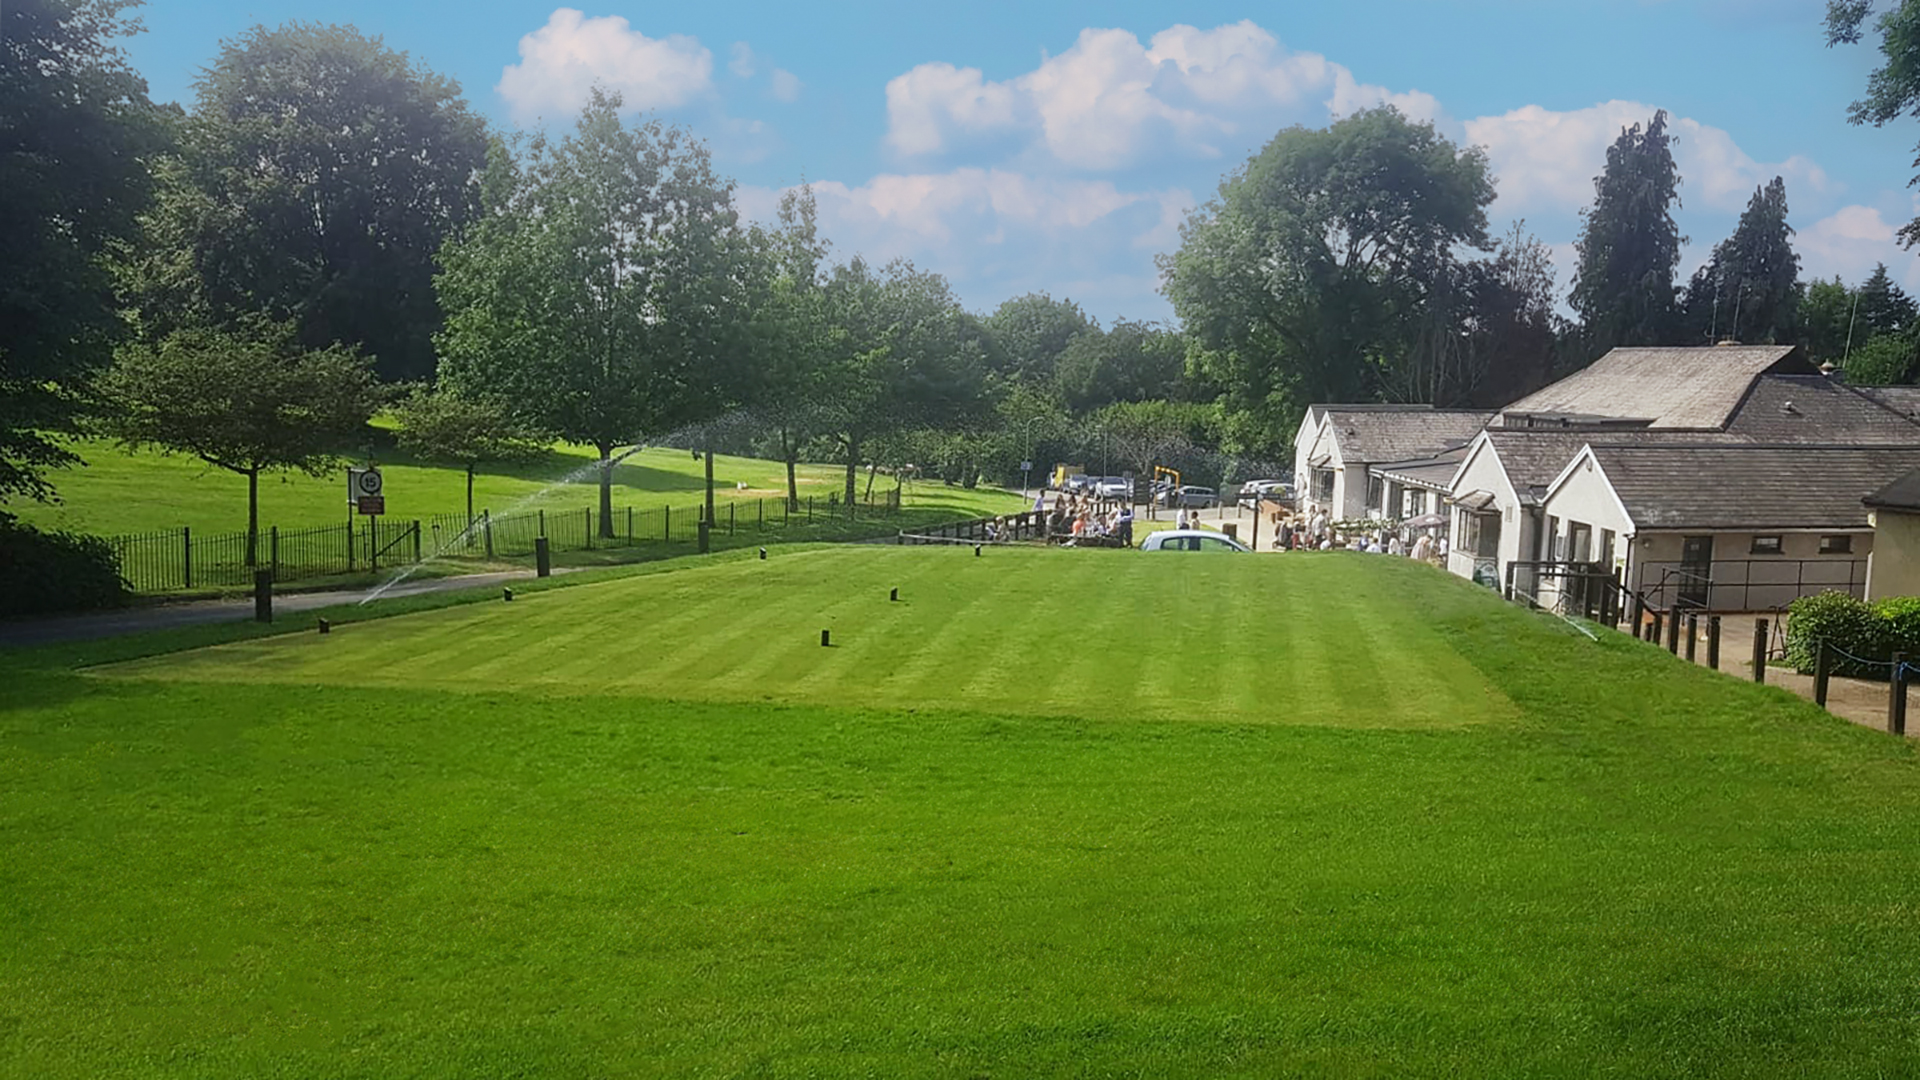
Rickmansworth Golf Course beckons with its unique blend of challenging fairways, lush greenery, and serene natural beauty. Whether you're a seasoned golfer seeking a formidable test of skill or a beginner eager to embark on a golfing journey, our course offers an experience that caters to every level of play.
EXPLORE THE COURSE
Loading status...
YARDS
4635
White Tee
YARDS
4425
Yellow Tee
YARDS
4106
Red Tee
1 of 18
| PAR | YARDS | STROKE | |
|---|---|---|---|
| White Tee | 3 | 133 | 13 |
| Yellow Tee | 3 | 131 | 13 |
| Red Tee | 3 | 126 | 13 |
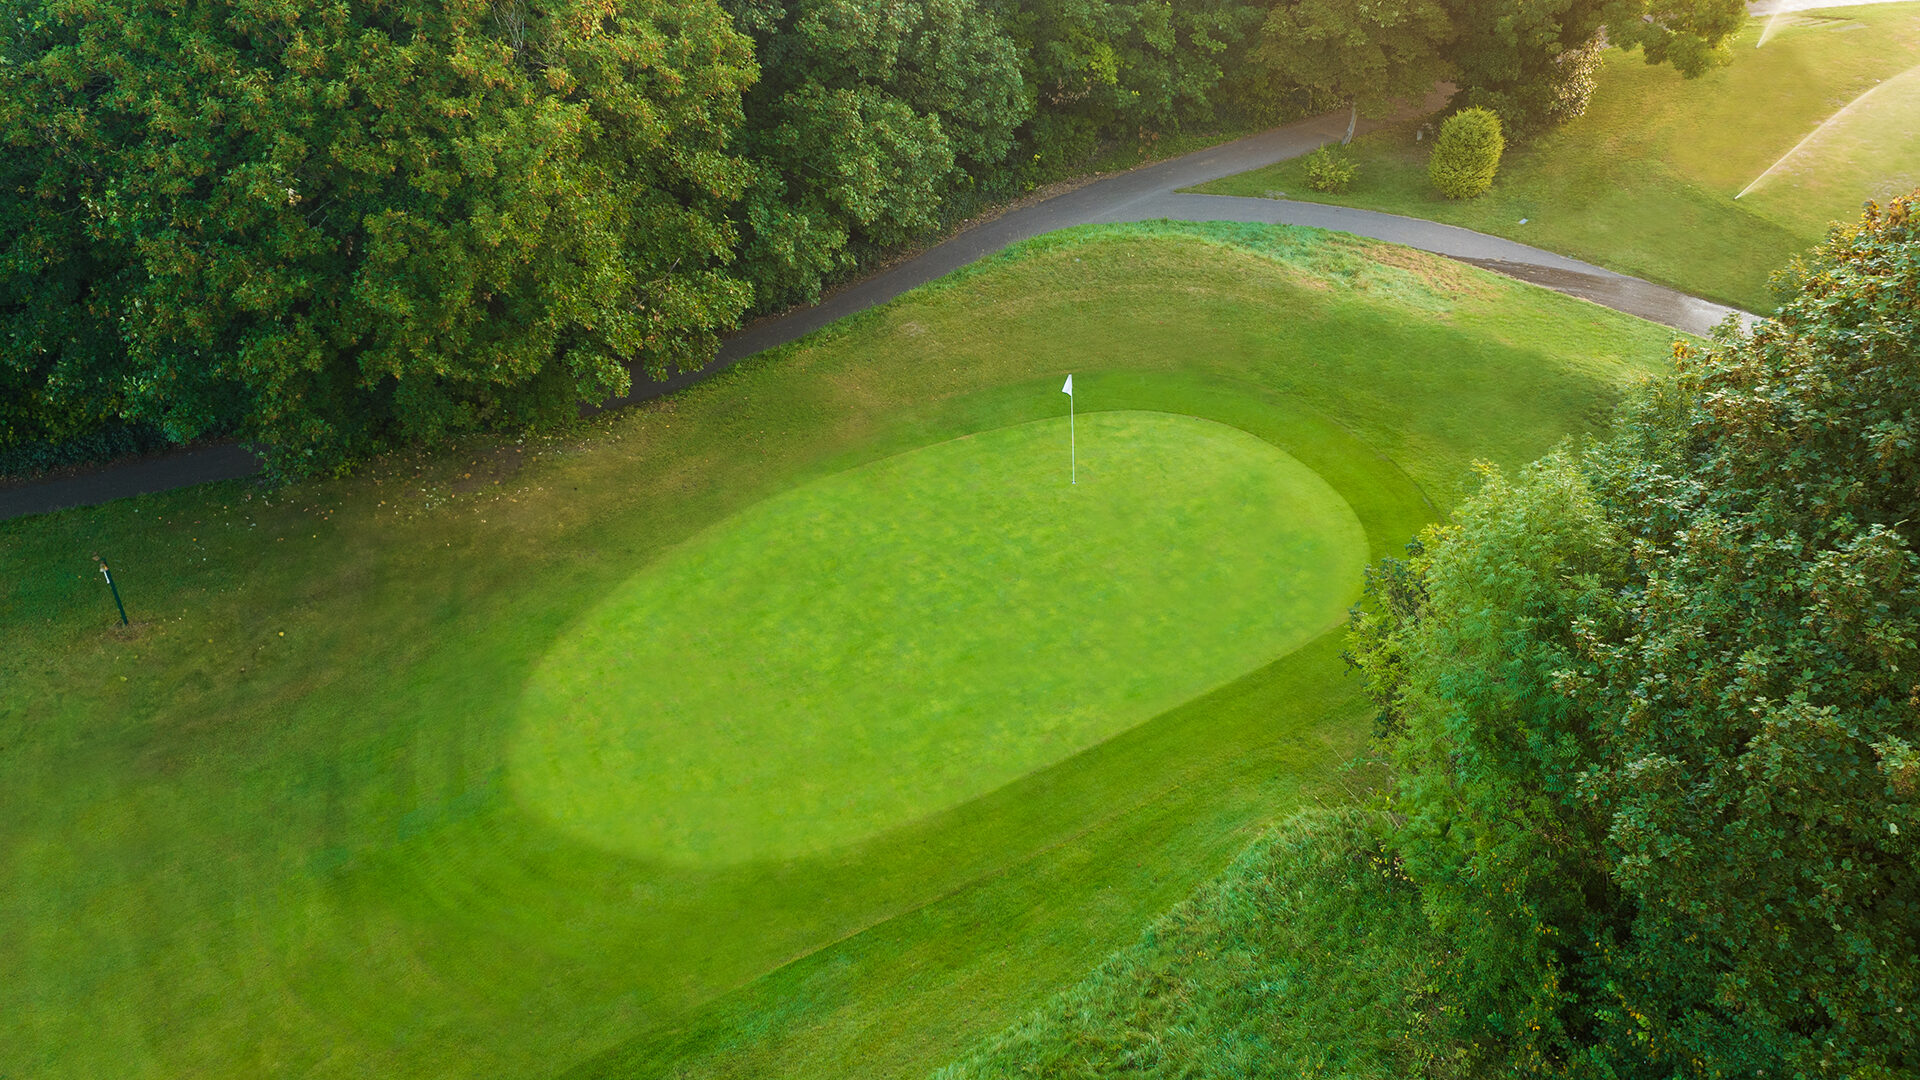
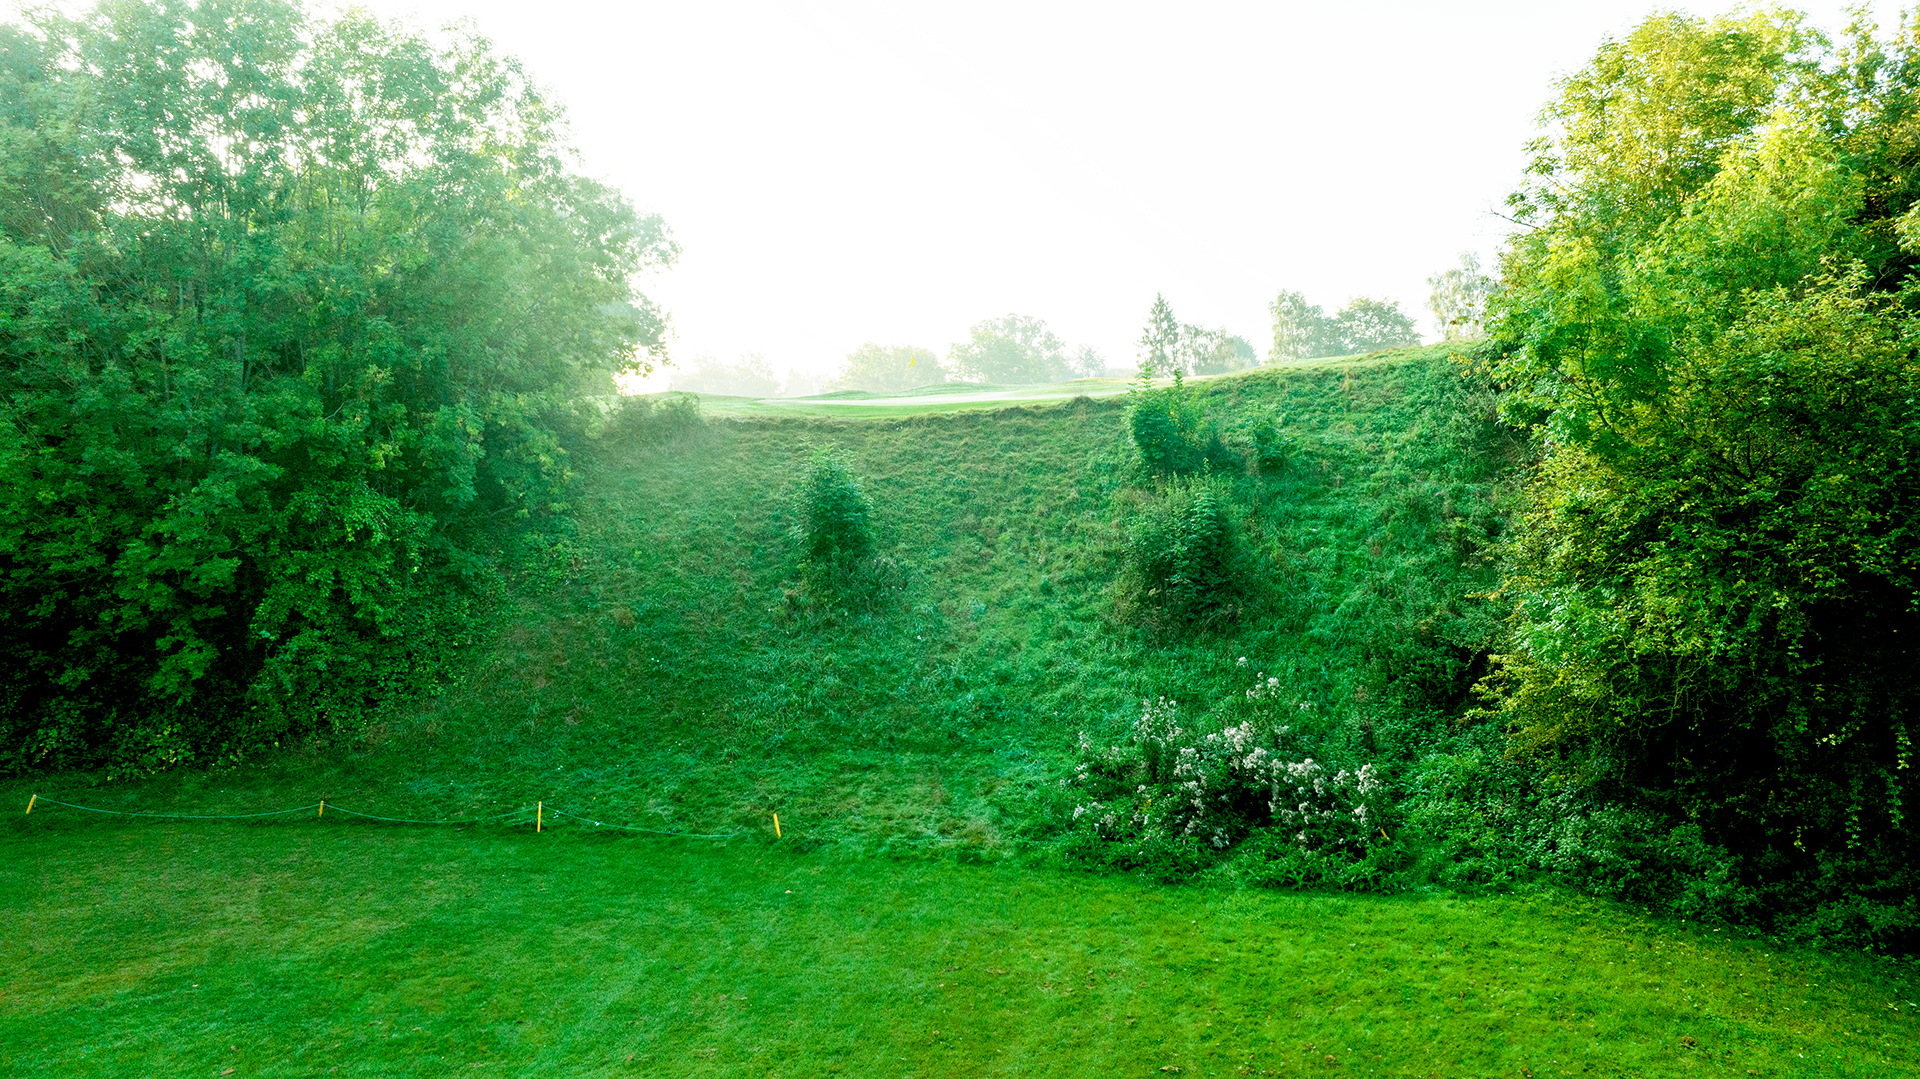
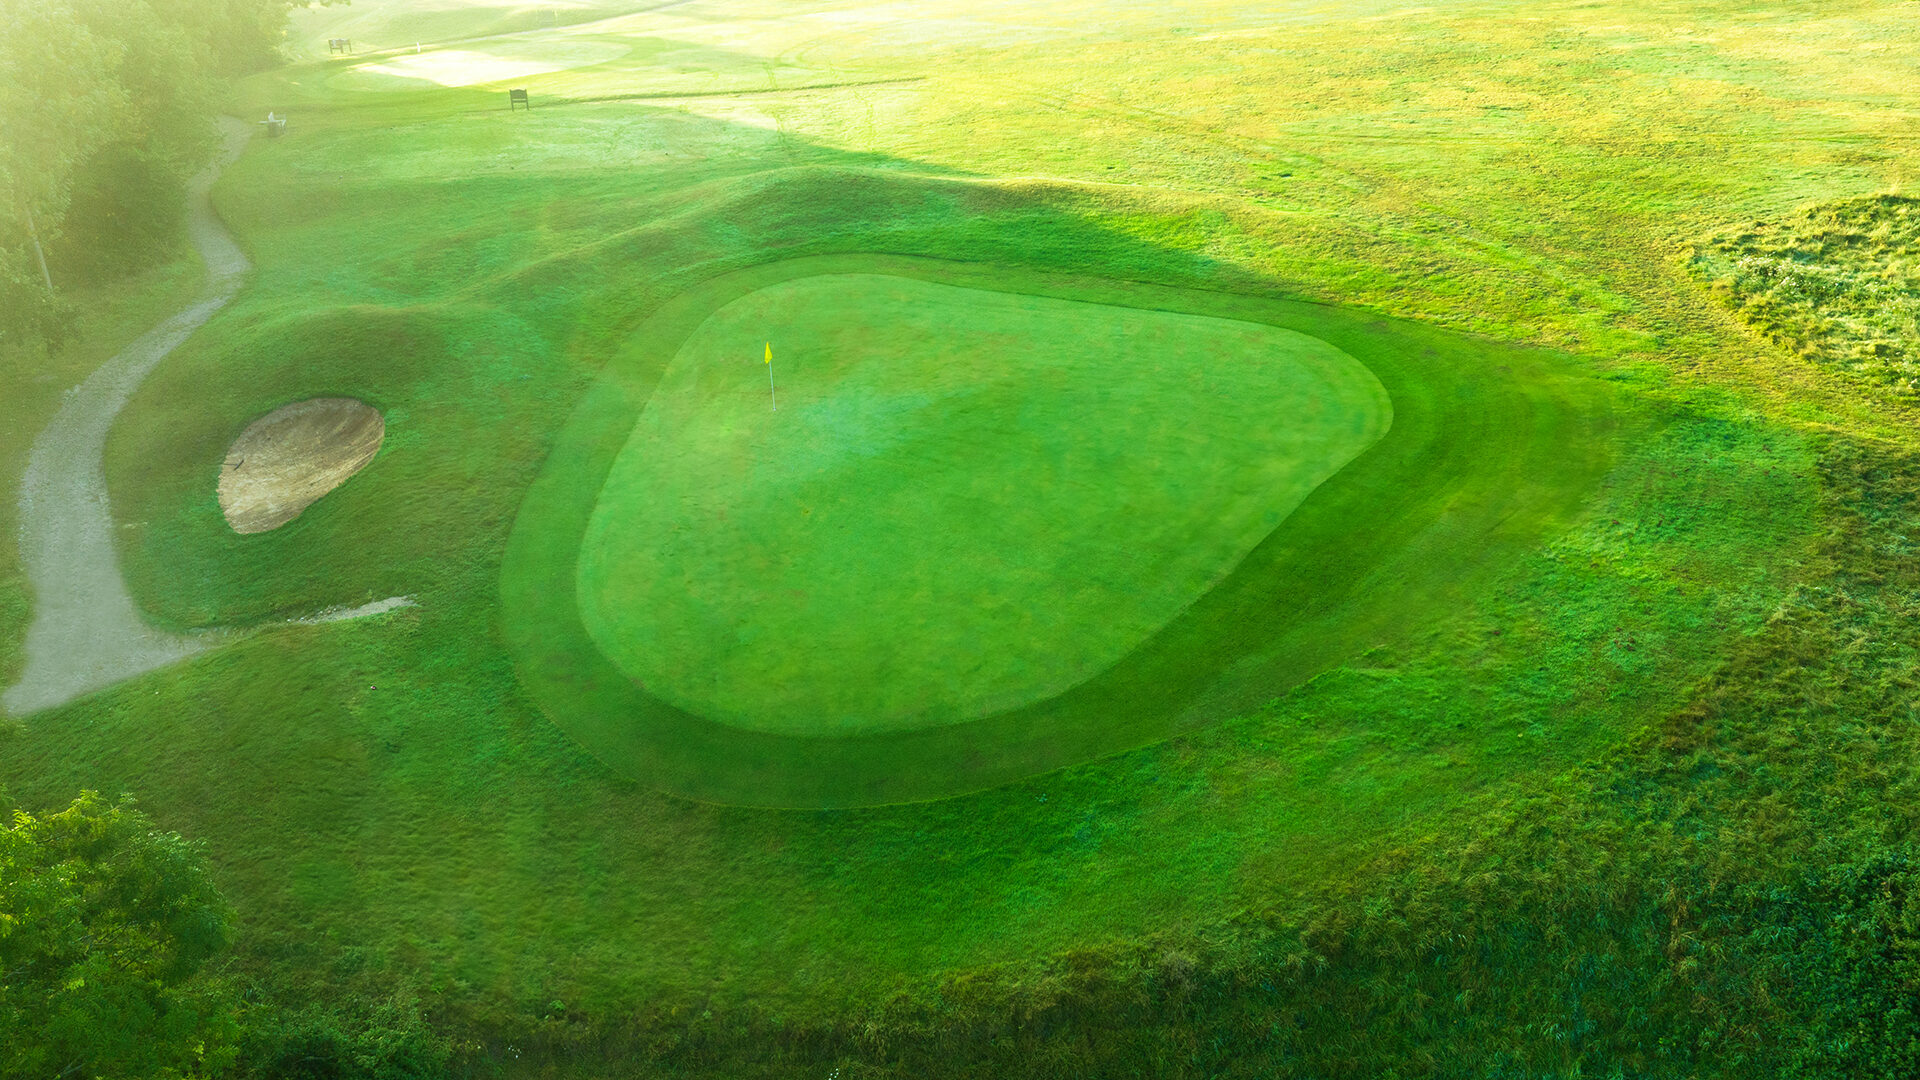
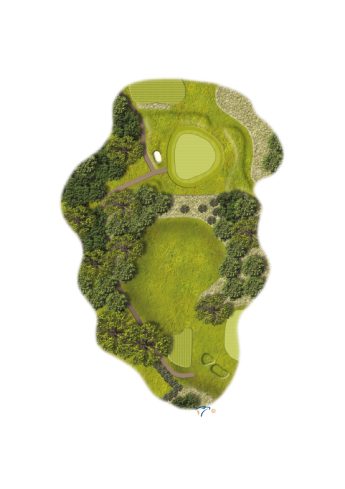
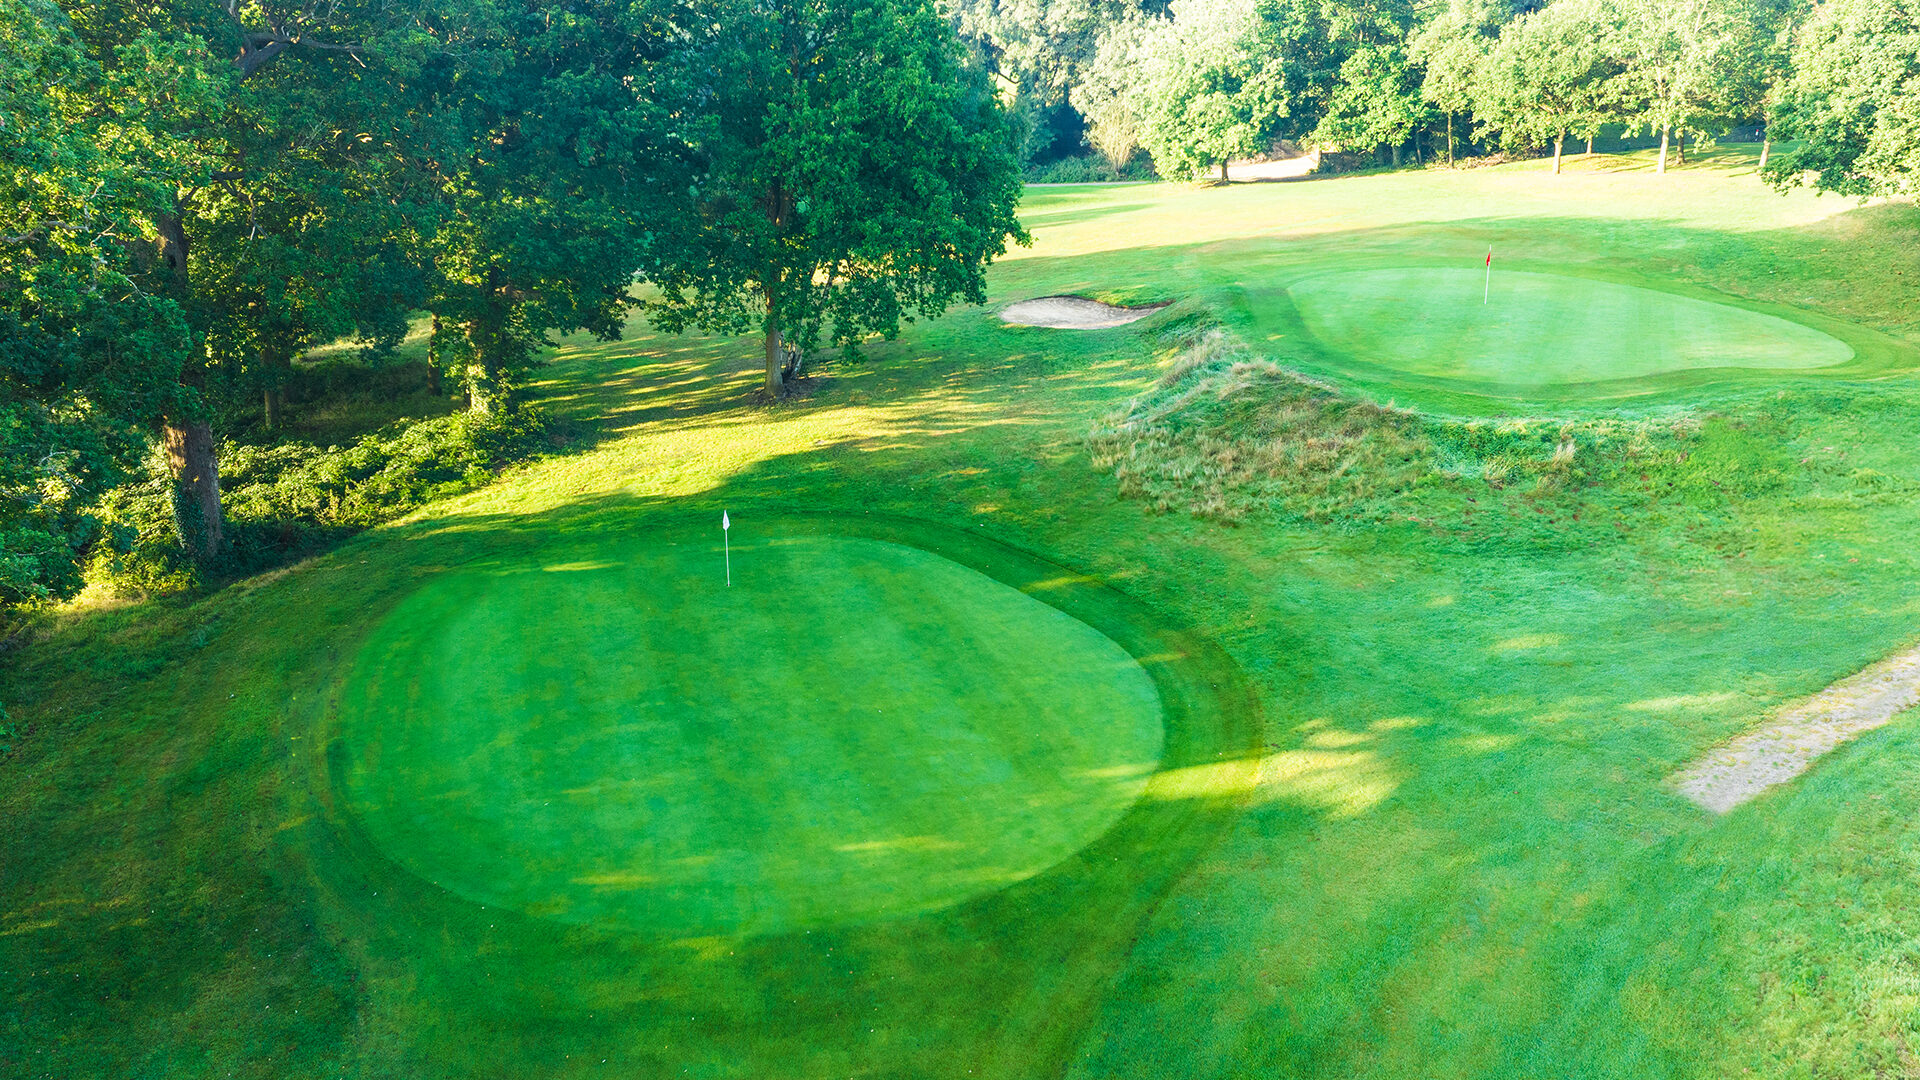
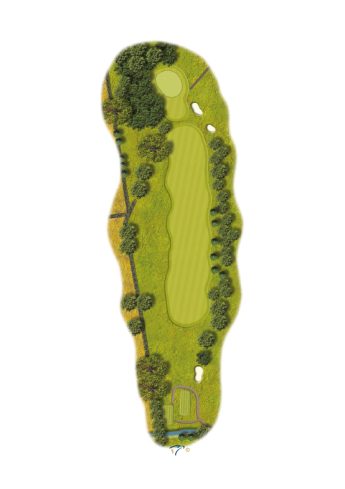
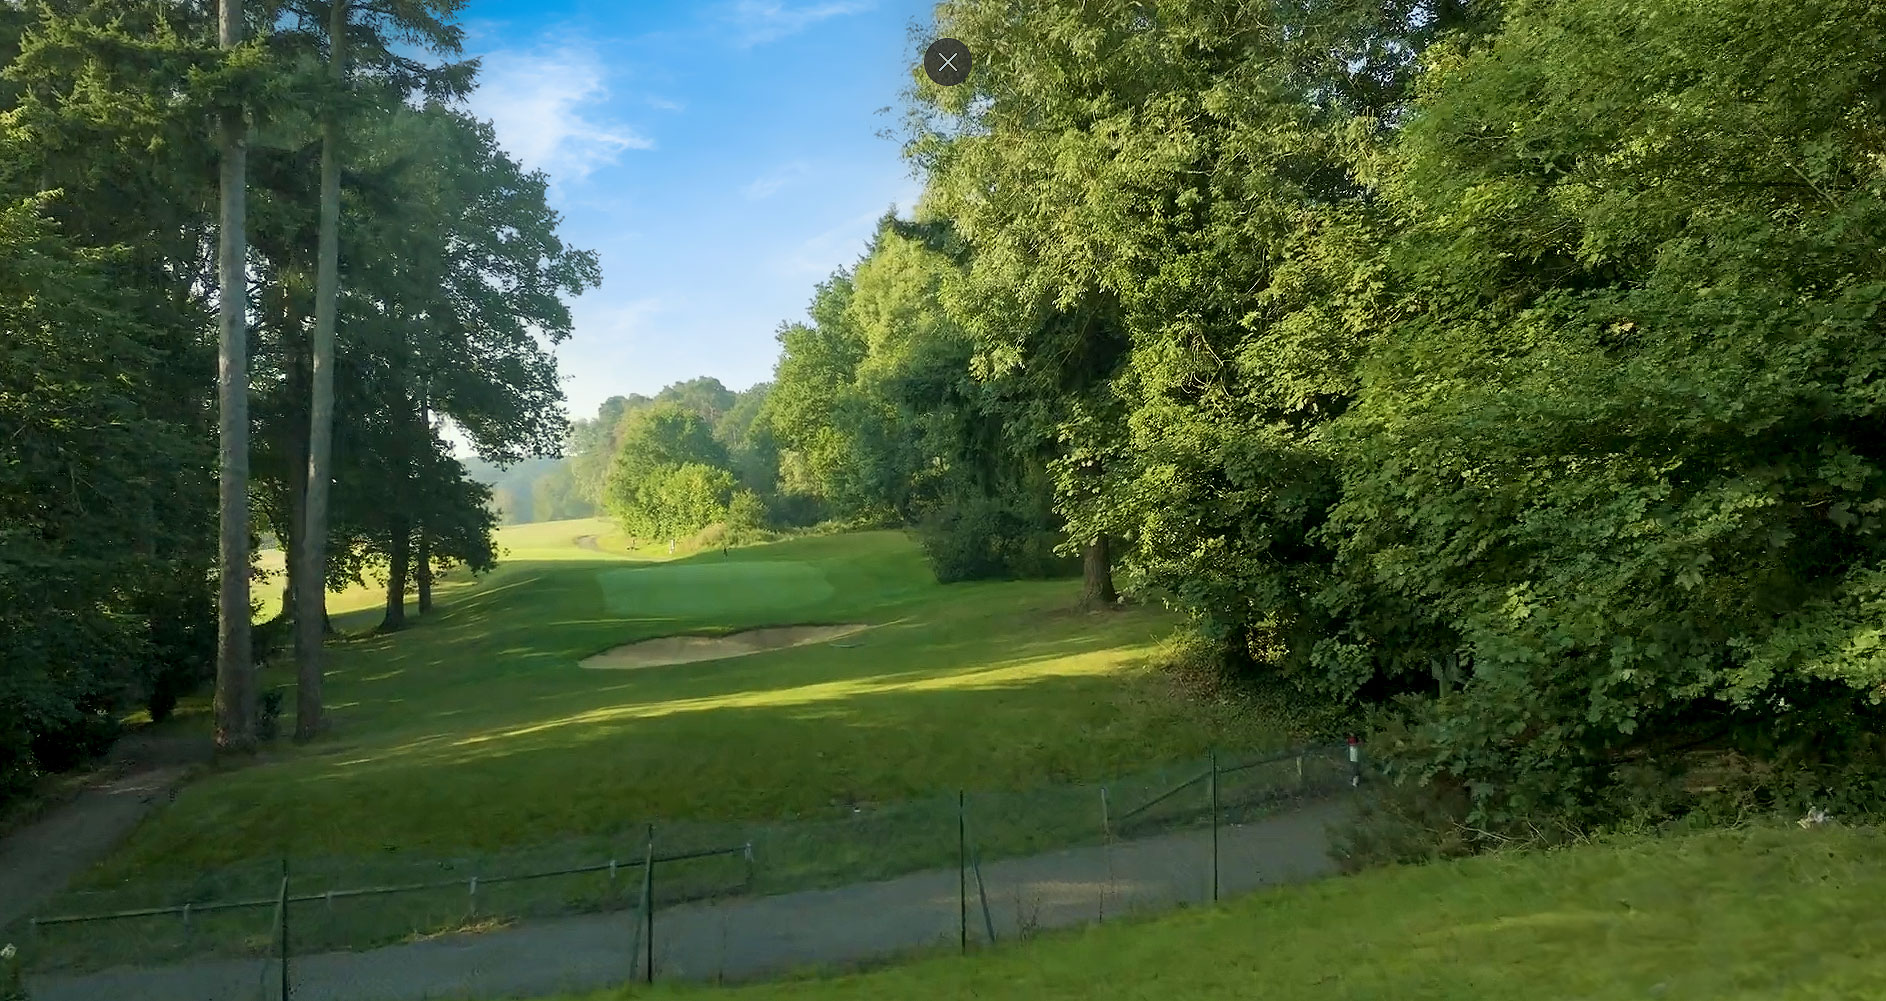
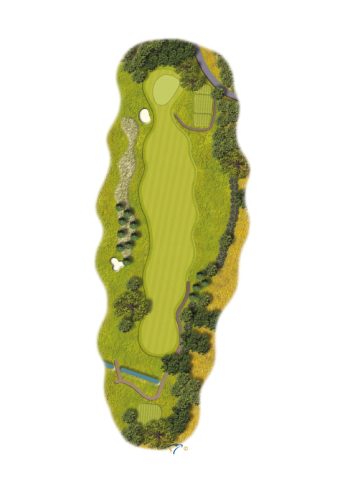
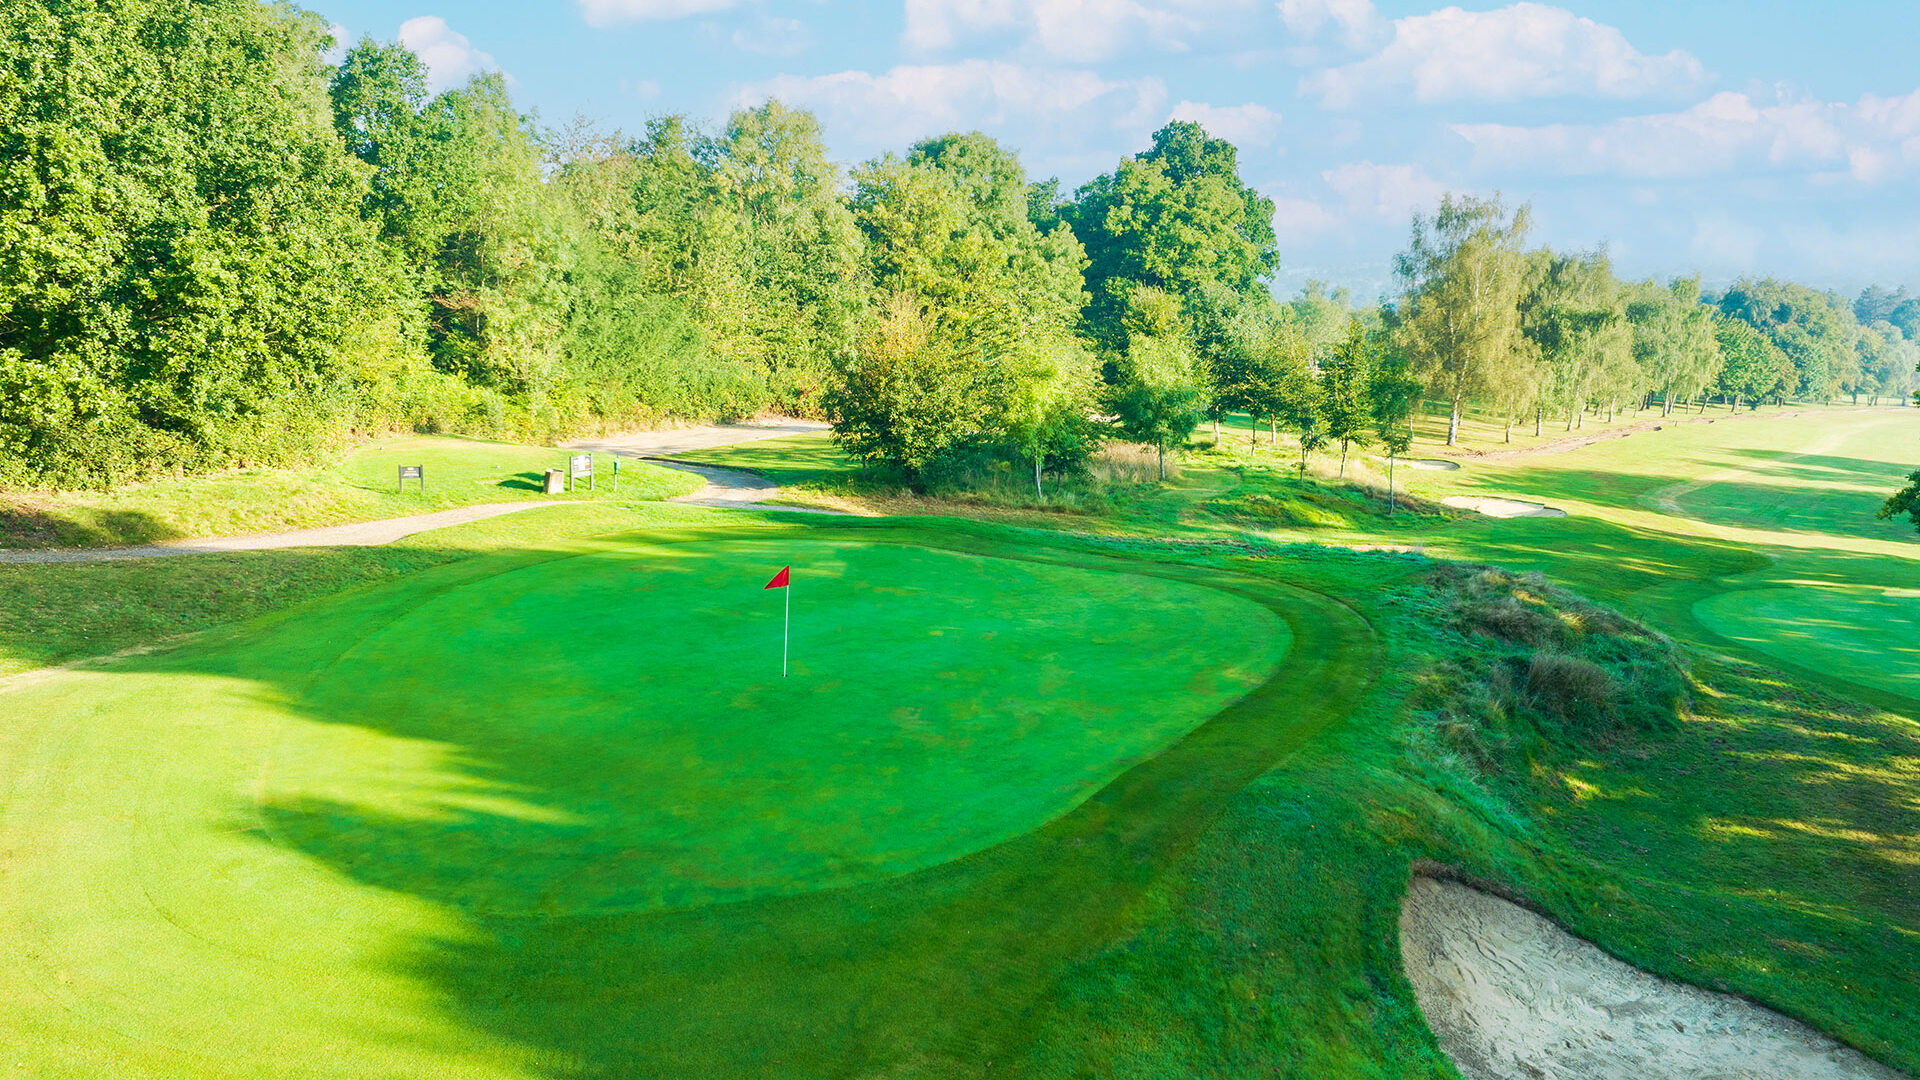
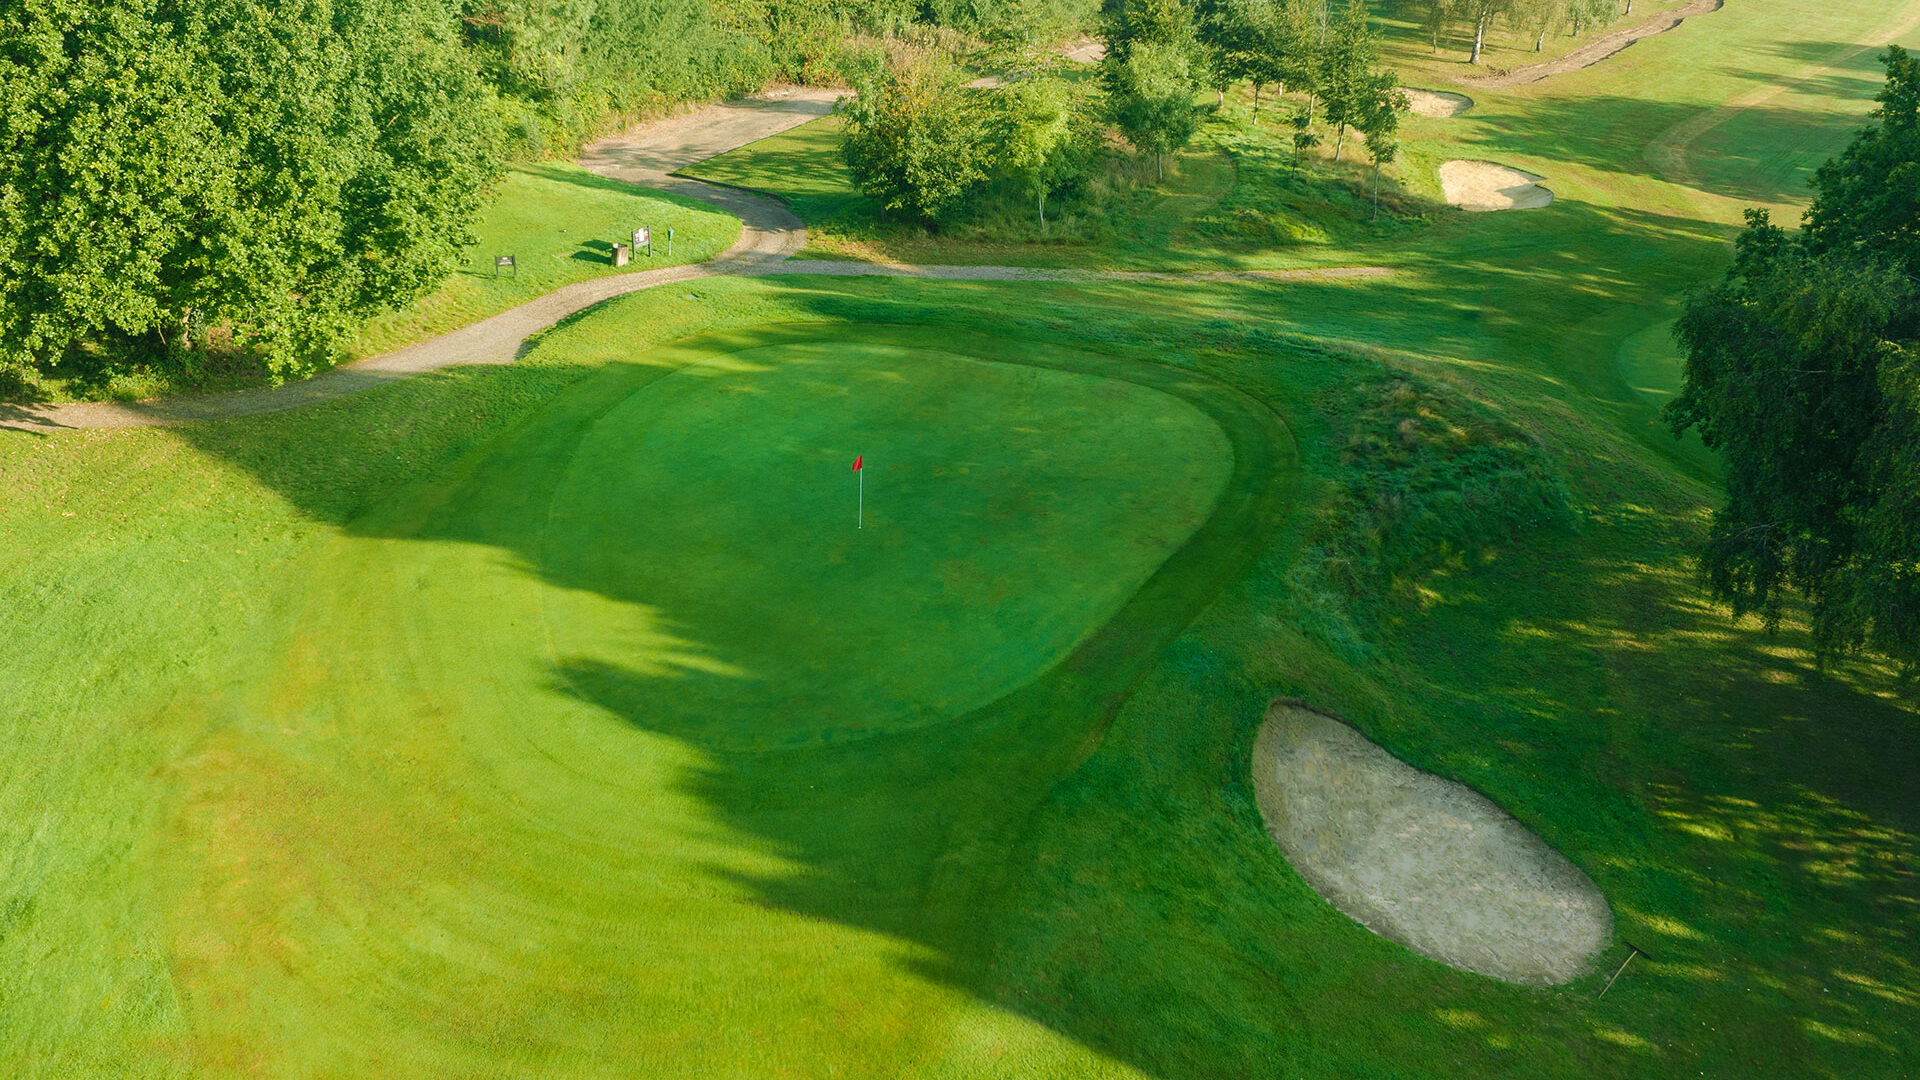
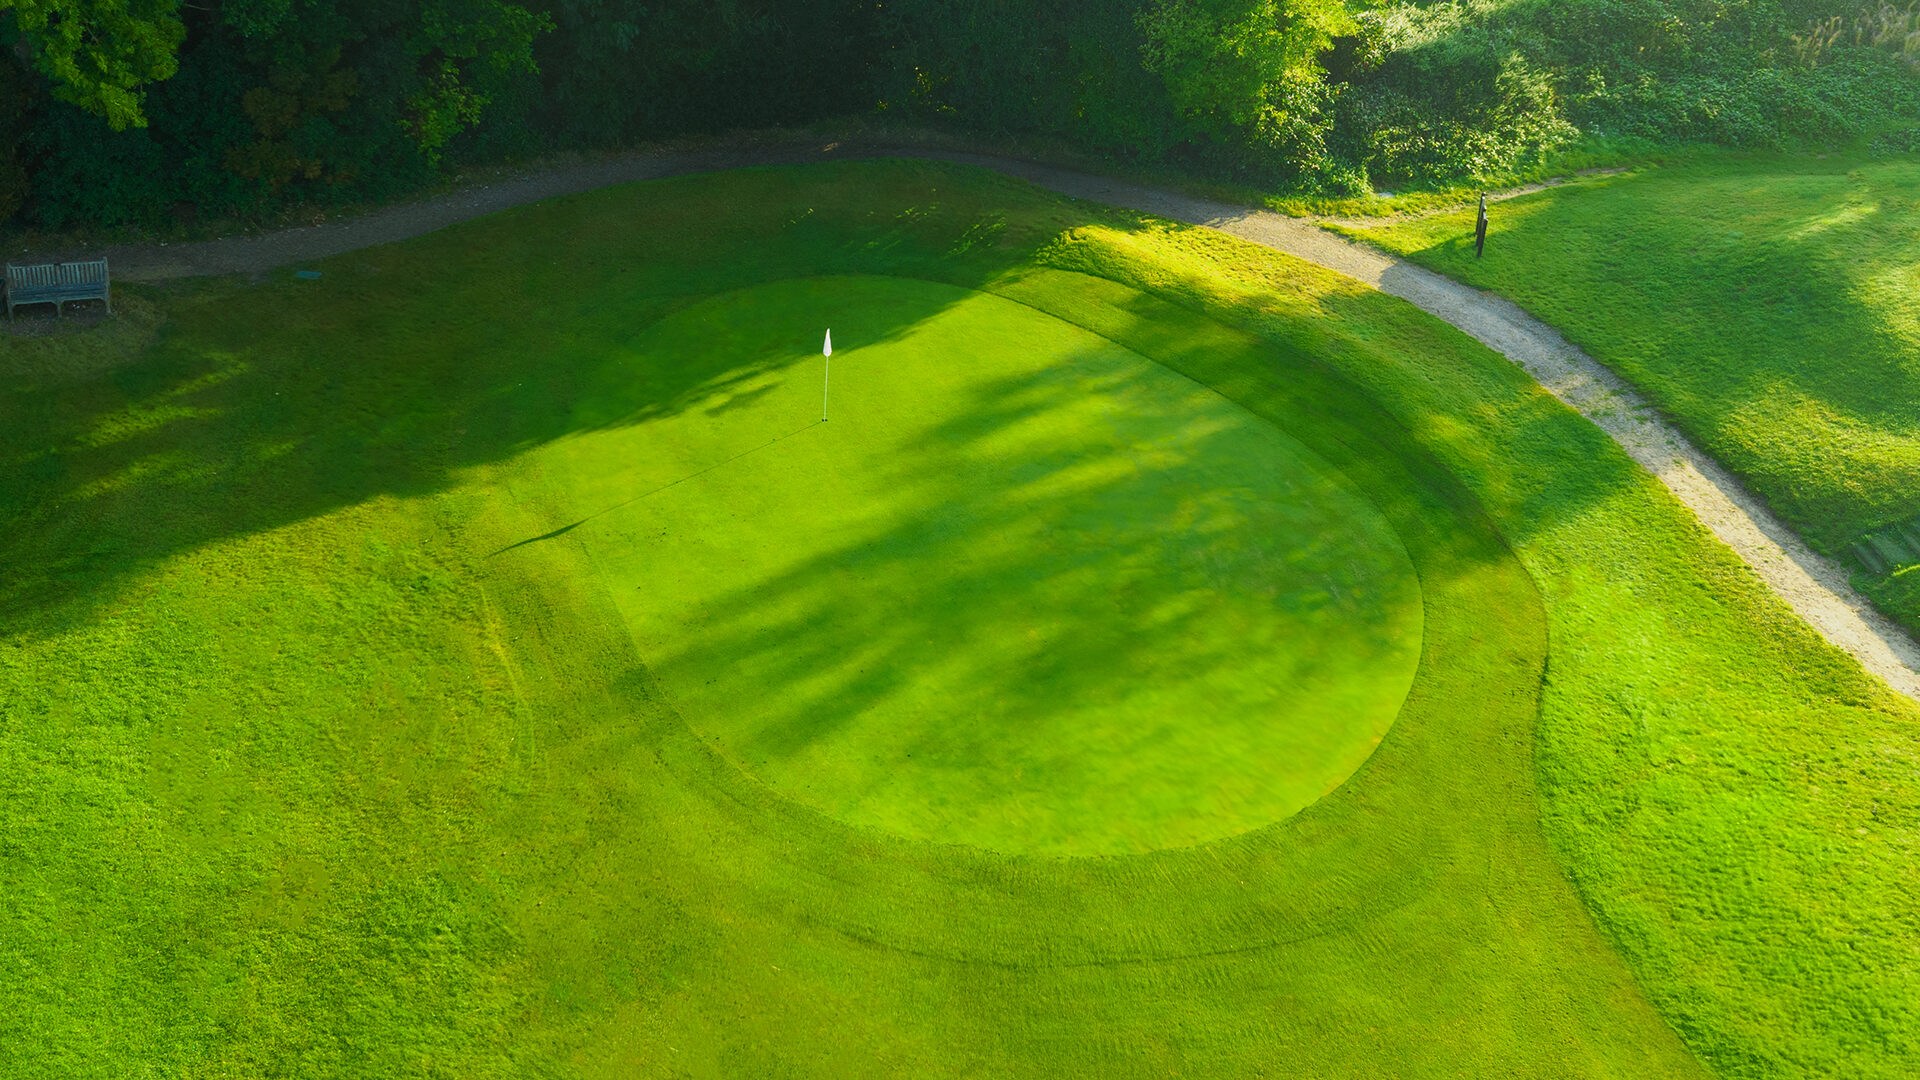
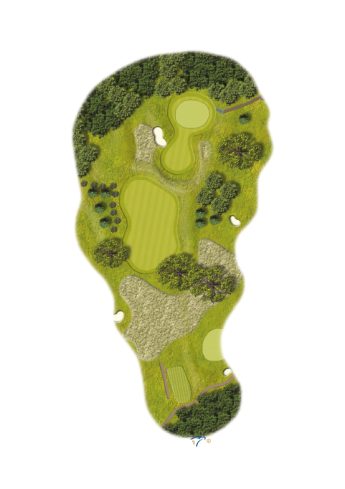
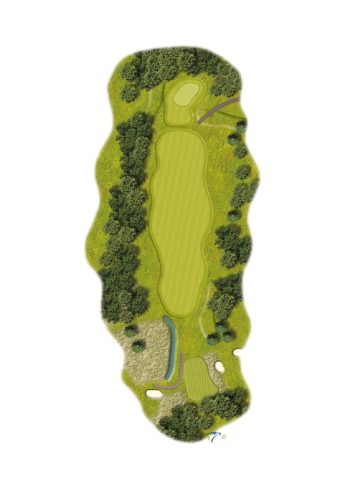
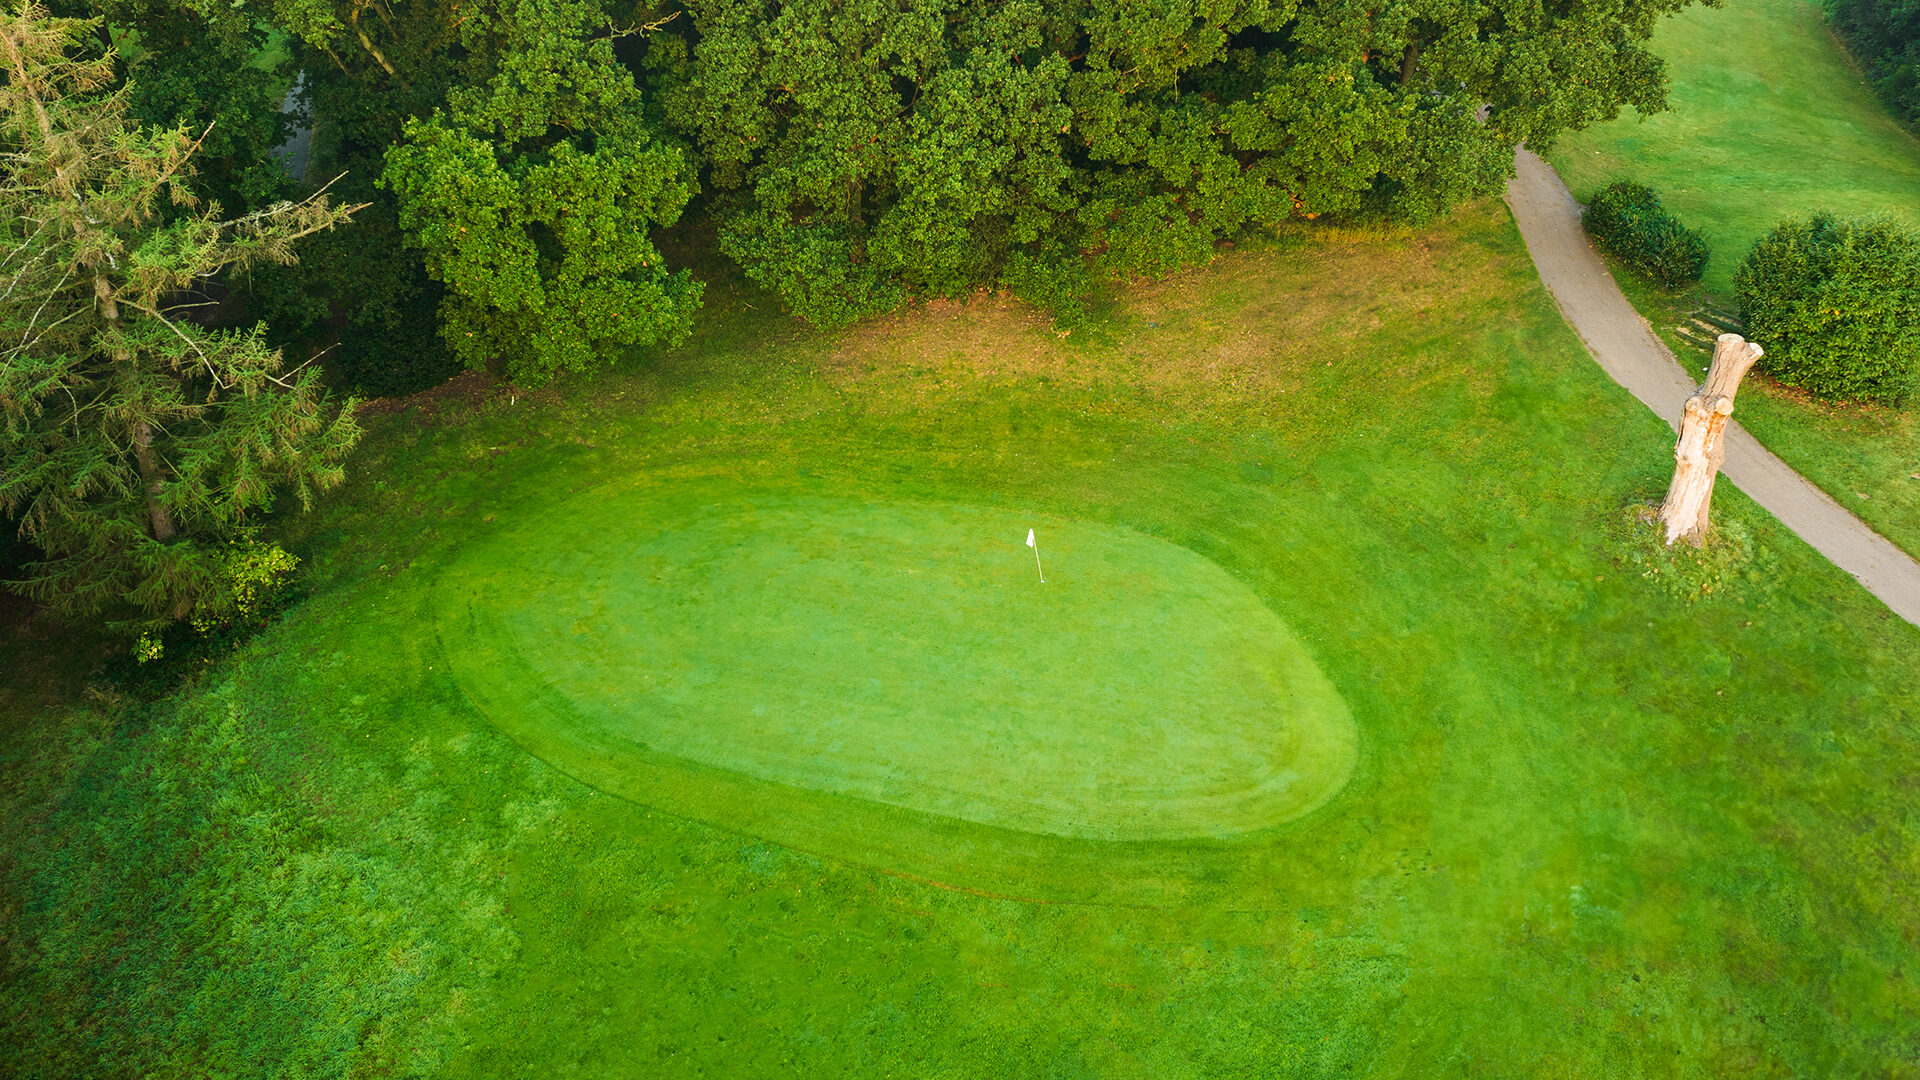
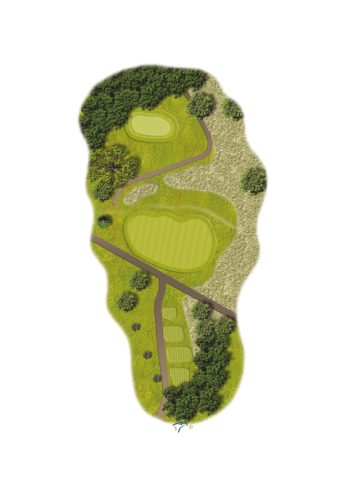
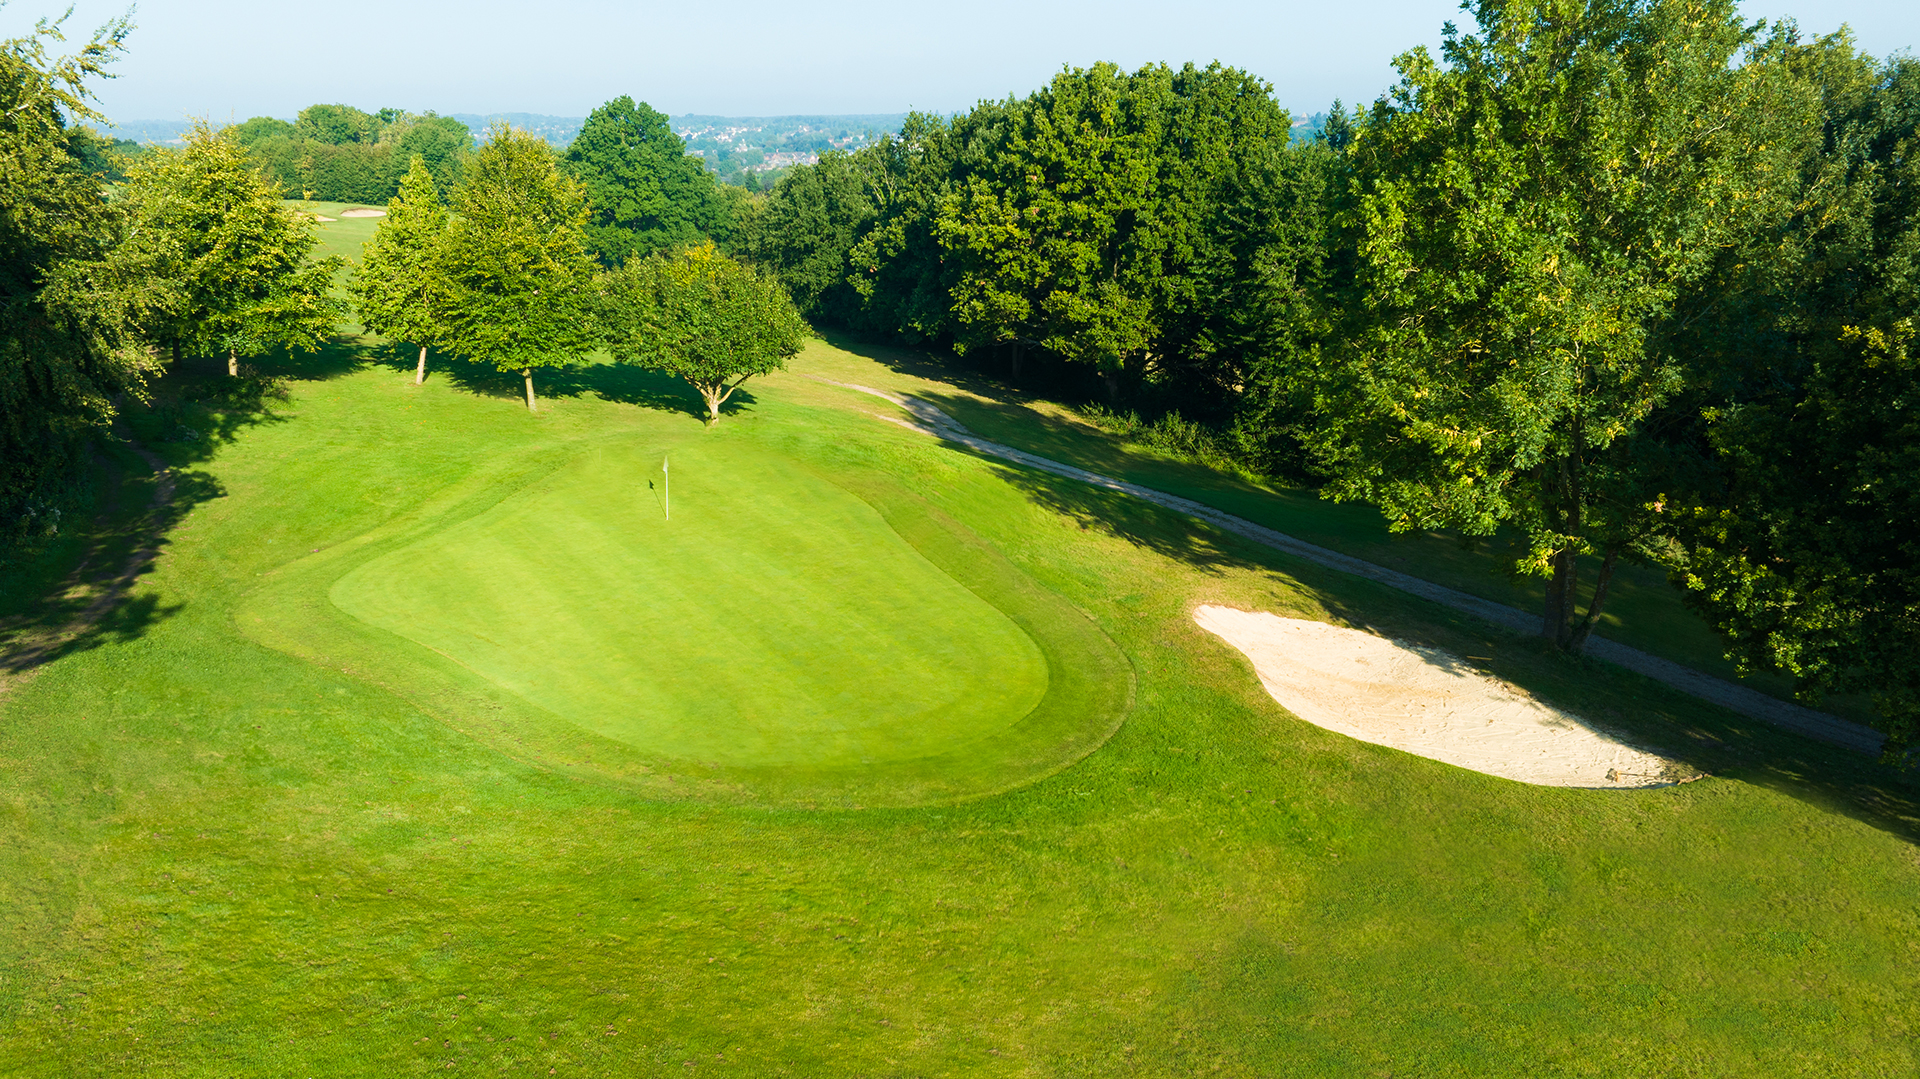
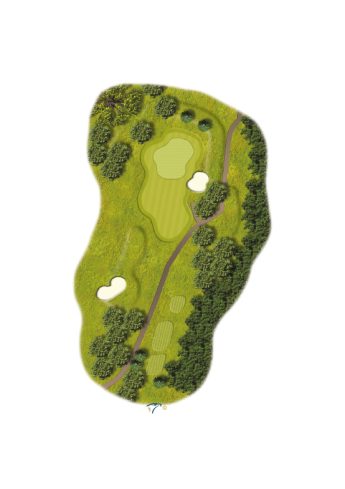
HOLE ONE
PAR 3, YARDS 133, STROKE INDEX 13

1 of 18
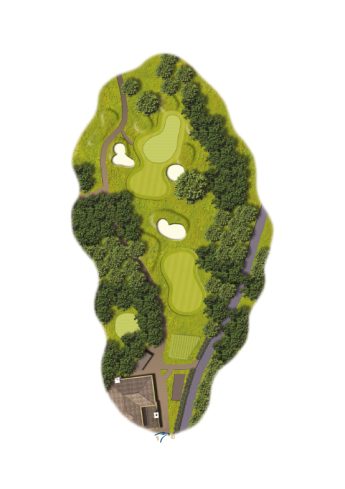
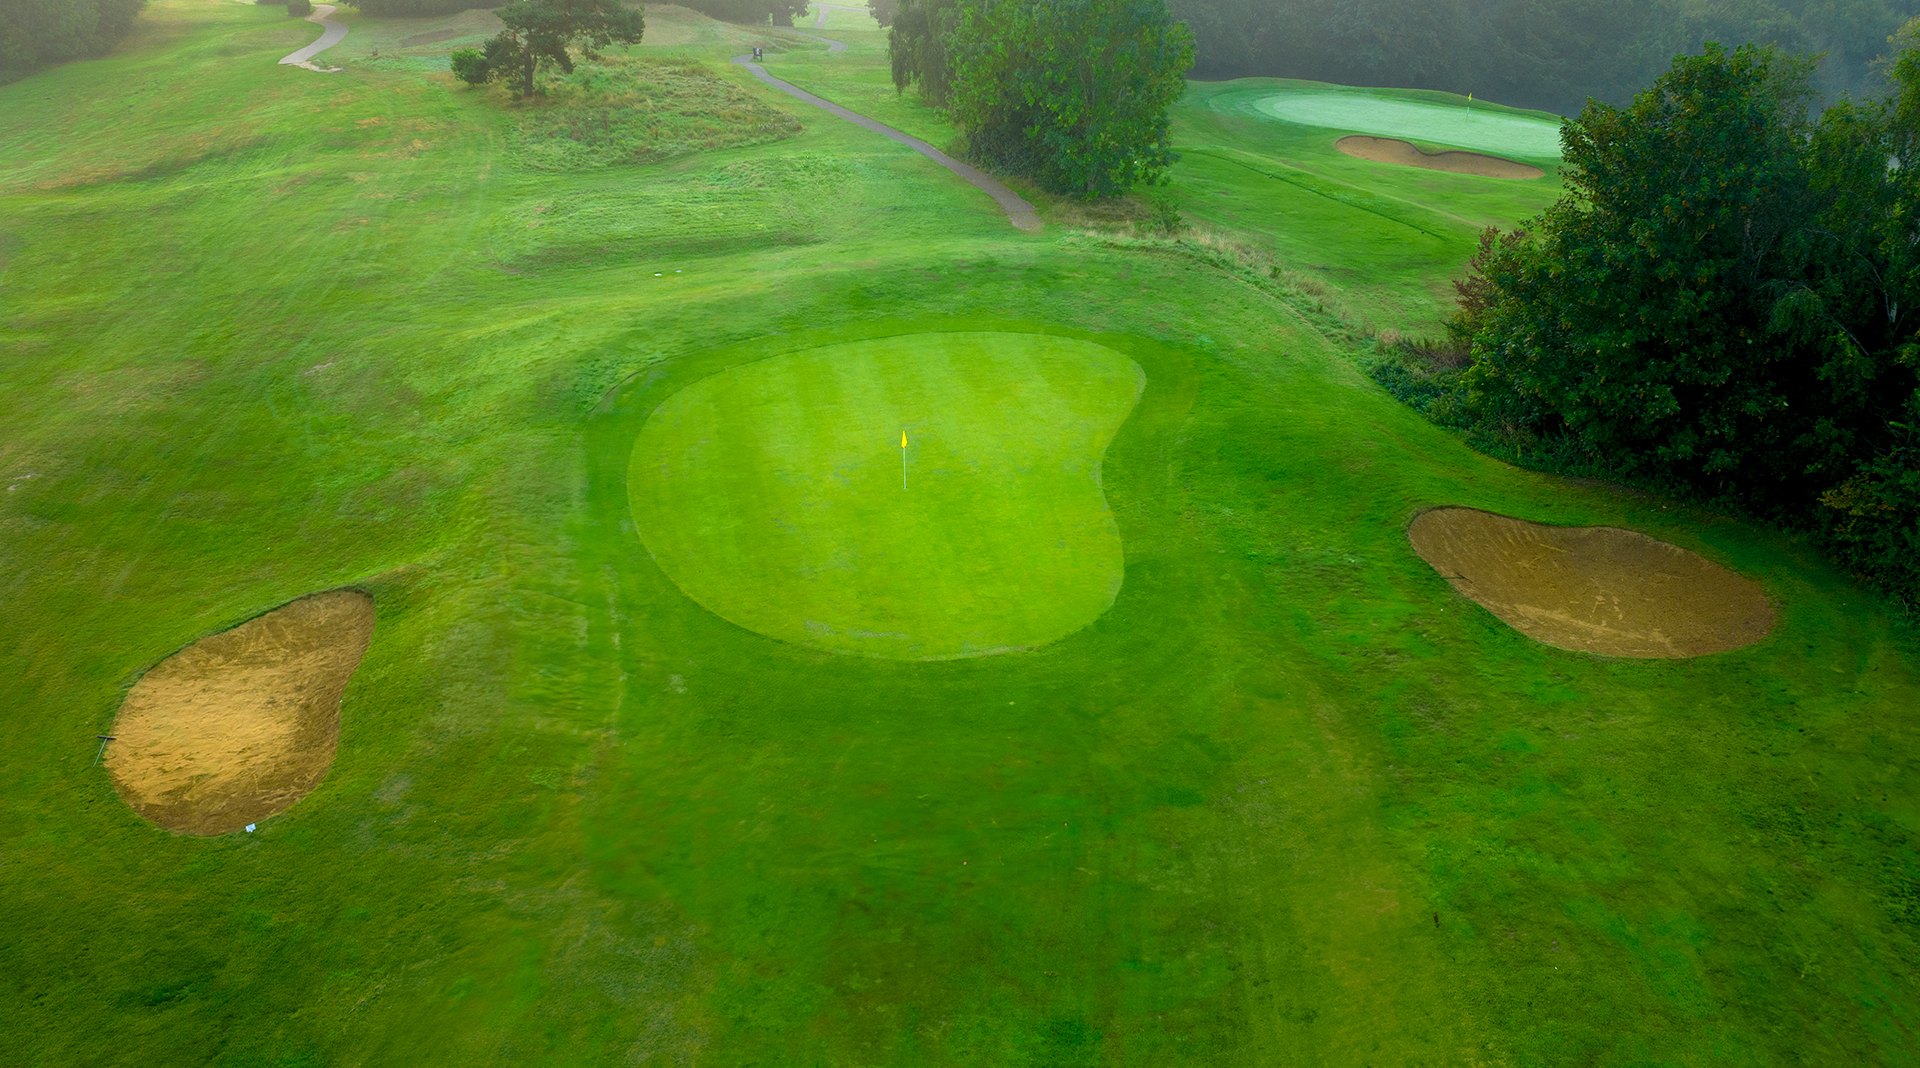
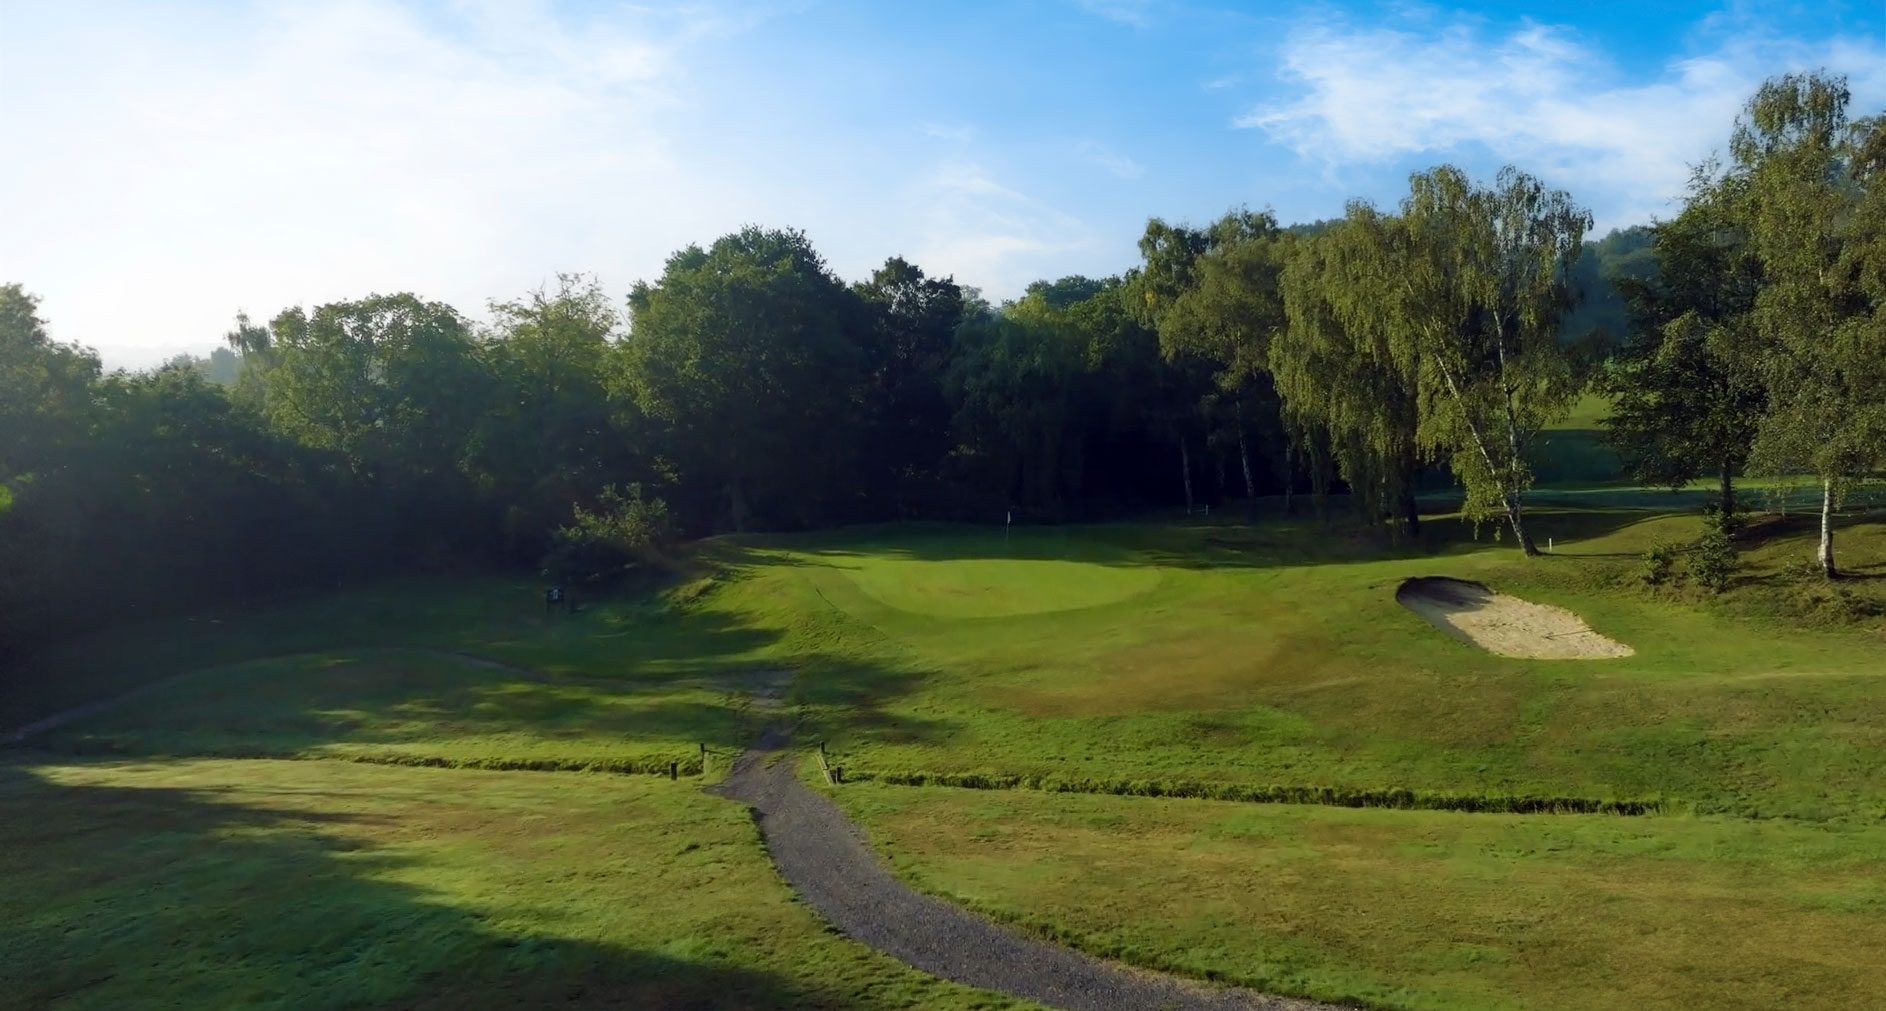
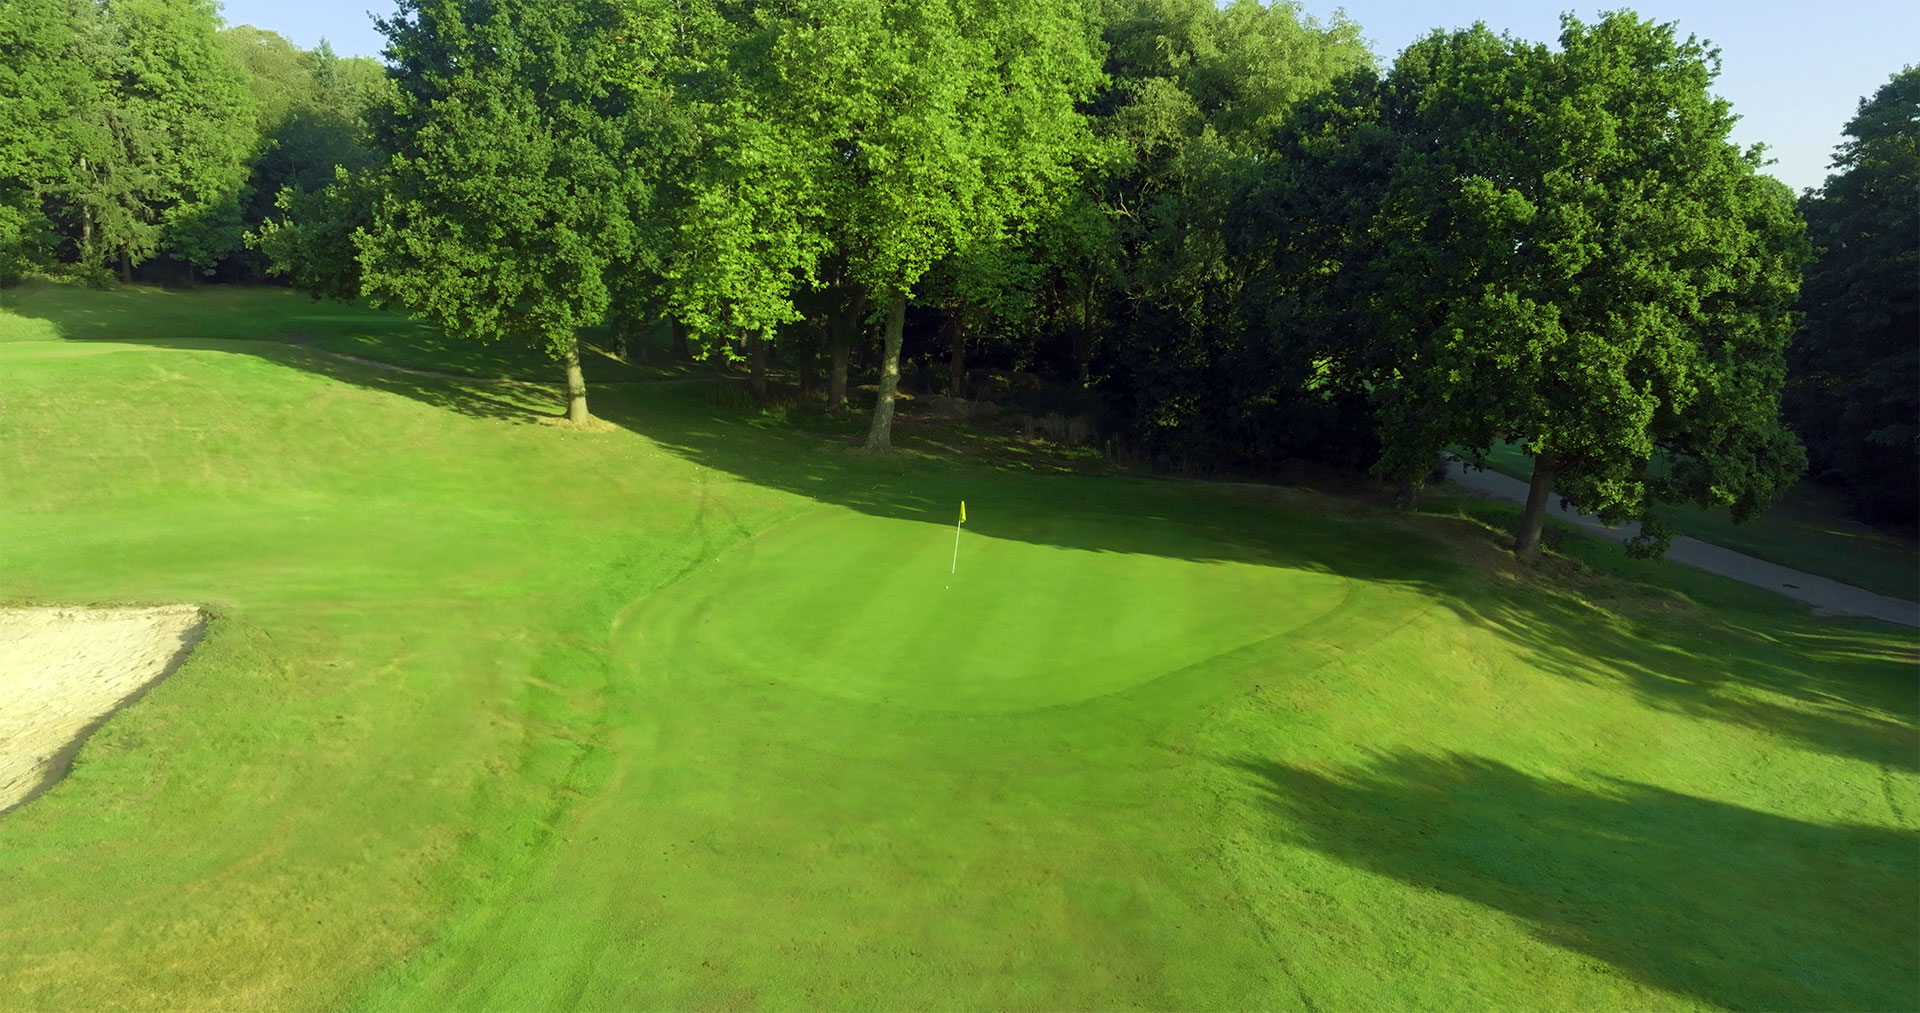
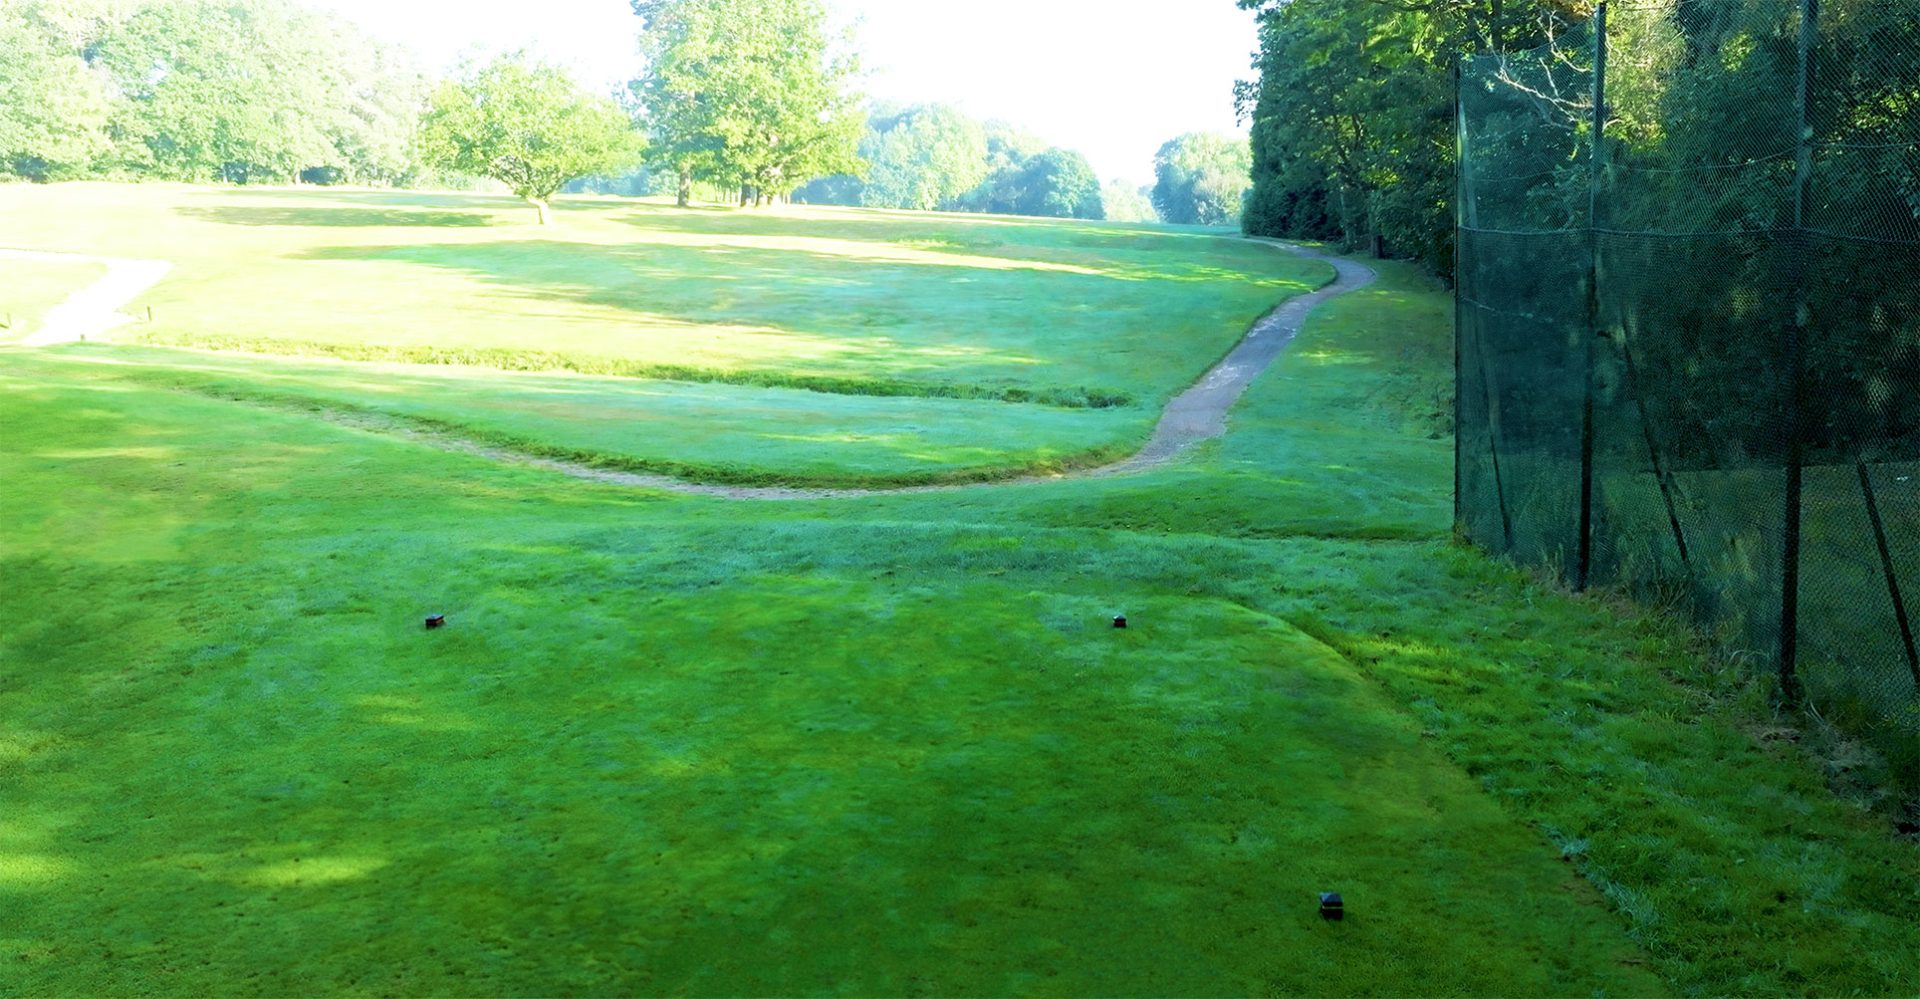
HOLE ONE
We begin with a short par 3 opening hole, that features an elevated green. It’s a well bunkered hole, with a deep one short and to the right of the green.
| PAR | YARDS | STROKE | |
|---|---|---|---|
| White Tee | 3 | 133 | 13 |
| Yellow Tee | 3 | 131 | 13 |
| Red Tee | 3 | 126 | 13 |
PRO TIP
Hit this one with plenty of club. Don’t let the yardage fool you, it’s best not to be short. Hole Sponsored by

2 of 18
| PAR | YARDS | STROKE | |
|---|---|---|---|
| White Tee | 5 | 485 | 5 |
| Yellow Tee | 5 | 473 | 5 |
| Red Tee | 5 | 439 | 3 |
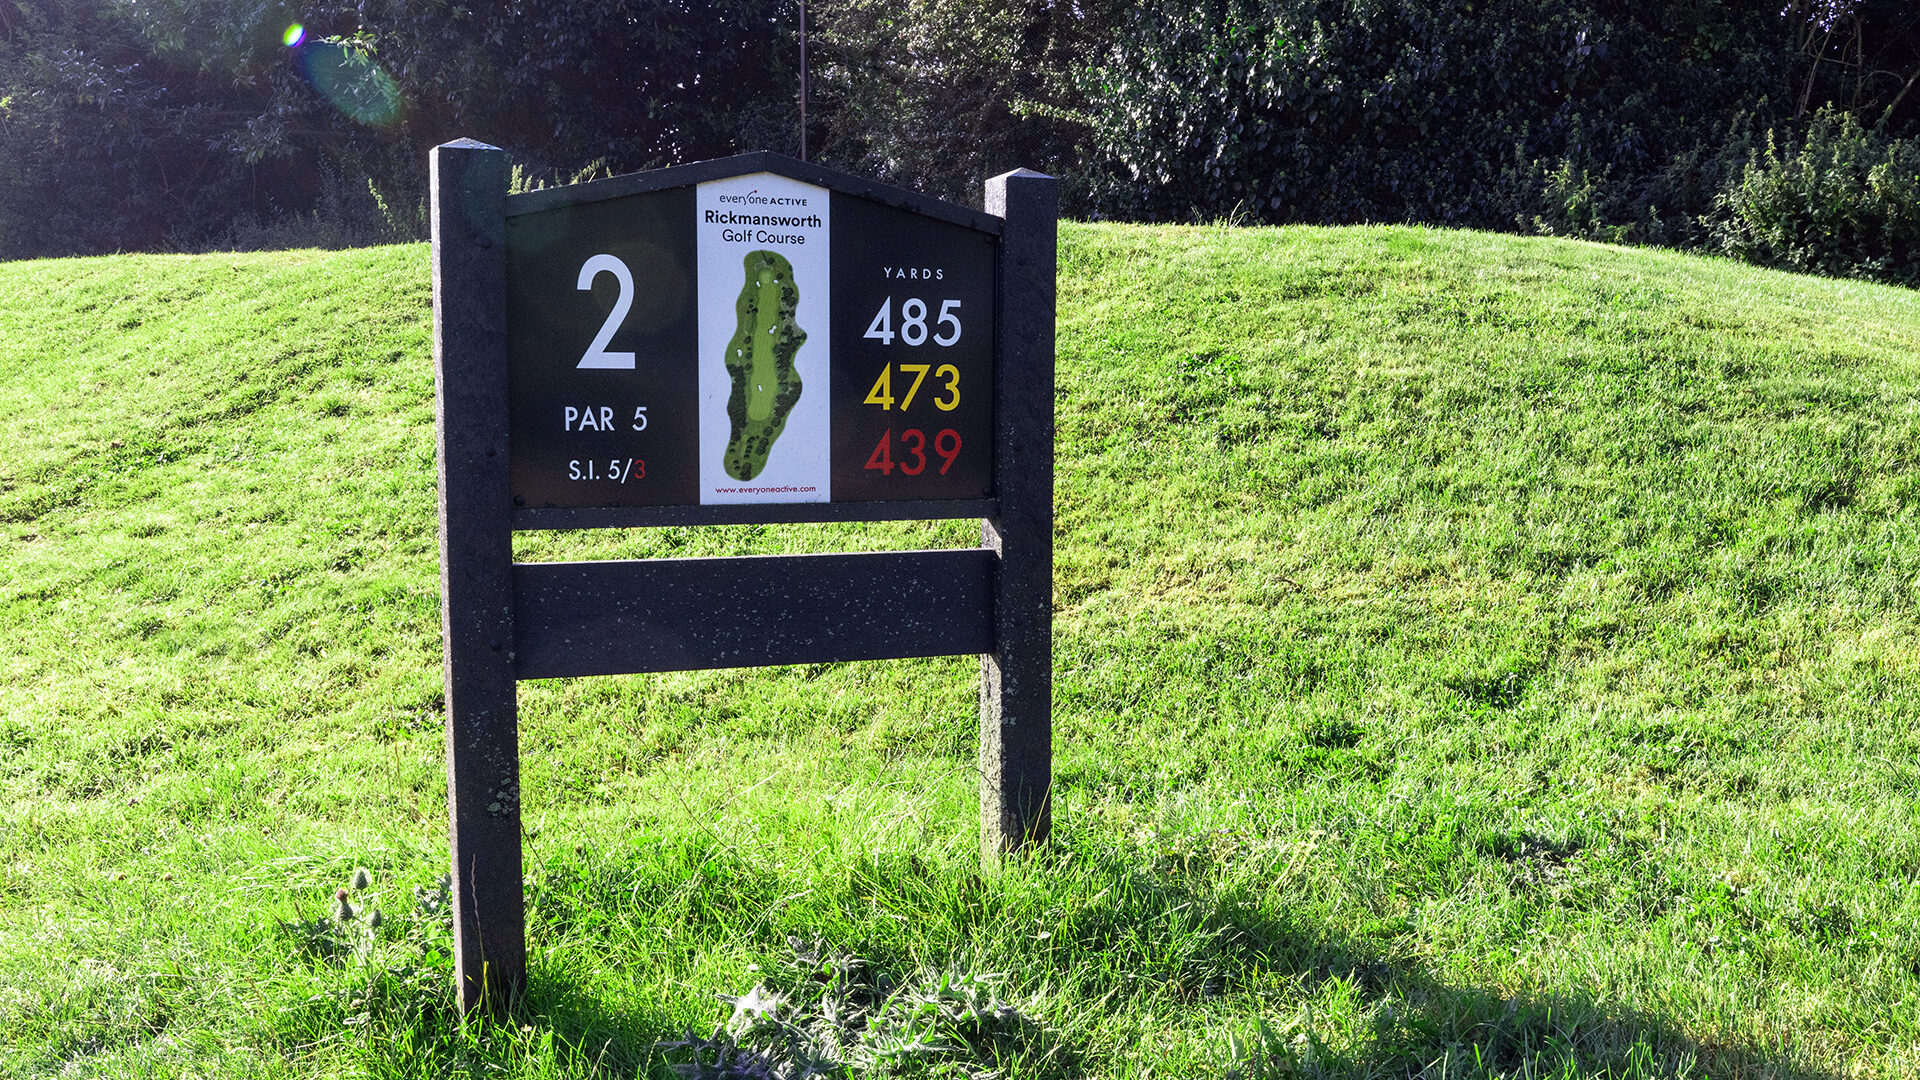
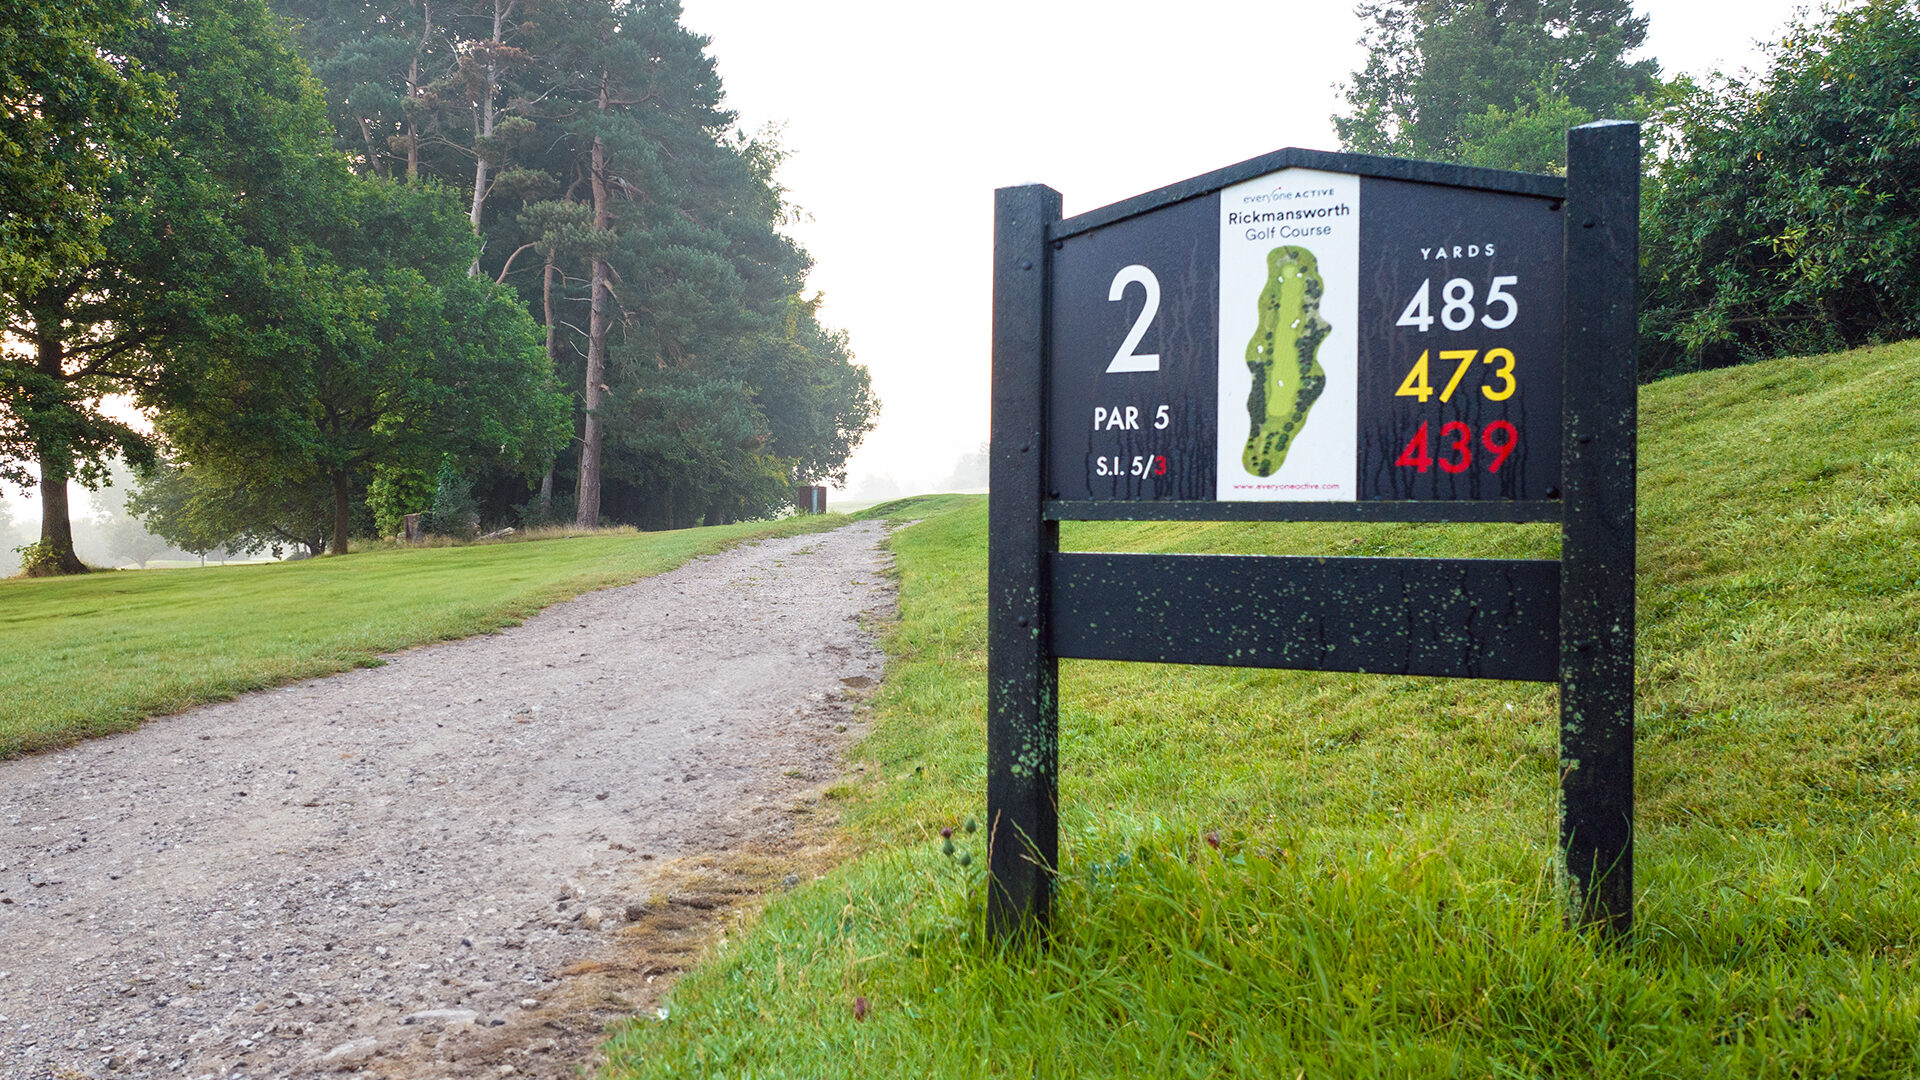
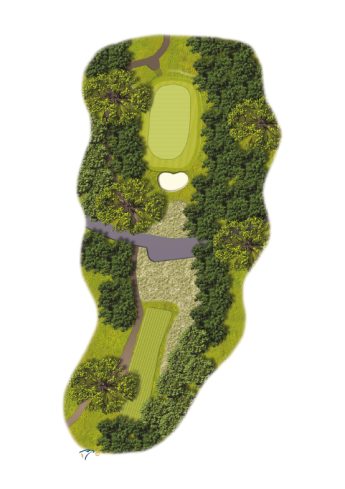
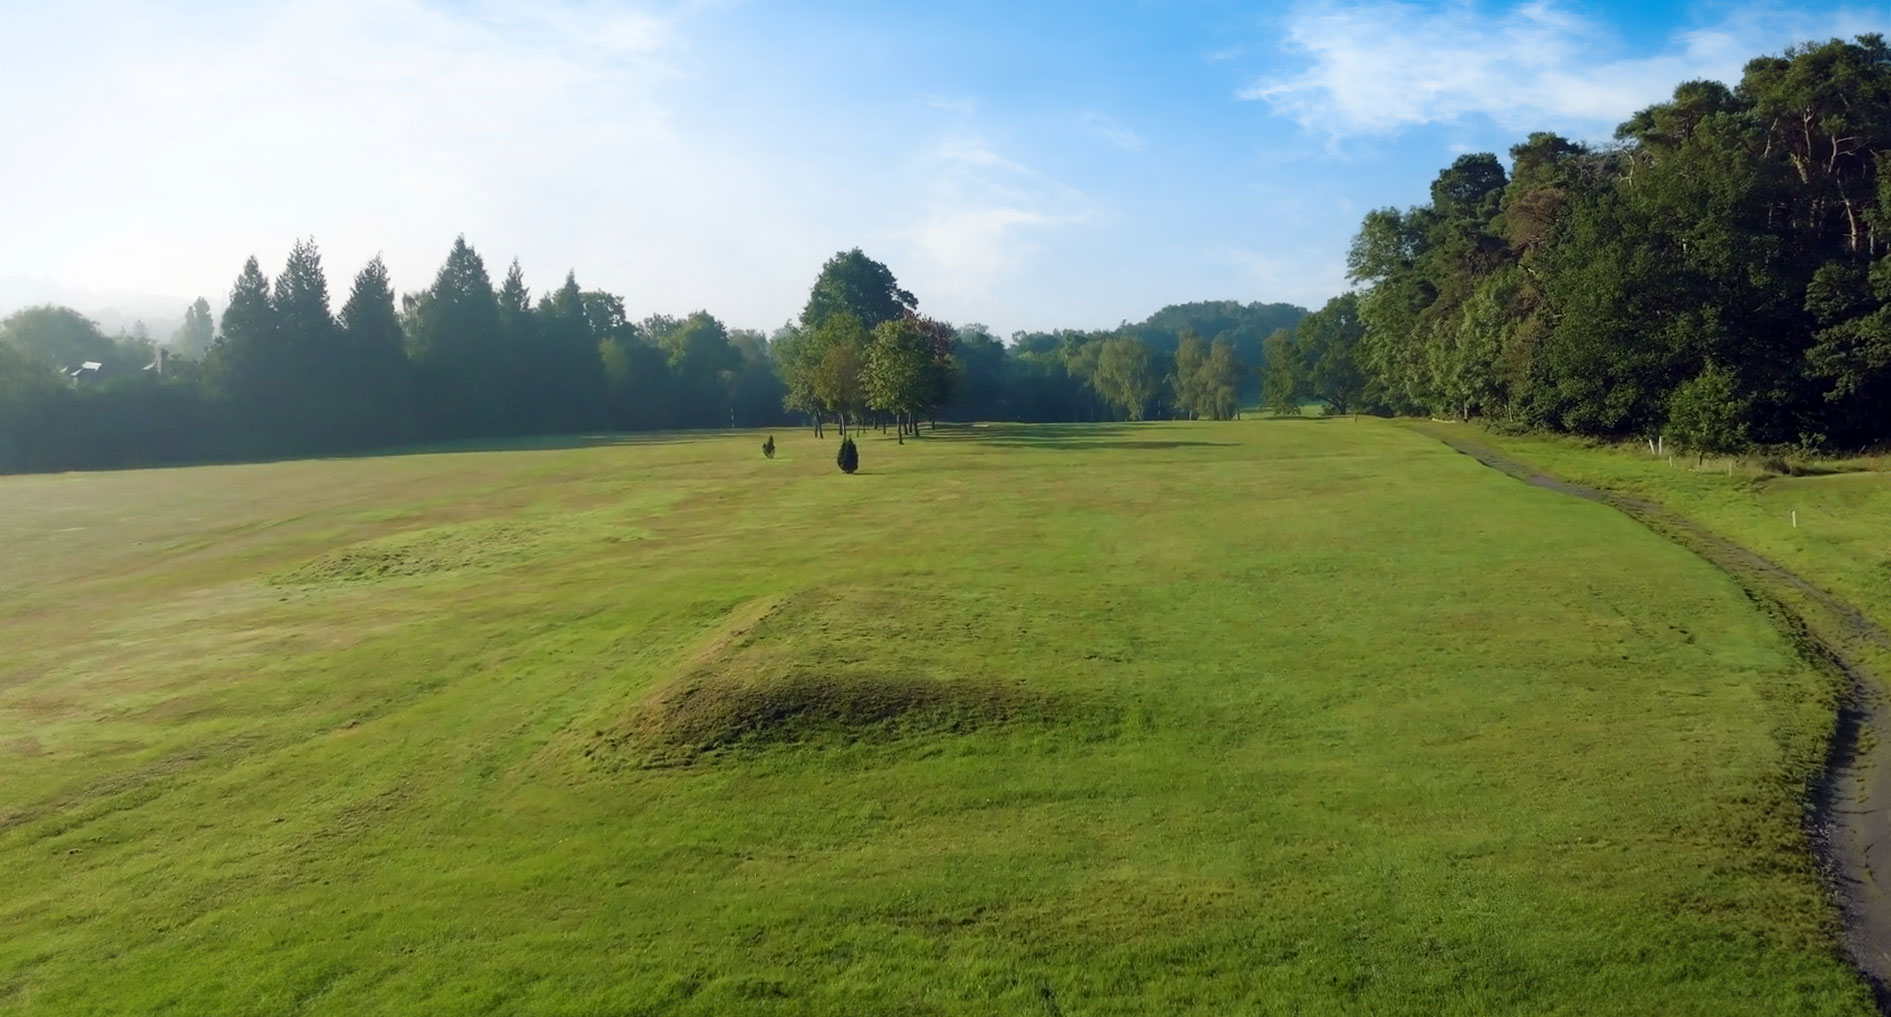
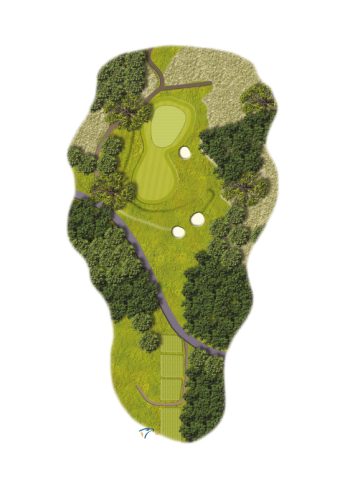
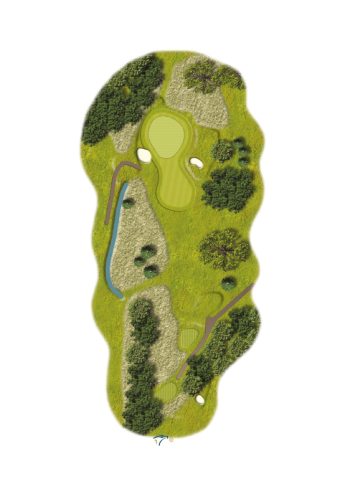
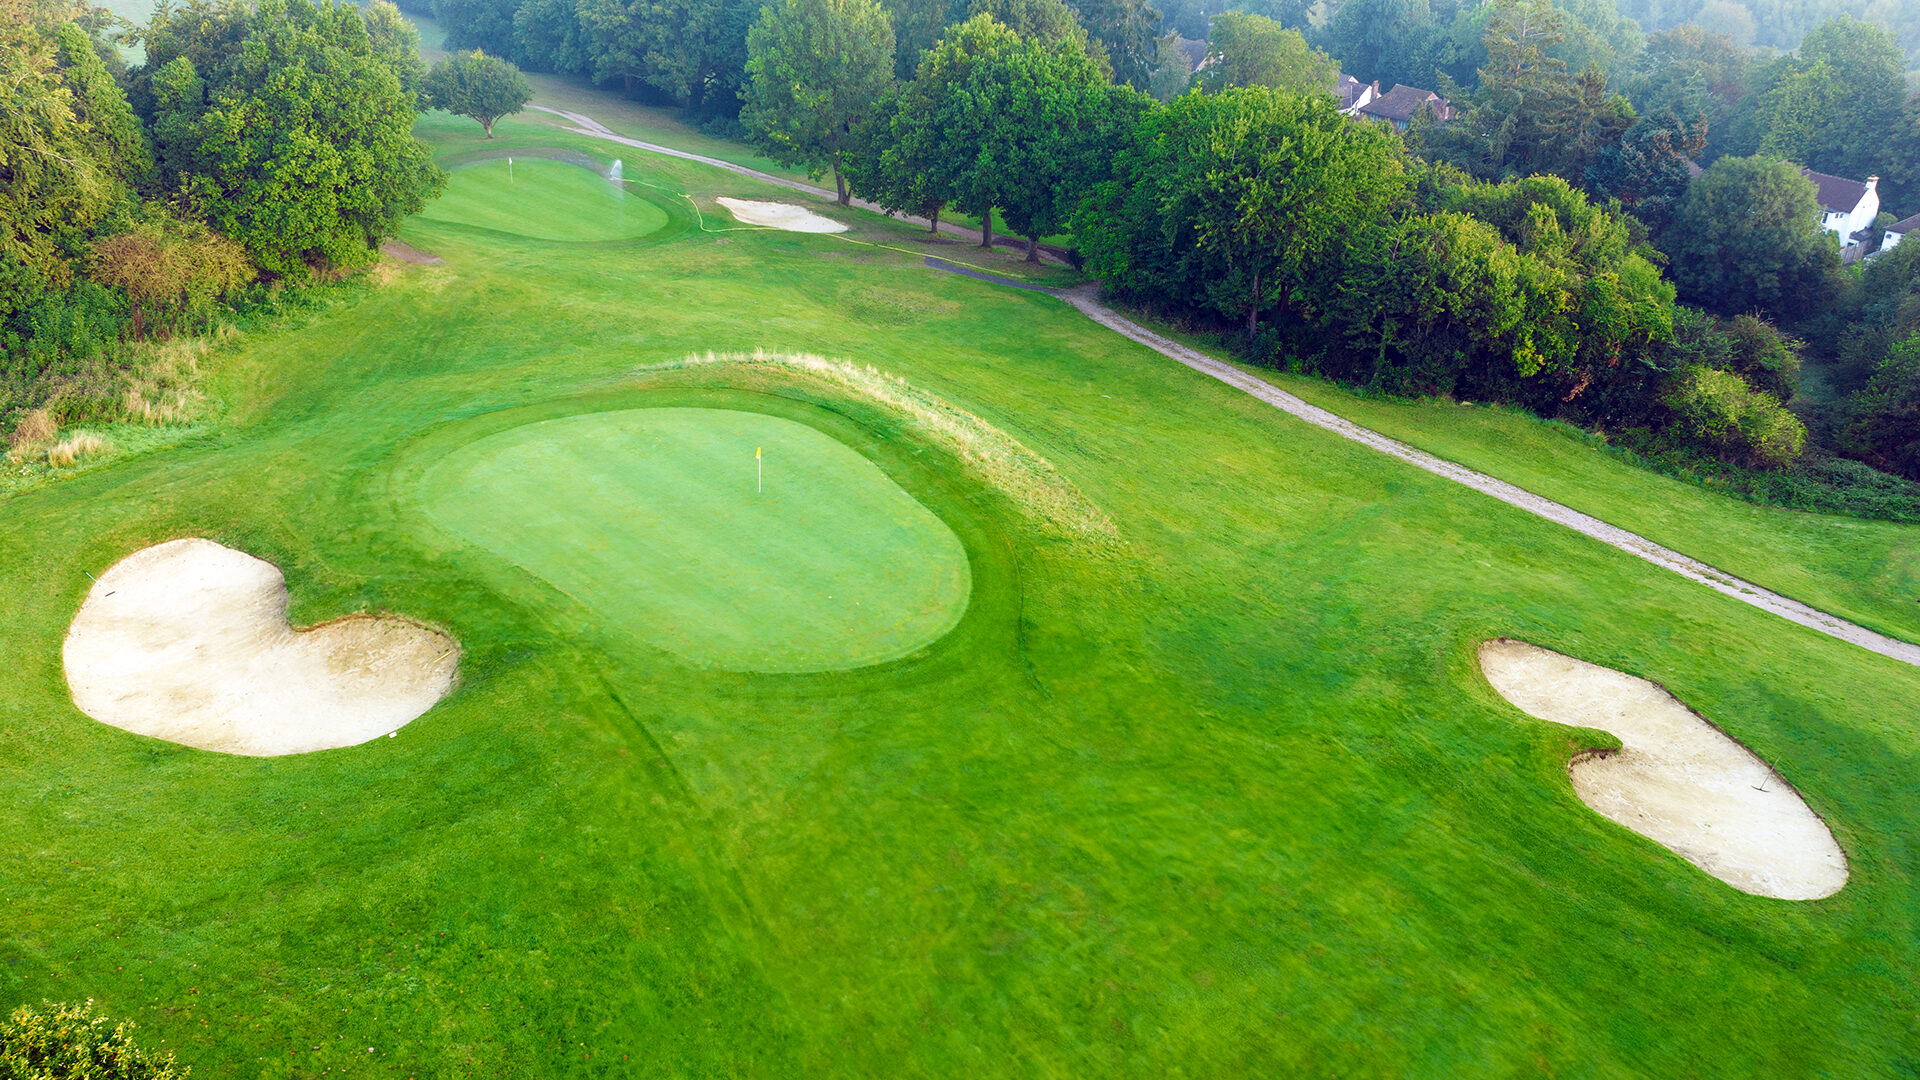
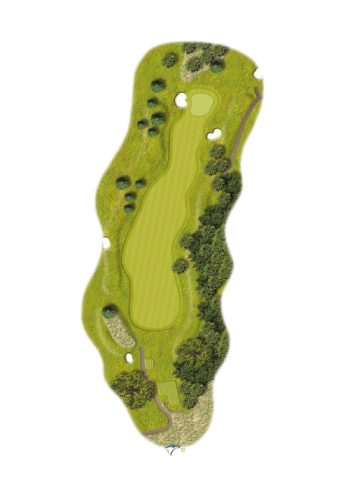
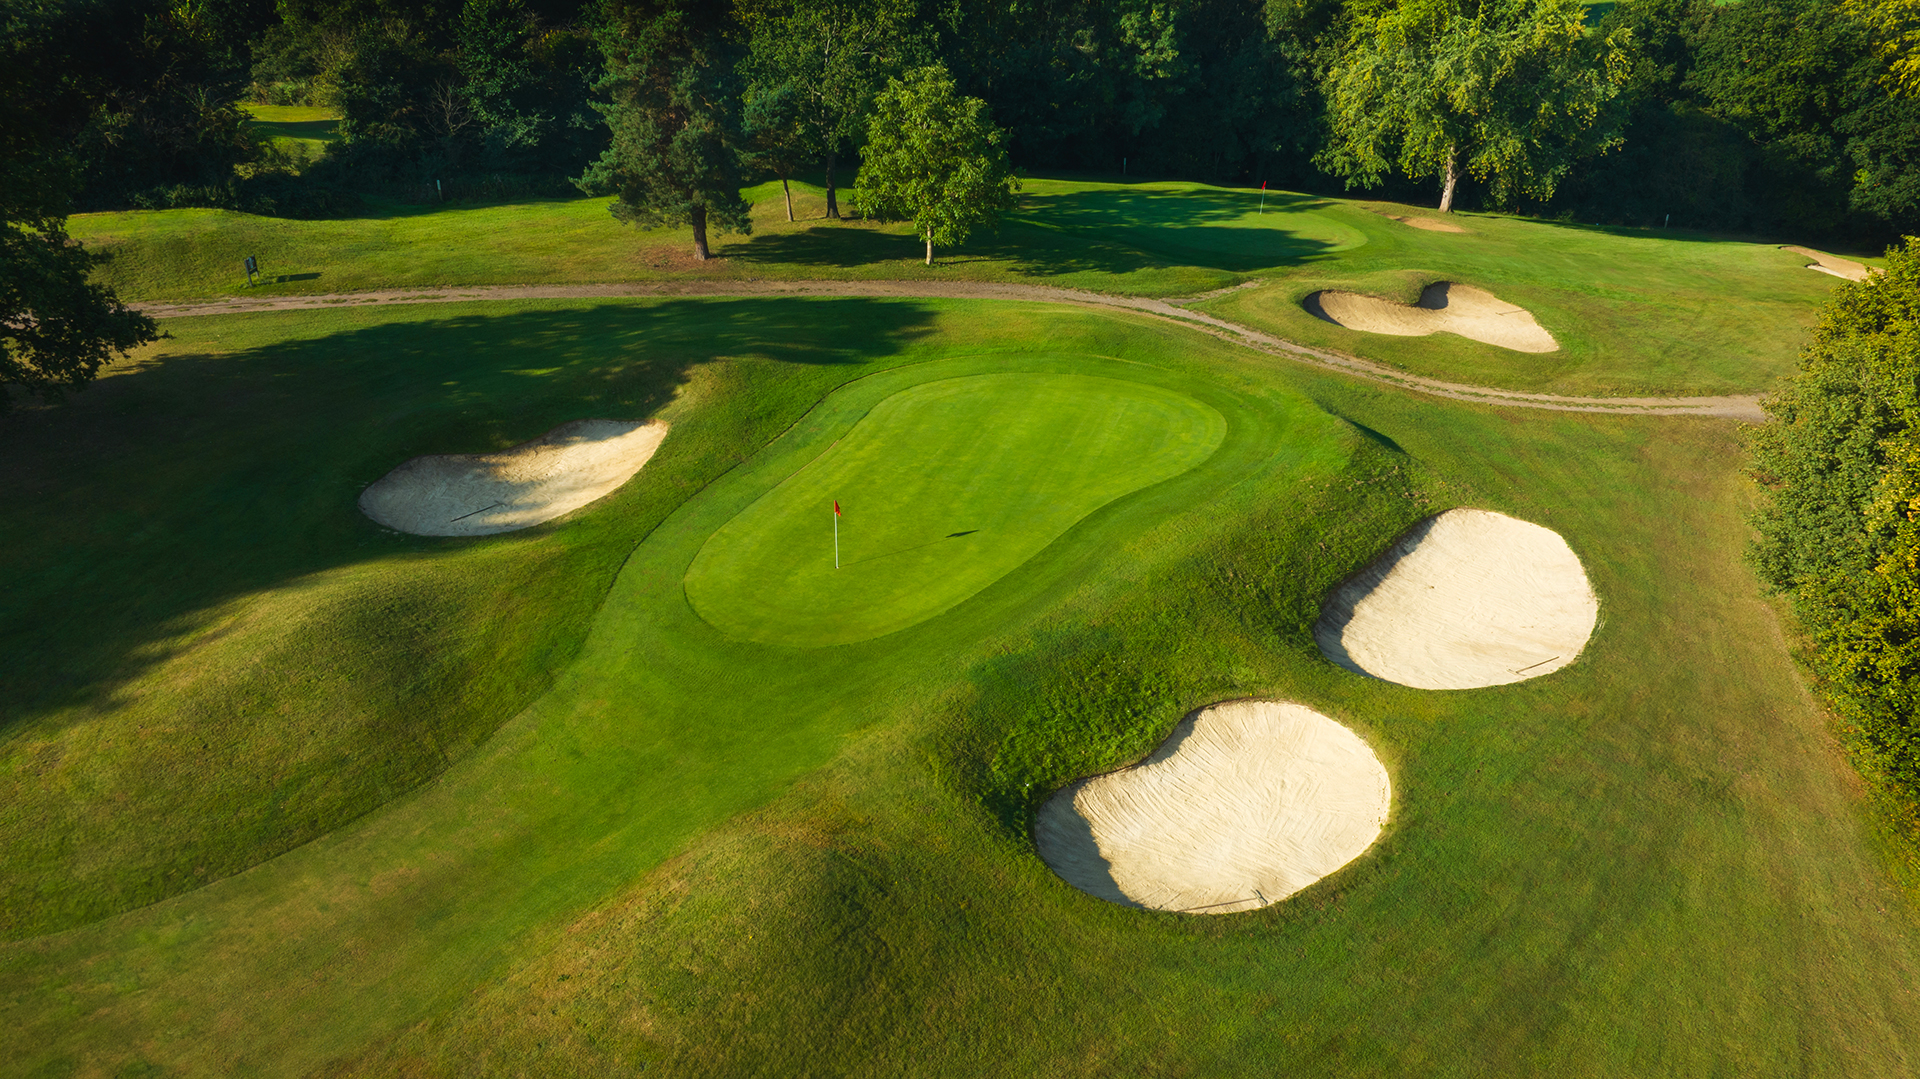
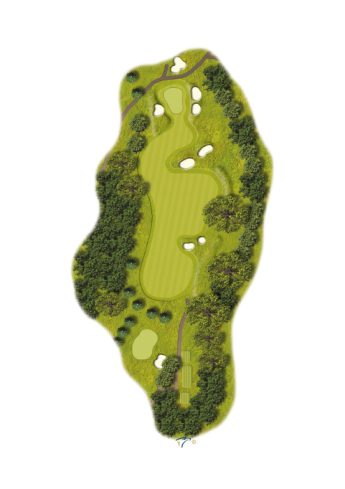
HOLE TWO
PAR 5, YARDS 485, STROKE INDEX 5
2 of 18
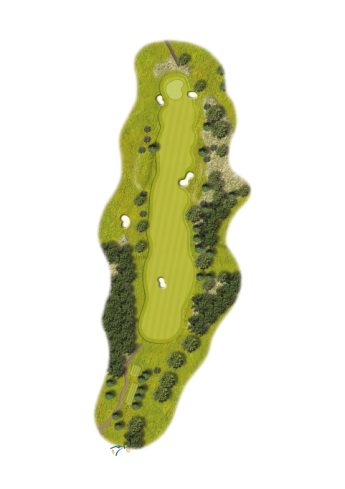
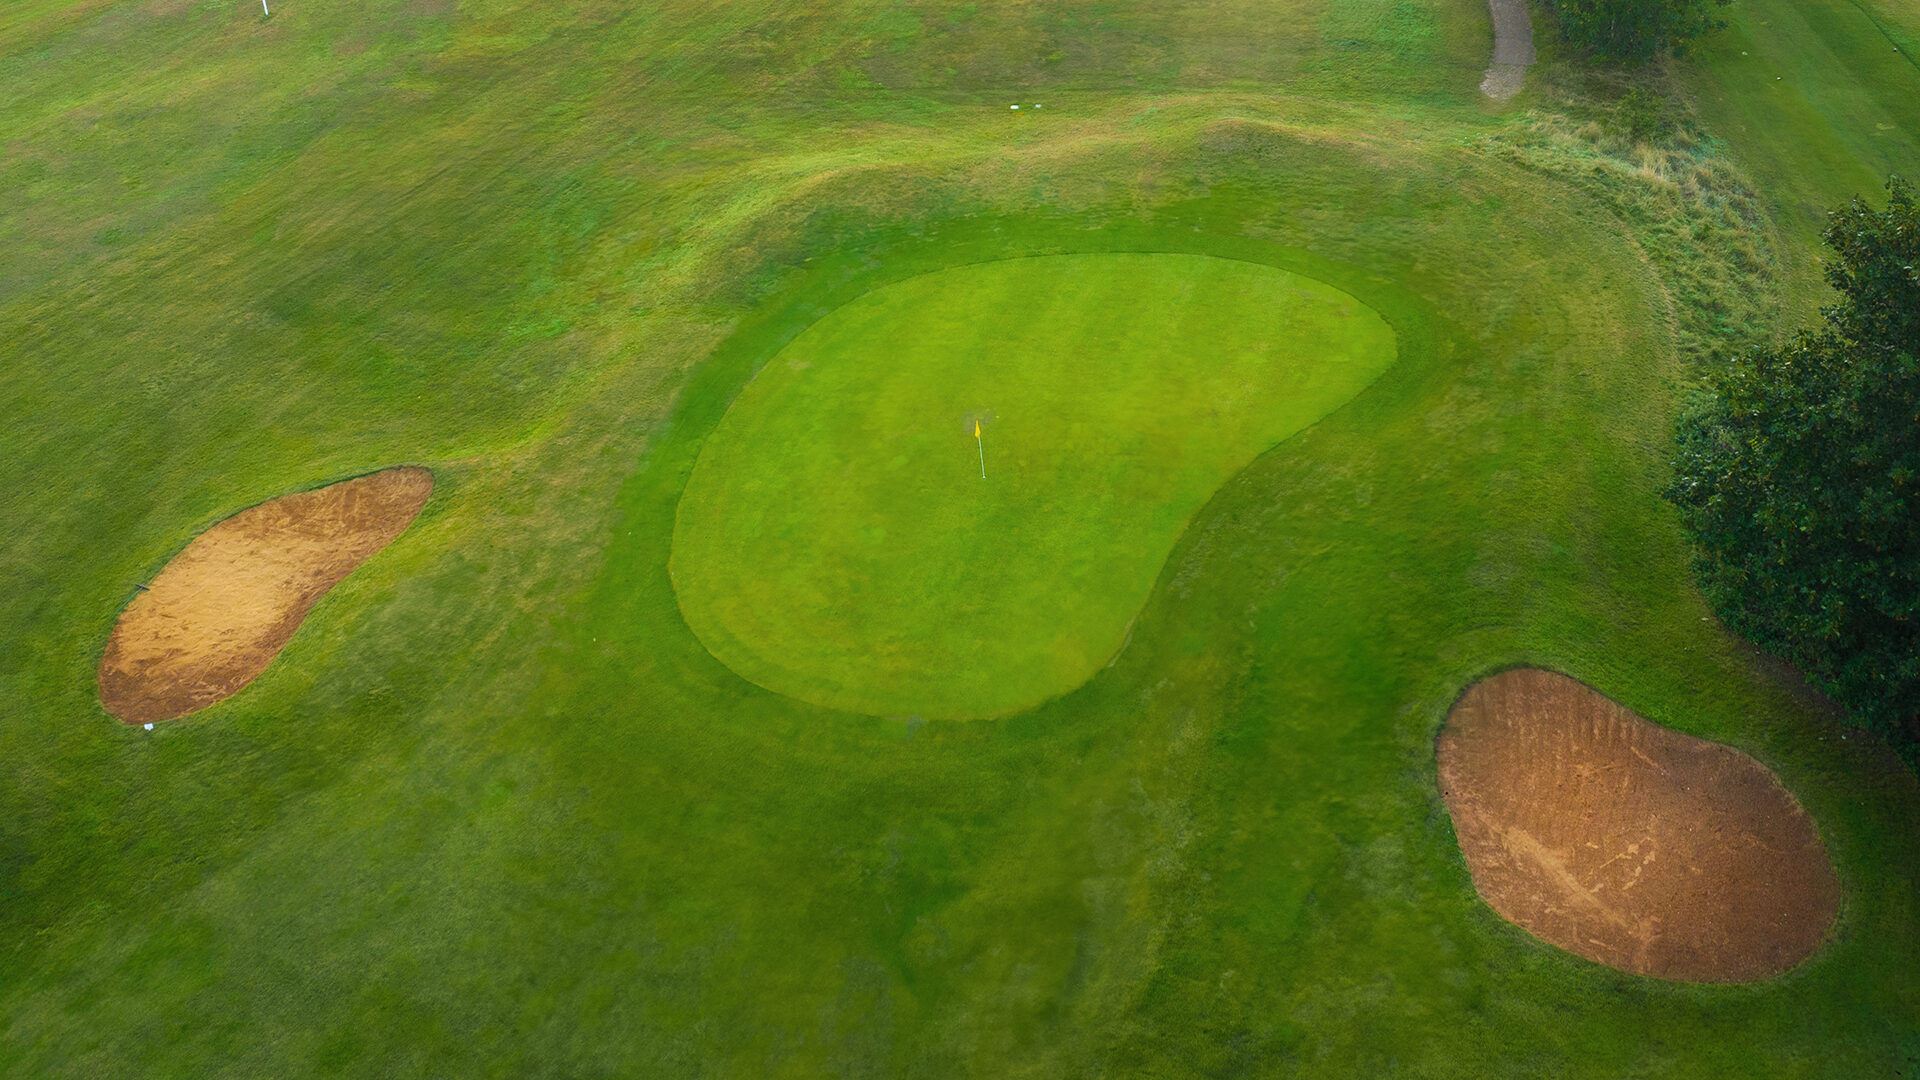
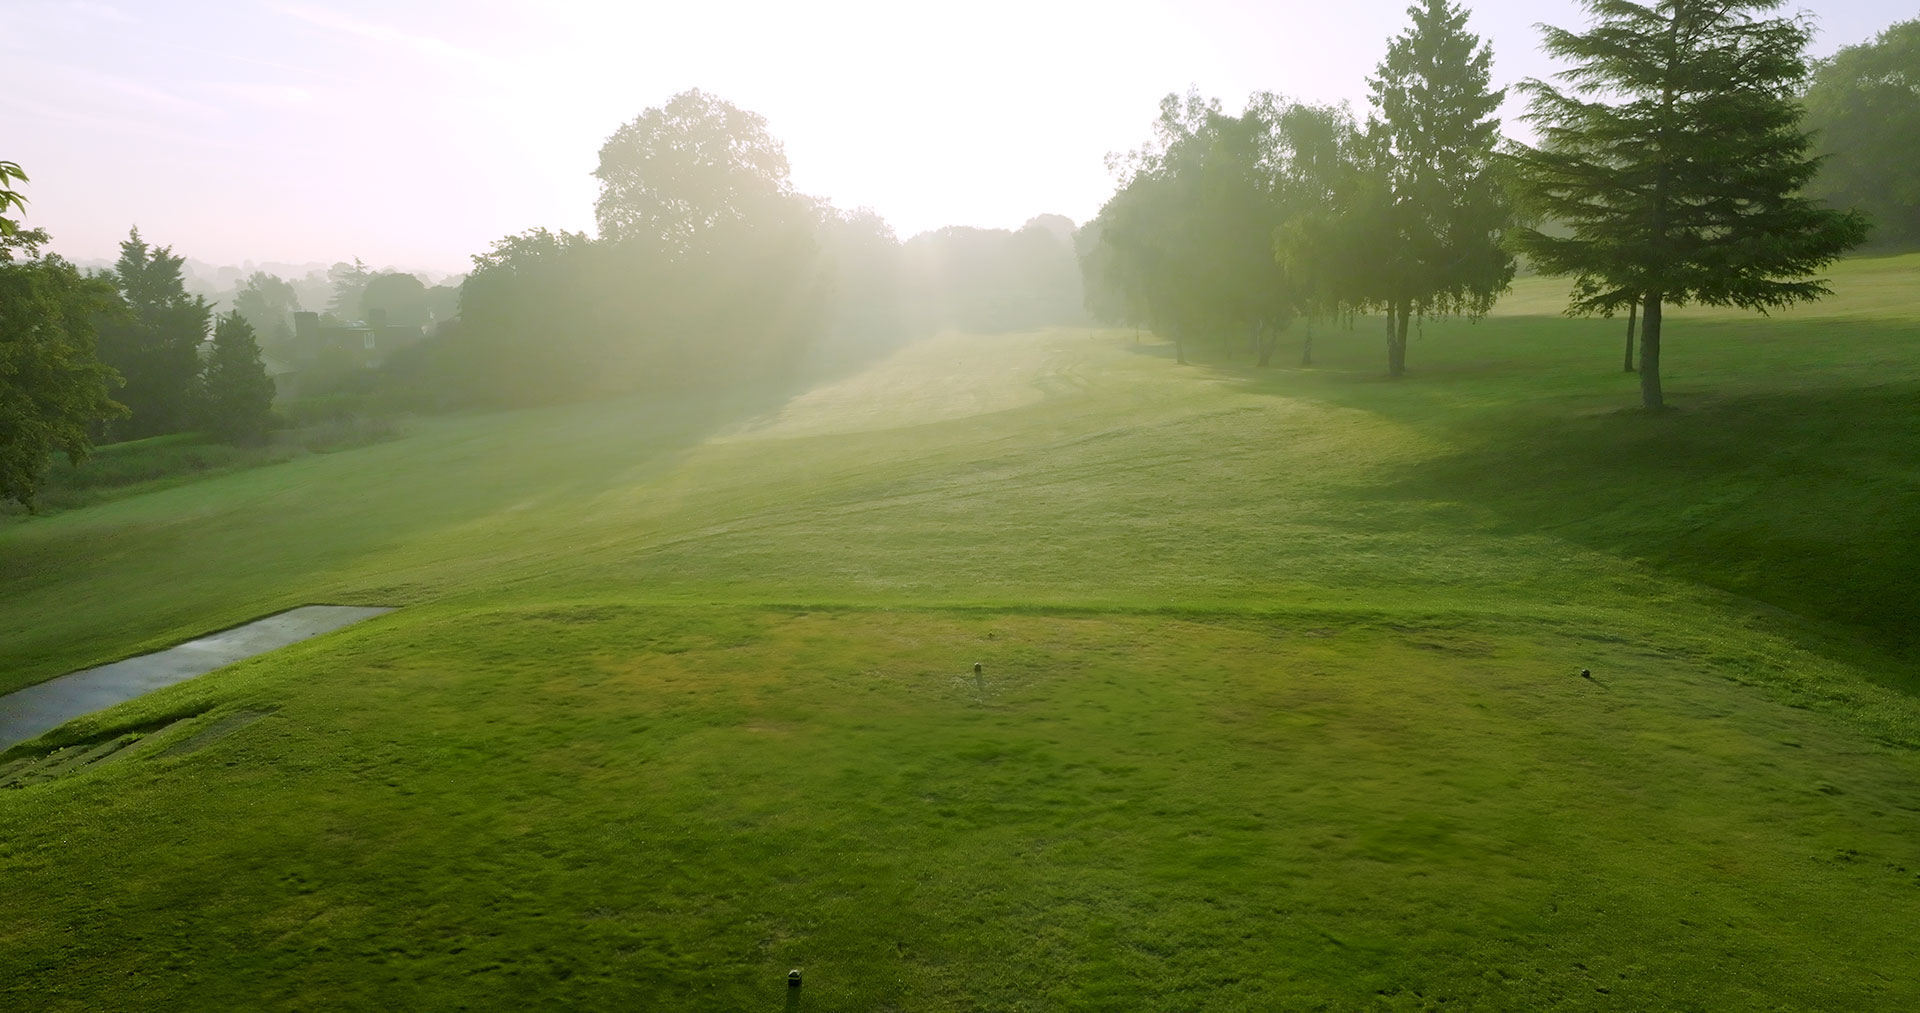
HOLE TWO
This is the only par 5 on the course. Be careful to avoid the two bunkers fairway bunkers, with one just off the tee and the other further down. The green is protected by two more bunkers.
| PAR | YARDS | STROKE | |
|---|---|---|---|
| White Tee | 5 | 485 | 5 |
| Yellow Tee | 5 | 473 | 5 |
| Red Tee | 5 | 439 | 3 |
PRO TIP
Keep the tee shot to the right, while a three wood on your second shot, should leave you a short shot in to the green. Hole Sponsored by

3 of 18
| PAR | YARDS | STROKE | |
|---|---|---|---|
| White Tee | 4 | 351 | 1 |
| Yellow Tee | 4 | 334 | 1 |
| Red Tee | 4 | 317 | 1 |
HOLE THREE
PAR 4, YARDS 351, STROKE INDEX 1
3 of 18

HOLE THREE
It’s a hard tee shot on this stroke index one hole. This narrow tee shot through tall trees is followed by a second shot from which you can’t see the small green you’re aiming for.
| PAR | YARDS | STROKE | |
|---|---|---|---|
| White Tee | 4 | 351 | 1 |
| Yellow Tee | 4 | 334 | 1 |
| Red Tee | 4 | 317 | 1 |
PRO TIP
This is a tough tee shot, so just try and get the ball away to begin with. With your second shot, though, it’s best to stay right.
4 of 18
| PAR | YARDS | STROKE | |
|---|---|---|---|
| White Tee | 4 | 314 | 9 |
| Yellow Tee | 4 | 308 | 9 |
| Red Tee | 4 | 299 | 11 |
HOLE FOUR
PAR 4, YARDS 314, STROKE INDEX 9
4 of 18
HOLE FOUR
This is a relatively straightforward par 4. The fairway bunkers are well placed, and it has a green that slopes from bank to front. Beware, however, the small bunker to the right of the green!
| PAR | YARDS | STROKE | |
|---|---|---|---|
| White Tee | 4 | 314 | 9 |
| Yellow Tee | 4 | 308 | 9 |
| Red Tee | 4 | 299 | 11 |
PRO TIP
Position the ball off the tee to the left of middle. Meanwhile, anything landed short will come back off the green, so getting onto the middle of the green is important. Hole Sponsored by
5 of 18
| PAR | YARDS | STROKE | |
|---|---|---|---|
| White Tee | 3 | 114 | 17 |
| Yellow Tee | 3 | 106 | 17 |
| Red Tee | 3 | 100 | 7 |
HOLE FIVE
PAR 3, YARDS 114, STROKE INDEX 17
5 of 18
HOLE FIVE
On this short par 3, there’s a a big dip to carry to an elevated green, with bunkers to the left. To finish the hole off, you’ll find a large, two-tiered green.
| PAR | YARDS | STROKE | |
|---|---|---|---|
| White Tee | 3 | 114 | 17 |
| Yellow Tee | 3 | 106 | 17 |
| Red Tee | 3 | 100 | 7 |
PRO TIP
It’s important to hit the ball to the same level as the pin on this hole. Par is always good on this hole. Hole Sponsored by

6 of 18
| PAR | YARDS | STROKE | |
|---|---|---|---|
| White Tee | 4 | 320 | 3 |
| Yellow Tee | 4 | 308 | 3 |
| Red Tee | 4 | 297 | 5 |
HOLE SIX
PAR 4, YARDS 320, STROKE INDEX 3
6 of 18
HOLE SIX
On this straight par 4, there aren’t any bunkers on the very narrow fairway (be sure to hit straight off the tee). Watch out for the two bunkers short and to the right of the green, however!
| PAR | YARDS | STROKE | |
|---|---|---|---|
| White Tee | 4 | 320 | 3 |
| Yellow Tee | 4 | 308 | 3 |
| Red Tee | 4 | 297 | 5 |
PRO TIP
A tee shot hit up the right will open up the green, while the trees to the left can impede your second shot otherwise. Hole Sponsored by

7 of 18
| PAR | YARDS | STROKE | |
|---|---|---|---|
| White Tee | 3 | 125 | 15 |
| Yellow Tee | 3 | 110 | 15 |
| Red Tee | 3 | 84 | 17 |
HOLE SEVEN
PAR 3, YARDS 125, STROKE INDEX 15

7 of 18
HOLE SEVEN
This is a tricky par 3. There’s a bunker just short of green and large overhanging trees on the left-hand side, both of which add an element of peril to this hole.
| PAR | YARDS | STROKE | |
|---|---|---|---|
| White Tee | 3 | 125 | 15 |
| Yellow Tee | 3 | 110 | 15 |
| Red Tee | 3 | 84 | 17 |
PRO TIP
It’s really important to use the right club here. It’s best to go to the right if you don’t hit the green first time. Hole Sponsored by

8 of 18
| PAR | YARDS | STROKE | |
|---|---|---|---|
| White Tee | 4 | 294 | 7 |
| Yellow Tee | 4 | 281 | 7 |
| Red Tee | 4 | 261 | 15 |
HOLE EIGHT
PAR 4, YARDS 294, STROKE INDEX 7
8 of 18
HOLE EIGHT
For this par 4, it’s important to aim at the post off the tee. There’s a cross ditch 50 yards from the elevated green and the second part of the fairway slops towards it.
| PAR | YARDS | STROKE | |
|---|---|---|---|
| White Tee | 4 | 294 | 7 |
| Yellow Tee | 4 | 281 | 7 |
| Red Tee | 4 | 261 | 15 |
PRO TIP
Hit an iron off the tee and this should leave you only a sand iron in to the green.
9 of 18
| PAR | YARDS | STROKE | |
|---|---|---|---|
| White Tee | 4 | 289 | 11 |
| Yellow Tee | 4 | 289 | 11 |
| Red Tee | 4 | 282 | 9 |
HOLE NINE
PAR 4, YARDS 289, STROKE INDEX 11
9 of 18
HOLE NINE
Another hole on which you should aim at a marker post. On this par 4, the fairway slopes from left to right. Meanwhile, your second shot is downhill to a green with a slope off to the right that has a bunker to the left.
| PAR | YARDS | STROKE | |
|---|---|---|---|
| White Tee | 4 | 289 | 11 |
| Yellow Tee | 4 | 289 | 11 |
| Red Tee | 4 | 282 | 9 |
PRO TIP
Rounding off the front 9, you should aim left off the tee. This should only leave you 100 yards in to the green. It’s better to go left with your second shot than to the right.
10 of 18
| PAR | YARDS | STROKE | |
|---|---|---|---|
| White Tee | 3 | 177 | 12 |
| Yellow Tee | 3 | 162 | 12 |
| Red Tee | 3 | 151 | 12 |
HOLE TEN
PAR 3, YARDS 177, STROKE INDEX 12
10 of 18
HOLE TEN
This short par 3 features an elevated green and two deep bunkers on the right. Be careful, though, because the green slopes from front to back.
| PAR | YARDS | STROKE | |
|---|---|---|---|
| White Tee | 3 | 177 | 12 |
| Yellow Tee | 3 | 162 | 12 |
| Red Tee | 3 | 151 | 12 |
PRO TIP
Onto the 10th, a par 3 that plays longer than you think. Make sure you hit with plenty of club. Hole Sponsored by

11 of 18
| PAR | YARDS | STROKE | |
|---|---|---|---|
| White Tee | 4 | 333 | 8 |
| Yellow Tee | 4 | 316 | 8 |
| Red Tee | 4 | 294 | 8 |
HOLE ELEVEN
PAR 4, YARDS 333, STROKE INDEX 8
11 of 18
HOLE ELEVEN
This par 4 features a dog leg to the right and a very narrow fairway. Once you’ve made your way to the green, however, you’ll find it’s sloping away from you.
| PAR | YARDS | STROKE | |
|---|---|---|---|
| White Tee | 4 | 333 | 8 |
| Yellow Tee | 4 | 316 | 8 |
| Red Tee | 4 | 294 | 8 |
PRO TIP
The 11th is a tricky par 4. It’s best to hit an iron to the corner, then short iron into a difficult green that slopes away from you.
12 of 18
| PAR | YARDS | STROKE | |
|---|---|---|---|
| White Tee | 3 | 210 | 2 |
| Yellow Tee | 3 | 204 | 2 |
| Red Tee | 4 | 201 | 18 |
HOLE TWELVE
PAR 3, YARDS 210, STROKE INDEX 2
12 of 18
HOLE TWELVE
On this long par 3, you can’t see the green from the tee. Theirs is a white aiming post for the best line, while the green has a big slope from the right to the left.
| PAR | YARDS | STROKE | |
|---|---|---|---|
| White Tee | 3 | 210 | 2 |
| Yellow Tee | 3 | 204 | 2 |
| Red Tee | 4 | 201 | 18 |
PRO TIP
One the hardest holes on the course. You can’t see the green from the tee, so it’s best to hit to the left-hand side, as there’s a big slope off to the right. Par is a great score on this hole. Hole Sponsored by

13 of 18
| PAR | YARDS | STROKE | |
|---|---|---|---|
| White Tee | 3 | 152 | 18 |
| Yellow Tee | 3 | 146 | 18 |
| Red Tee | 3 | 118 | 16 |
HOLE THIRTEEN
PAR 3, YARDS 152, STROKE INDEX 18

13 of 18
HOLE THIRTEEN
From the elevated tee on this par 3, you’re hitting down onto a well bunkered green, which slopes significantly from right to left.
| PAR | YARDS | STROKE | |
|---|---|---|---|
| White Tee | 3 | 152 | 18 |
| Yellow Tee | 3 | 146 | 18 |
| Red Tee | 3 | 118 | 16 |
PRO TIP
On this par 3, hit one club less as elevation will play its part. Aim at the right half of the green as the ball will come round due to the slope. Hole Sponsored by

14 of 18
| PAR | YARDS | STROKE | |
|---|---|---|---|
| White Tee | 4 | 331 | 10 |
| Yellow Tee | 4 | 312 | 10 |
| Red Tee | 4 | 297 | 6 |
HOLE FOURTEEN
PAR 4, YARDS 331, STROKE INDEX 10
14 of 18
HOLE FOURTEEN
This is a fairly straight par 4, while the fairway slopes from left to right. Once you get to green, you’ll find it’s long and narrow, with a big slope on the right.
| PAR | YARDS | STROKE | |
|---|---|---|---|
| White Tee | 4 | 331 | 10 |
| Yellow Tee | 4 | 312 | 10 |
| Red Tee | 4 | 297 | 6 |
PRO TIP
Drive the ball up the left of the fairway as it slopes down. Short iron in again and aim left middle of the green, as anything missing right will go down a large slope.
15 of 18
| PAR | YARDS | STROKE | |
|---|---|---|---|
| White Tee | 3 | 187 | 6 |
| Yellow Tee | 3 | 171 | 6 |
| Red Tee | 3 | 155 | 4 |
HOLE FIFTEEN
PAR 3, YARDS 187, STROKE INDEX 6
15 of 18
HOLE FIFTEEN
This is a pretty long par 3 and probably the course’s marquee hole. Be careful of the elevated and narrow green here.
| PAR | YARDS | STROKE | |
|---|---|---|---|
| White Tee | 3 | 187 | 6 |
| Yellow Tee | 3 | 171 | 6 |
| Red Tee | 3 | 155 | 4 |
PRO TIP
This is a tough par 3 that plays longer than you think. It’s important to take enough club to make the carry. Par is a great score on here.
16 of 18
| PAR | YARDS | STROKE | |
|---|---|---|---|
| White Tee | 4 | 375 | 4 |
| Yellow Tee | 4 | 366 | 4 |
| Red Tee | 4 | 330 | 2 |
HOLE SIXTEEN
PAR 4, YARDS 375, STROKE INDEX 4

16 of 18
HOLE SIXTEEN
On this par 4, there’s a dog leg from left to right, with two bunkers short and to the right of the green, as well as a large one on the left of it.
| PAR | YARDS | STROKE | |
|---|---|---|---|
| White Tee | 4 | 375 | 4 |
| Yellow Tee | 4 | 366 | 4 |
| Red Tee | 4 | 330 | 2 |
PRO TIP
On this long par 4, aim up left half of the fairway. This should leave you a mid to long iron in. Be careful, though, as there’s a big drop off on the right, so best to be on the left half of the green as it slopes from left to right. Hole Sponsored by

17 of 18
| PAR | YARDS | STROKE | |
|---|---|---|---|
| White Tee | 3 | 151 | 14 |
| Yellow Tee | 3 | 133 | 14 |
| Red Tee | 3 | 106 | 10 |
HOLE SEVENTEEN
PAR 3, YARDS 151, STROKE INDEX 14
17 of 18
HOLE SEVENTEEN
The penultimate hole is a nice par 3, with a large mound on the left. There’s a bunker on the right-hand side of what is a good sized green.
| PAR | YARDS | STROKE | |
|---|---|---|---|
| White Tee | 3 | 151 | 14 |
| Yellow Tee | 3 | 133 | 14 |
| Red Tee | 3 | 106 | 10 |
PRO TIP
Aim to the left half of the green on this par 3. If you hit a bit too far left, the large mound will kick the ball towards the green.
18 of 18
| PAR | YARDS | STROKE | |
|---|---|---|---|
| White Tee | 4 | 294 | 16 |
| Yellow Tee | 4 | 275 | 16 |
| Red Tee | 4 | 249 | 14 |
HOLE EIGHTEEN
PAR 4, YARDS 294, STROKE INDEX 16
18 of 18
HOLE EIGHTEEN
This last hole is a slightly uphill par 4. On the fairway, there are four well placed bunkers, as well as two on the right of the elevated two step green and a large one on the left.
| PAR | YARDS | STROKE | |
|---|---|---|---|
| White Tee | 4 | 294 | 16 |
| Yellow Tee | 4 | 275 | 16 |
| Red Tee | 4 | 249 | 14 |
PRO TIP
Here you should aim up the left half of the fairway to miss the bunkers. The second shot is best to get it on the same level as the pin. Hole Sponsored by

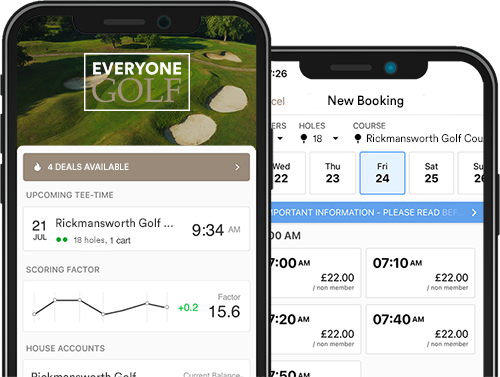
BOOK ANYTIME, ANYWHERE WITH
OUR APP
OUR APP
Easy to use and saves you time. Book with our mobile app. Available on iOS & Android.